


Vertica Integration with Pentaho Data Integration: Connection Guide
About Vertica Connection Guides
Vertica connection guides provide basic instructions for connecting a third-party partner product to Vertica. Connection guides are based on our testing with specific versions of Vertica and the partner product.
Vertica and Pentaho Data Integration: Latest Versions Tested
| Software | Version |
|---|---|
| Partner Product |
Pentaho Data Integration Enterprise Edition v.9.3 |
| Desktop Platform |
Microsoft Windows Server 20196 (64-bit) |
| Vertica Client | Vertica JDBC 23.3 |
| Vertica Server | Vertica Analytic Database 23.3 |
Pentaho Data Integration Overview
Pentaho is a platform that offers tools for data movement and transformation, as well as discovery and ad hoc reporting with the Pentaho Data Integration (PDI) and Pentaho Business Analytics products. This guide focuses on the Data Integration component of the platform, which provides Extraction, Transformation, and Loading (ETL) capabilities.
For information about Pentaho Business Analytics, see Vertica Integration with Pentaho Business Analytics: Connection Guide.
Pentaho connects to your Vertica database in the cloud or on-premises using the Vertica JDBC driver. You must install the Vertica JDBC driver that is compatible with your Vertica server version.
Installing Pentaho Data Integration
Enterprise Edition
You can download the latest version of Pentaho Data Integration as follows:
- Navigate to https://www.hitachivantara.com/en-us/products/pentaho-plus-platform/data-integration-analytics/download-pentaho.html.
- Scroll down and click START YOUR TRIAL!.
- Fill out the form and click DOWNLOAD FREE TRIAL.
- Save the downloaded .exe file on your computer.
- Double-click the installer .exe and follow the prompts for installation.
Installing the Vertica Client Driver
Pentaho Data Integration connects to Vertica using the Vertica JDBC driver. Follow these instructions to download and install the JDBC driver:
- Navigate to the Client Drivers page on the Vertica website.
-
Download the JDBC driver.
Note For details about client and server compatibility, see Client Driver and Server Version Compatibility in the Vertica documentation.
-
Locate the directory where Pentaho is installed.
-
Paste the Vertica JAR file in the folder
\data-integration\libin your PDI installation.For example:
C:\<pentaho>\design-tools\data-integration\lib.Note <pentaho> in the location above refers to the name of the directory where Pentaho is installed.
Connecting Vertica to Pentaho Data Integration
Follow the steps below to create a connection to Vertica that can be used either as a source or as a target database.
-
From the Start menu, open Pentaho Enterprise Edition > Data Integration.
- Select File > New > Transformation to create a new transformation.
-
Alternatively, on the left side of the screen, in the View tab, right-click Transformations > New.
If you are new to PDI and want to understand the difference between transformations and jobs, see the PDI documentation.
-
In Transformations, click the View tab, then right-click Database connections > New to create a connection to your Vertica database.
-
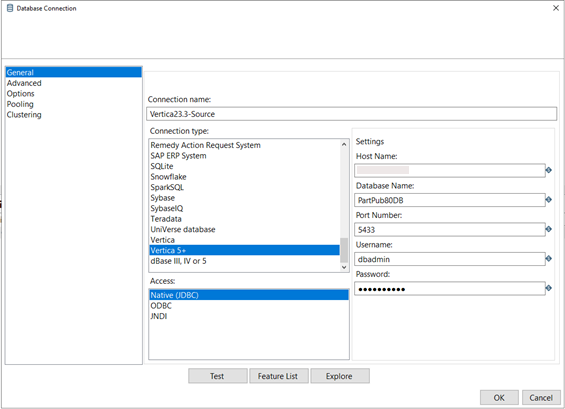
In the Database Connection dialog box, use the General option in the left pane, which is selected by default, to enter your database connection information:
- Connection Name: Type a name for the connection.
- Connection Type: Select Vertica 5+.
- Access: Select Native JDBC.
- Host Name: Type the IP Address of the Vertica server.
- Database Name: Type the database name.
- Port Number: Type the port number of the database.
- User Name: Type the database user name.
- Password: Type the database password.
For information about the other items in the left pane of the Database Connection dialog box, see Customize Your Database Connection.
-
Click Test to check if the connection is correct.
-
Click OK to close the connection test dialog box.
-
Click OK to save the connection.
Customize Your Database Connection
In addition to the General option in the left pane of the Database Connection dialog box, you can use the other items to further customize your connection to Vertica:
- Advanced: Use this option to customize how PDI generates SQL.
-
Options: Use this option to set up additional Vertica JDBC connection properties, such as Connection Load Balancing or a Session Label. For a full list of Vertica’s JDBC connection properties, see JDBC Connection Properties in the Vertica documentation.
-
Pooling: Use this option to enable and configure a pool of connections. Refer to the following topics in the Vertica documentation for details:
- Clustering: Use this option to create and connect to data partitions in your database.
Using Vertica as a Source or as a Target Database
Create a transformation with steps to extract, transform, and write data. The following is an example of reading data from and writing data into your Vertica database.
Reading Data from Vertica
You can read data from your Vertica database using the Table input component. Follow these steps:
- Go to File > New > Transformation to create a transformation.
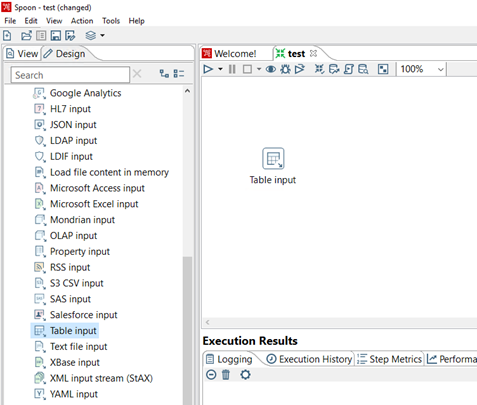
- Select the Design tab.
-
From the Input folder, select the Table input component and drag it to the canvas.
-
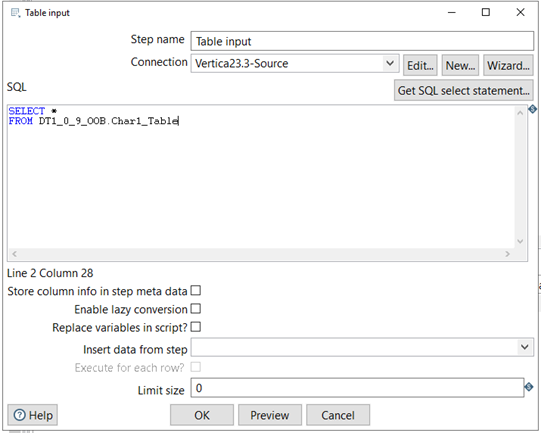
Double-click the Table input component on the canvas.
The Table input dialog box opens.
-
In the Table input dialog box, provide the following information:
- Step name: Type a name for this transformation step.
- Connection: Select a connection to Vertica from the drop-down list or create a new one. For instructions on creating a connection to Vertica, see Connecting Vertica to Pentaho Data Integration.
- SQL: Provide a query by either clicking Get SQL select statement or by typing a query directly in the text box.
-
Optionally click Preview to view the data returned by the query.
-
Click OK to close the dialog box.
Writing Data into Vertica
You can write data into your Vertica database using one of two components:
Table Output Component
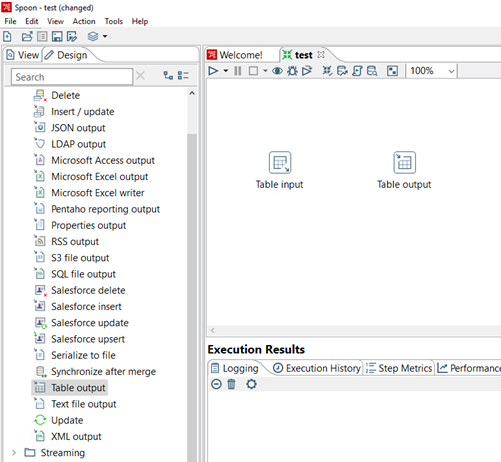
- In the transformation you created earlier, select the Design tab.
-
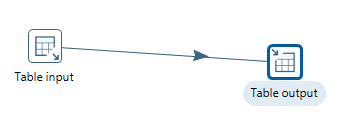
From the Output folder, select the Table output component and drag it to the canvas.
-
Connect the source component to the target component by creating a Hop.
To create the Hop, select the source component and press Shift. Without releasing the mouse button, draw a line to connect the source component to the target component, then release the mouse button.
-
Double-click the Table output component to configure the target table.
The Table output dialog box opens.
-
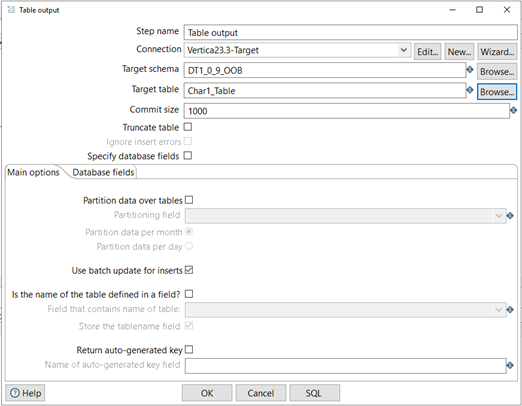
In the Table output dialog box, select or provide the following information:
- Step name: Type a name for this transformation step.
- Cnnection: Select a connection to Vertica from the drop-down list or create a new one. For instructions on creating a connection to Vertica, see Connecting Vertica to Pentaho Data Integration.
- Target schema: Browse and select the schema that contains the target table.
- Target table: Browse and select the target table.
- Commit size: The number of rows that will be loaded, after which the transaction will be committed in the database.
- Truncate table: Check this box if you want PDI to truncate the target table before loading.
- Specify database fields: Check this box if the source and target tables have a different structure. If you check this box, you must manually specify the mapping of source to target columns in the Database fields tab.
-
Click OK to close the dialog box.
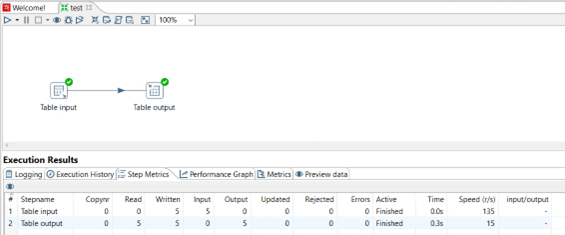
-
Press the Play button to execute the transformation and load the data from the source to the target.
Vertica Bulk Loader Component
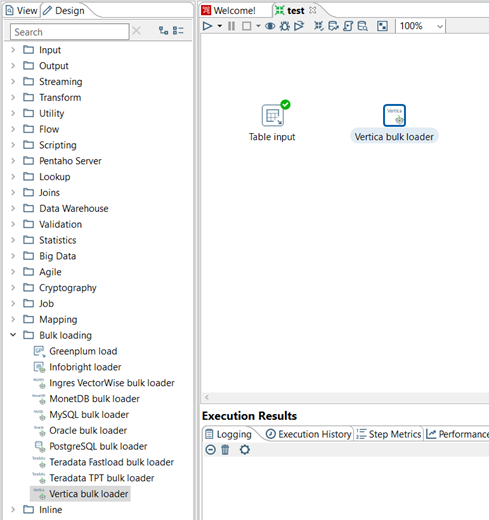
-
From the Bulk loading folder in the Design tab of the open transformation, select Vertica Bulk Loader.
-
Connect the source component to the target component by creating a Hop.
To create the Hop, select the source component and press Shift. Without releasing the mouse, draw a line to connect the source component to the target component, then release the mouse.
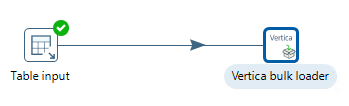
-
Double-click the Vertica Bulk Load component to configure the load to the target table.
Select or provide the following information:
- Step name: Type a name for the transformation step.
- Connection: Select a connection to Vertica from the drop-down list or create a new one. For instructions on creating a connection to Vertica, see Connecting Vertica to Pentaho Data Integration.
- Target schema: Browse and select the schema that contains the target table.
- Target table: Browse and select the target table.
- Specify database fields: Check this box if the source and target tables have a different structure. If you check this box, you must manually specify the mapping of source to target columns in the Database fields tab.
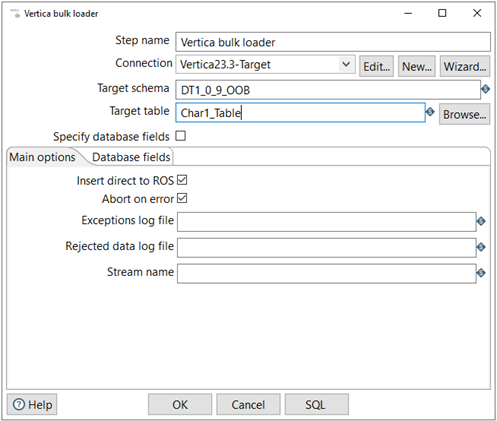
-
Click OK to close the dialog box.
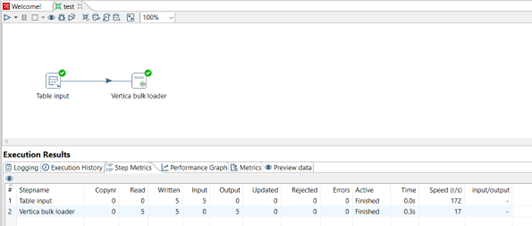
-
Press the Play button to execute the transformation and load the data from the source to the target.
Known Limitations
Table Input
-
NUMERIC data type displays precision up to 1024 values.
- For FLOAT data types, a maximum of 10 digits of scale is displayed when reading from Vertica.
- TIME and TIMETZ data types are converted to timestamp with a date appended to the time. For example: The time value
14:30:45.666666in Vertica is displayed as1970/01/01 14:30:45.667. - For TIMETZ data type, milliseconds are not displayed when reading from Vertica.
- For BINARY, VARBINARY, and LONG VARBINARY data types, data is displayed incorrectly.
Table Output
-
NUMERIC data type displays precision up to 1024 values.
-
When writing into Vertica, TIME and TIMETZ data types, data is not displayed or loaded. The error
Vertica][JDBC](10120)Error converting data, invalid type for parameter: <#>is displayed.As a workaround, you can manually convert the values to a VARCHAR before writing them into Vertica.
Vertica Bulk Loader
-
For LONG VARCHAR, INTERVAL, LONG VARBINARY, and UUID data types, the error
java.lang.IllegalArgumentException: Column type <ColumnName> <Vertica’s datatype> not supportedis displayed.
For More Information
- Hitachi Vantara Pentaho Data Integration website
- Vertica Integration with Pentaho Data Integration: Tips and Techniques
- Vertica QuickStart for Pentaho Data Integration (Linux)
- Vertica QuickStart for Pentaho Data Integration (Windows)
- Vertica Community Edition
- Vertica User Community
- Vertica Documentation

