


Vertica Integration with Workato: Connection Guide
About Vertica Connection Guides
Vertica connection guides provide basic instructions for connecting a third-party partner product to Vertica. Connection guides are based on our testing with specific versions of Vertica and the partner product.
Vertica and Workato: Latest Versions Tested
This document is based on our testing using the following versions:
| Software | Version |
|---|---|
| Workato On-premise Agent | 2.8.1 |
| Desktop Platform |
Windows Server 2016 |
| Vertica Client |
Vertica JDBC 10.1.1 |
| Vertica Server |
Vertica 10.1.1 |
Workato Overview
Workato is an automation platform that enables business and IT teams to integrate their applications and automate business work flows. Workato automates with recipes (work flows) to integrate applications for specific tasks. Each recipe has three components, apps, triggers, and actions.
Installing Workato
You need to install the Vertica On-prem Agent to create and use Workato recipes with the Vertica database. The On-prem Group enables you to create multiple on-prem connections. For more information about this grouping and the advantages, refer to On-prem Group.
For instructions on setting up and running the agent, see Setting up On-prem Agent.
Installing the Vertica Client Driver
Workato uses the Vertica JDBC driver to connect to Vertica. To install the client driver
- Navigate to the Vertica Client Drivers page.
-
Download the JDBC driver package for your version of Vertica.
Note For more information about client and server compatibility, see Client Driver and Server Version Compatibility in the Vertica documentation.
- Place the Vertica JDBC driver in the Agent/lib folder.
-
You need to provide the path to the JDBC driver in the config.yml file. The file is located in the Agent/conf directory.
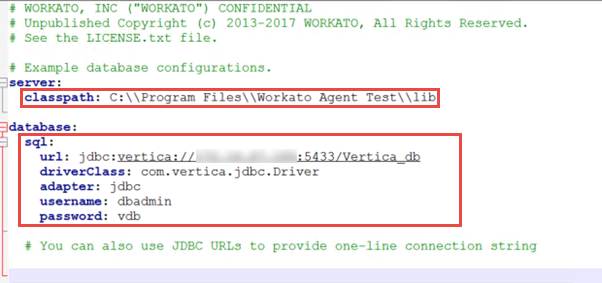
- In the server section, provide the classpath.
-
In the database section provide the Vertica database details such as the connection profile name, URL, driver class, adapter, username and password.
-
After you configure, the config.yml file looks as follows:
- Restart the Workato Agent.
Note We provided sql as the connection profile name in the following example. This name will be used to create a connection to Workato.
Connecting Vertica to Workato
- Open app.workato.com in a browser and login with your Workato credentials.
-
In the Assets tab, click the Create Recipe drop-down and then click Create connection.

- Select JDBC from the available connections.
-
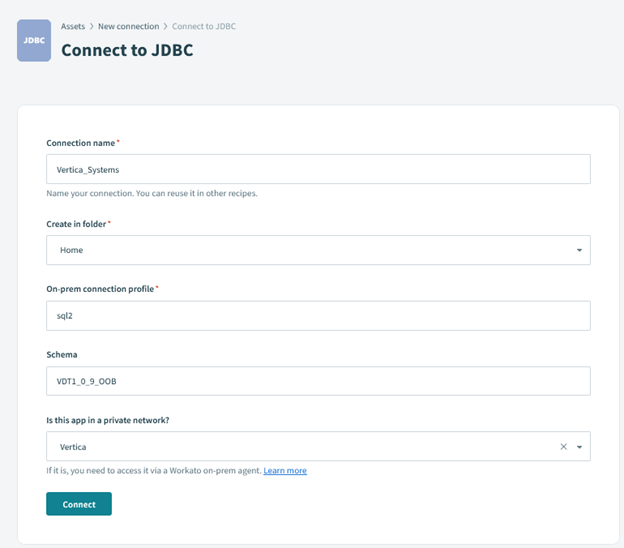
Enter the connection name, select the folder, on-prem connection profile (from the config.yml file), schema name, and the on-prem agent name.
Note In the Is this app in a private network? drop-down, you need to enter the name of the on-prem agent that you set up during the agent installation.
-
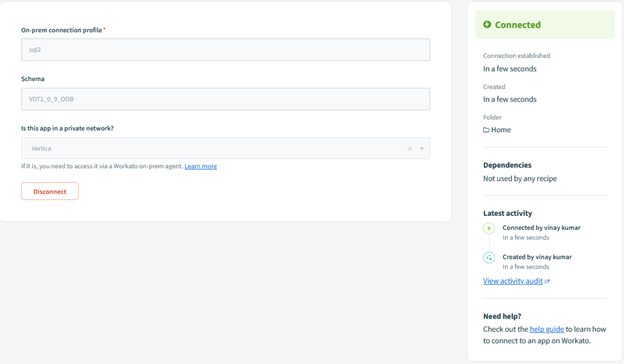
Click Connect. If the connection is successful, the following message is displayed:
Creating a Recipe Using the Vertica Connection
In this example, we will be creating a recipe that reads data from Vertica and processes the data into a CSV file.
Note Before you create a recipe, ensure that you follow the instructions here to connect to on-prem files on Workato.
-
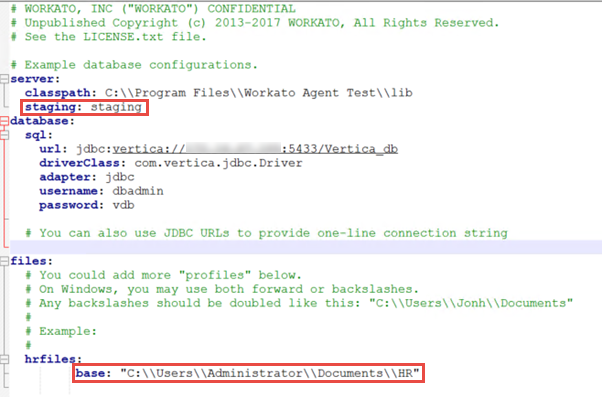
To process data to a CSV file, in the config.yml file, you need to provide a staging directory and a directory where the CSV file will be stored.
- In the server section, provide the staging directory.
-
In the files section, provide the directory where you want to save the CSV file.
- Restart the Agent.
- Open app.workato.com and login with your credentials.
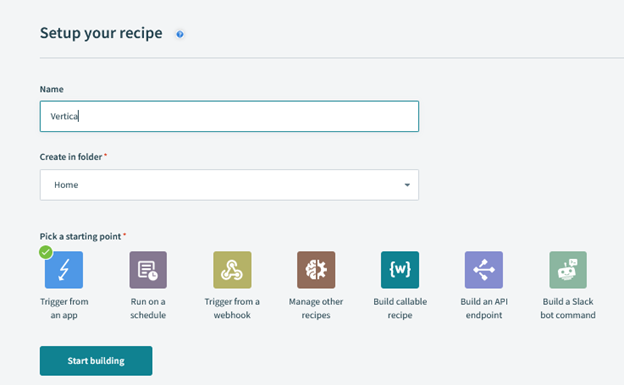
- In the Assets tab, click Create Recipe.
-
Enter the name, select the folder, pick the starting point, and click Start building.
- In the Recipe work flow, click Trigger on a specified schedule.
-
On the right pane, select
- App: Scheduler by Workato
- Trigger: New recurring event
- Now create another trigger to connect to the on-prem files. In the Recipe work flow, click the + sign.
-
On the right pane, select
- App: On-prem files
- Action: ALL ACTIONS > Generate on-prem file URL
- Connection: Select the on-prem file connection that you created.
-
Setup: Folder - Select the folder and enter File name for the CSV file.
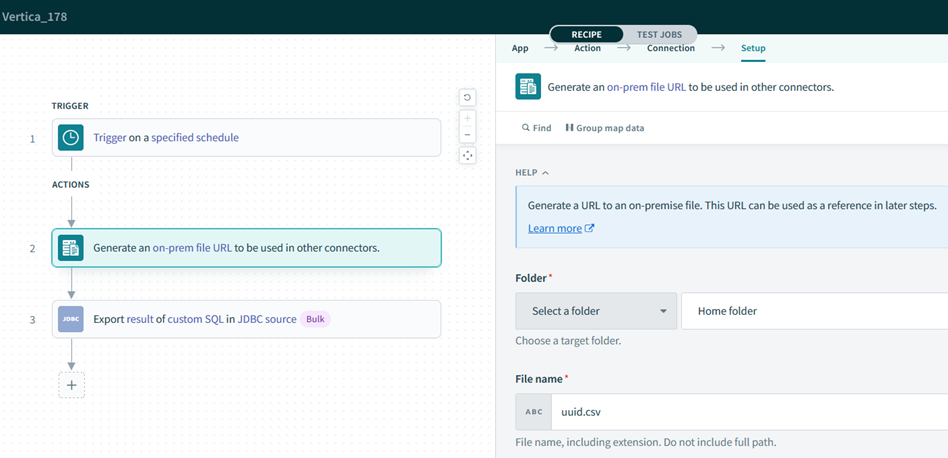
-
Create another trigger to create a connection to the Vertica database. In the Recipe work flow, click the + sign.
-
On the right pane, select
- App: JDBC
- Action: Export query result
- Connection: Select the JDBC on-prem connection that you created or you can create a new connection.
-
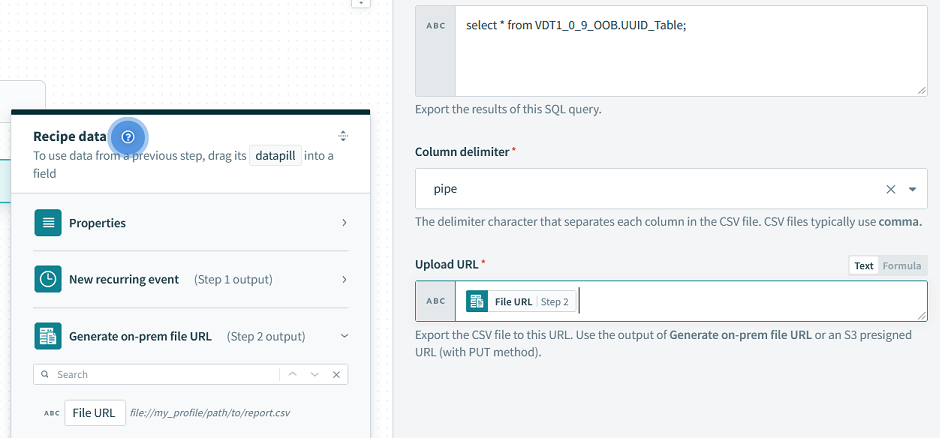
Setup
- SQL: Provide the SQL Query.
- Column delimiter: Select the required delimiter.
-
Upload URL: In the Recipe data pop-up, click File URL.
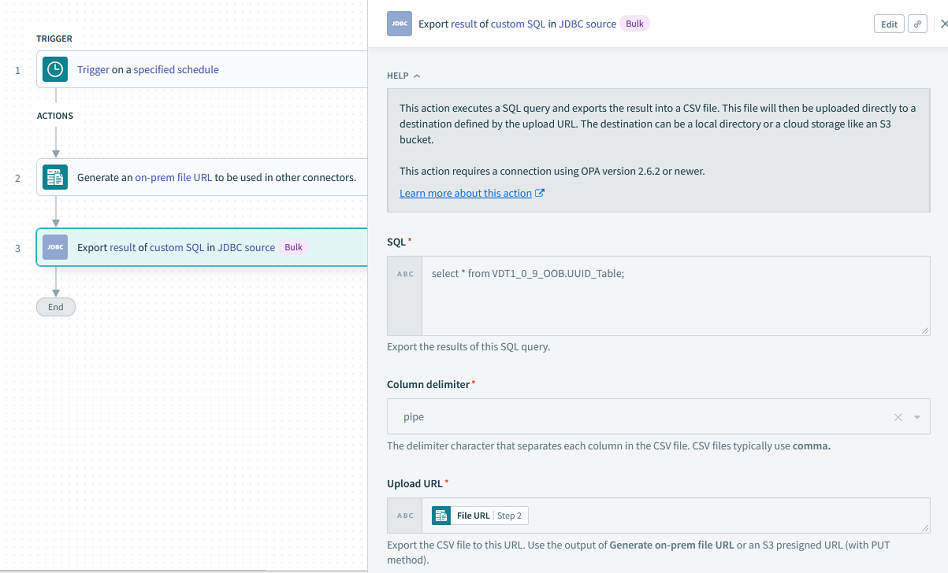
-
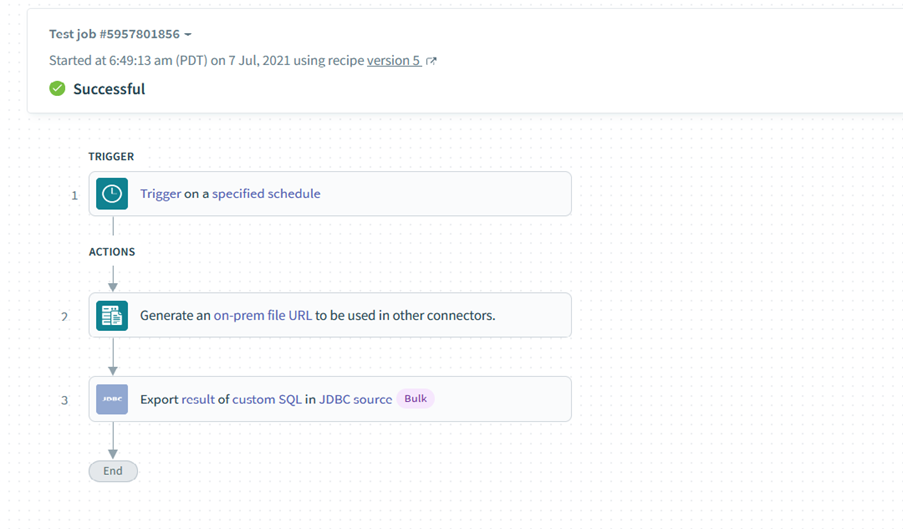
Click Save and then click Test.
Known Limitations
-
DATE, TIME, and TIMETZ data types are not supported.
-
BINARY, VARBINARY, and LONG VARBINARY data types are not supported.

