


Multi-Factor Authentication for Vertica with Kerberos and Duo: Technical Exploration
Multi-factor authentication (MFA) provides a secure method for validating users on login. And as we mentioned in another recent post, GDPR Ready Recipe, the full implementation of GDPR may soon make multi-factor authentication a legal necessity for vendors doing business in the European Union.
Vertica makes it easy to configure a user-friendly method of multi-factor authentication with the assistance of Kerberos and an authentication proxy. Vertica software has supported Kerberos since version 7.0.
But Vertica already has a user authentication solution, so why use Kerberos (instead of LDAP) with Duo to set up MFA, you might ask?
One answer is that it’s more convenient for your users. The typical user authentication design, using LDAP for example, frequently asks users to reenter their credentials. Users understandably find these repeated requests frustrating.
Kerberos, a network authentication protocol, solves that problem. Kerberos uses a caching mechanism to grant and store a “ticket” generated from the user’s password and an additional encrypted secret. Configuring a proxy provides a second method of authentication by requiring a response from the user’s mobile phone or another authentication device, to fully authenticate the user. After the user is validated, the cached ticket gives the user 24 hours of access to the protected Vertica instance without further interruptions to re-authenticate. (The Kerberos default is 24 hours but the Kerberos administrator can configure another interval.)
Another benefit: Setting up MFA using Kerberos instead of LDAP is more secure. That’s because no passwords are sent over the network, and there are fewer places where passwords are written down on end-user computers. If you have just one password that you use once to log into your machine and then you never need another one again, for example to talk to Vertica, there are fewer opportunities for that information to be lost or stolen.
In this document, we’ll look at:
- The User’s Experience
- MFA with Kerberos and Duo – What’s Happening Under the Hood?
- Configuring Multi-Factor Authentication with Duo for Vertica on Windows
The User’s Experience
As the User, You Install Duo on Your Phone
The system administrator performs most of the steps to set up MFA with Kerberos and Duo. After the system administrator enters your credentials into Kerberos and Duo, you receive an email from Duo. Follow the instructions in the email to install Duo on your authentication device. Most people use their mobile phones. After you install Duo, you’re ready to log in to Windows using multi-factor authentication.
When You Log in to Windows, Duo Asks You to Respond on Your Phone
When you log in to Windows as the user, you enter your password as usual. Duo sends your phone (or alternate authentication device) a confirmation request. The request might ask you to click Approve, or provide you with a six-digit code to enter, or request some other response from you, to demonstrate you are in possession of the configured two-factor authentication device. For example:
Respond to the request on your device, to affirm your identity. After you respond, Duo signals to Kerberos to authenticate you to Windows. Behind the scenes, Kerberos issues you an encrypted authentication ticket. Because Kerberos caches the Vertica ticket, it can be reused for multiple Vertica sessions, up to the configured length of time, usually 24 hours, before you need to enter your credentials again. This means you won’t get an MFA prompt for every Vertica connection you create, which is very helpful if you are using a tool or dashboard that uses multiple connections. LDAP does not offer that advantage.
MFA with Kerberos and Duo – What’s Happening Under the Hood?
The diagram below shows, step by step, how multi-factor authentication works after you, as system administrator, configure it for Vertica database users using Kerberos and Duo.
Let’s take a more detailed look at each step of the interaction between Vertica, Duo, and Kerberos, to authenticate a user:
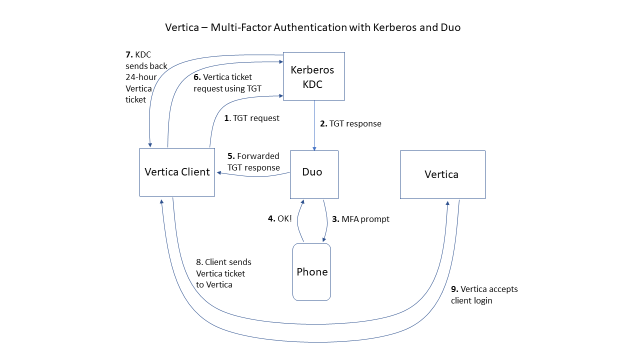
- TGT request: When the user logs into the computer, Kerberos sends a Ticket-Granting Ticket (TGT) request to the Kerberos Key Distribution Center (KDC). Kerberos derives this request from the password the user typed when logging in.
- TGT response: The Kerberos KDC compares the TGT request derived from the password the user entered, to its stored hash of the user’s password, to validate the user. After Kerberos determines the TGT request is legitimate, it generates a TGT and sends it back to Duo via proxy.
- MFA prompt: Duo sends an MFA prompt to the user’s configured mobile number. This prompt might offer a Yes/No response, provide a six-digit key value, or give the user a call to request confirmation from the user.
- OK! User approves: The user responds to the MFA prompt on the phone or other two-factor authentication device. The user’s response depends on the device and authentication method configured for that user.
- Forwarded TGT response: After the user approves the MFA prompt on the phone or device, Duo forwards the TGT request to the Vertica client. Note that from the Vertica client’s perspective, the response is no different from a regular TGT response.
- Client TGT request for Vertica: The Vertica client now has an MFA-authenticated TGT. It presents that TGT to the KDC and requests a Vertica service ticket.
- KDC sends back 24-hour Vertica ticket: The TGT is proof of the user’s identity. In this step, the KDC may validate that Vertica is a service and that the user has permission to use Vertica.
- Client sends Vertica ticket to Vertica: The client presents the Vertica ticket to Vertica. Vertica validates the ticket according to its Kerberos Keytab. If the ticket is valid, the authentication succeeds.
- Vertica accepts client login: The Vertica instance validates the ticket and the user’s credentials and logs the user into the Vertica database.
Configuring Multi-Factor Authentication with Duo for Vertica on Windows
These instructions describe how to set up multi-factor authentication on a Windows client connected to a Microsoft Active Directory (AD) domain, using Duo as the authentication proxy. The official Duo steps are here: https://duo.com/docs/rdp.
Before You Start
The following instructions assume you are the system administrator. Before you start, be sure that:
• You have a Windows client connected to a Windows Active Directory account.
• Each user has a mobile phone or other two-factor authentication device on which to install the Duo app.
Duo allows both individual enrollment and bulk enrollment. You can configure Duo to deny access when offline or when an unenrolled user tries to log in.
Administrator: First Steps
- If you have not already done so, add the user(s) to Microsoft Active Directory.
- If you do not have one, sign up for a Duo account.
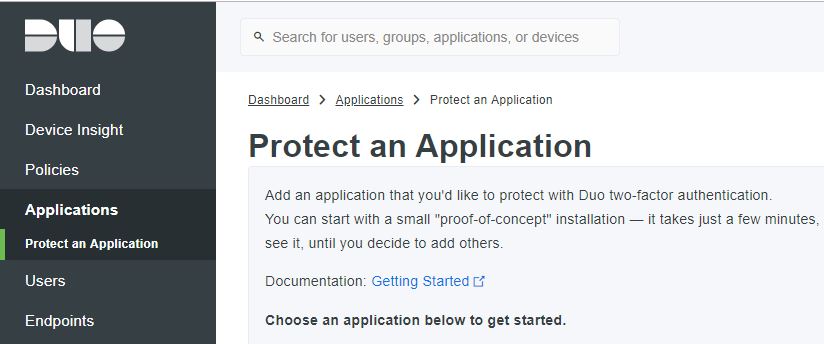
- Login to the Duo Admin panel and navigate to Applications.
- Click Protect an Application and scroll down to locate Microsoft RDP (Remote Desktop Protocol) in the applications list.
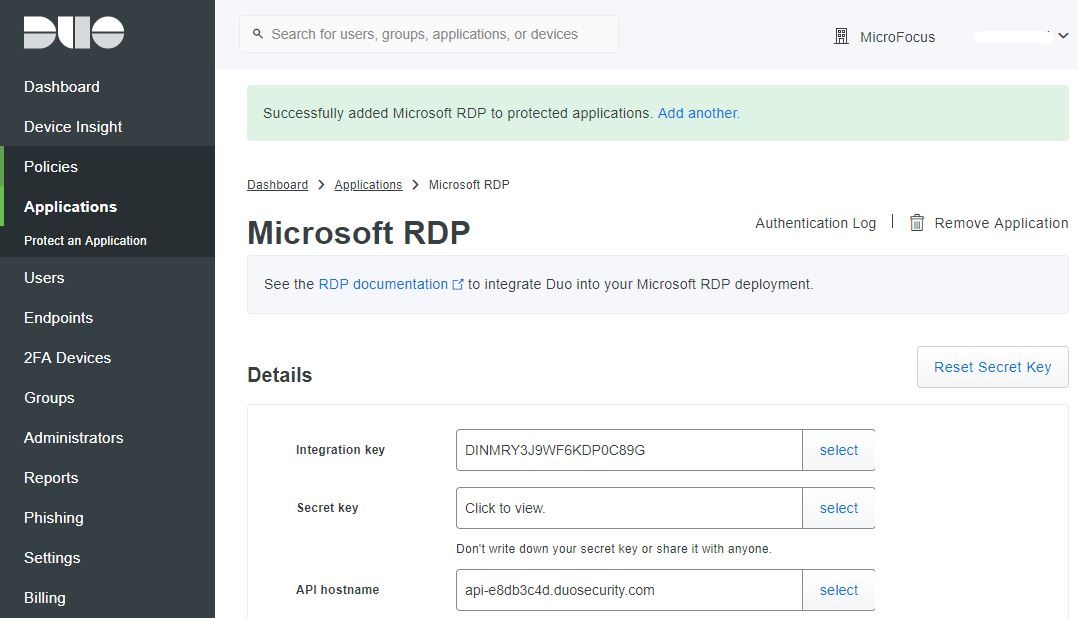
- To the right of Microsoft RDP, click Protect this Application. Duo displays your integration key, secret key, and API hostname. Record this information. You will need it later to install the Duo application on the Windows client.
- Download the Duo Authentication for Windows Logon installer package on the Windows client. The Duo .exe install package appears in your \Downloads folder.

Note Protecting Microsoft RDP with Duo two-factor authentication protects all applications that rely on Windows authentication. By integrating MFA at the Windows logon stage, any application that relies on Windows authentication, including Vertica, can benefit. When you have an IT mandate for two-factor authentication and you need to protect all of your enterprise’s applications, this is a clean way to set things up without having to configure and administer several different MFA solutions for each application that runs on the host.
Configuring Duo MFA for Vertica for a Single User
1. To enroll an individual user:
In the Duo admin panel, click Users in the left navigation pane.
- At the top right, click the Add User button. Duo displays the Add User screen.
- In the Username field, type the user’s Microsoft Active Directory primary authentication username (the user’s Windows logon name) and click Add User. Duo displays the full set of user information fields.
- Below Username, fill in the user’s real name and email address.
- Scroll down and click Save Changes.
- Scroll down further and click Add Phone.
- In the Add Phones screen, enter the user’s mobile number. Click Add Phone. Duo displays the complete information for this user’s mobile phone.
- Click Send Enrollment Email.
- Alert the client user to follow the steps in the enrollment email.
- When the client user responds to the enrollment email, the client user name appears in the Users screen in Duo.
- As part of following the enrollment email steps, the client user should install and set up the Duo app on his or her mobile phone (or other authentication device).
2. As administrator, run the Duo installer (downloaded in step 6 under Administrator: First Steps) on the end user’s Windows client. The Duo installer asks for the API hostname, integration key, and secret key that you recorded above.
Note An easy way to install Duo with administrator privileges is to right-click the duo-win-login<version>.exe file in your \Downloads folder, and select Run as administrator.
Configuration of Duo is complete! Any user with GSS/Kerberos authentication enabled in Vertica is now covered by MFA.
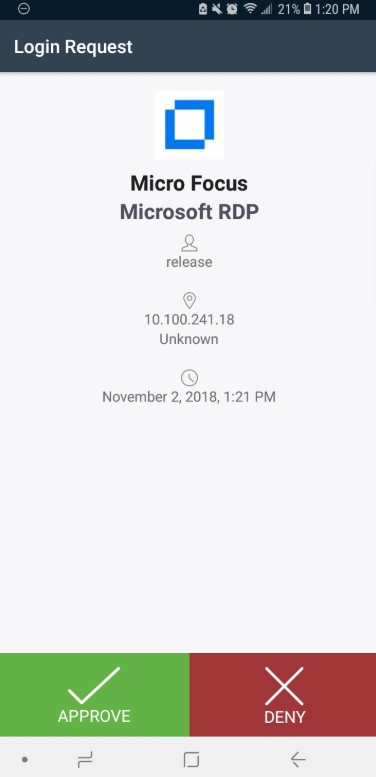
Now when the enrolled user logs into the host, the following dialog box displays. This dialog box pushes a login request to the user’s selected two-factor authentication device:
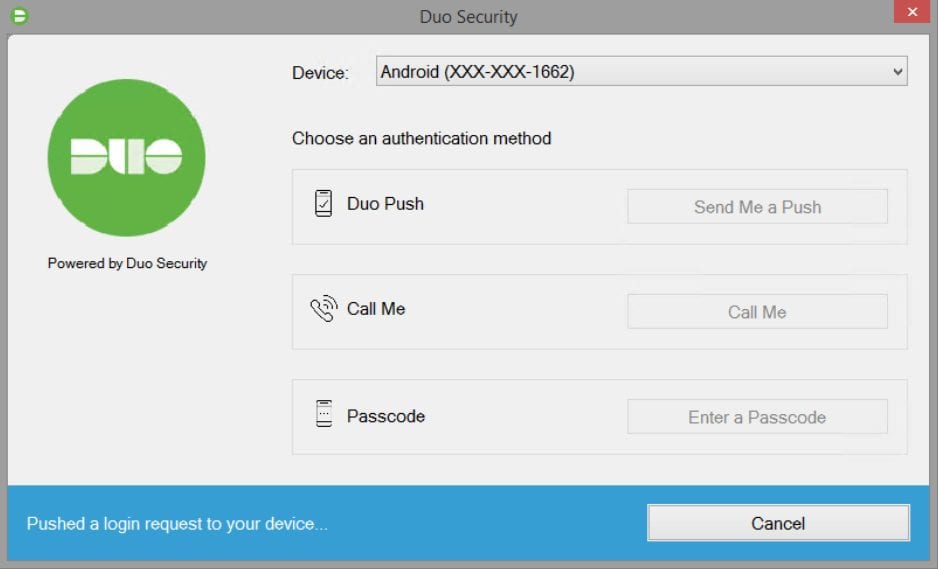
The following image shows an example of the login request that may appear on the user’s mobile phone, depending on how you configured Duo:
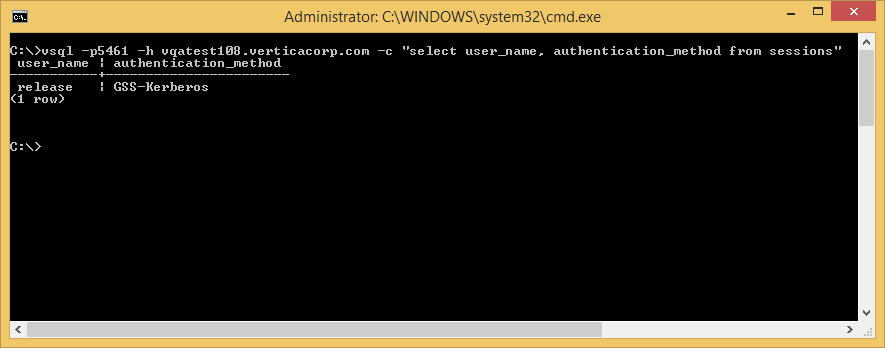
After the user responds to the login request by clicking Approve, the user can authenticate to the Vertica database as usual, as shown below.
Configuring Duo MFA for Vertica for Bulk Enrollment of Multiple Users
Follow the steps in this section to enroll a group of users into Duo from Microsoft AD with the help of AD Sync.
Note For complete information on AD Sync, see: https://duo.com/docs/adsync
Before You Start
Make sure you have the following information:
- Your AD server hostname or IP address
- LDAP or LDAPS port number and base DN.
- LDAPS or STARTTLS information and CA certificate for providing local network security, if desired
- A Windows 2008 R2 or later, or modern Linux system (CentOS, Ubuntu, or Red Hat) for running the Duo Authentication Proxy software
- Duo Authentication Proxy (installation steps below)
Steps
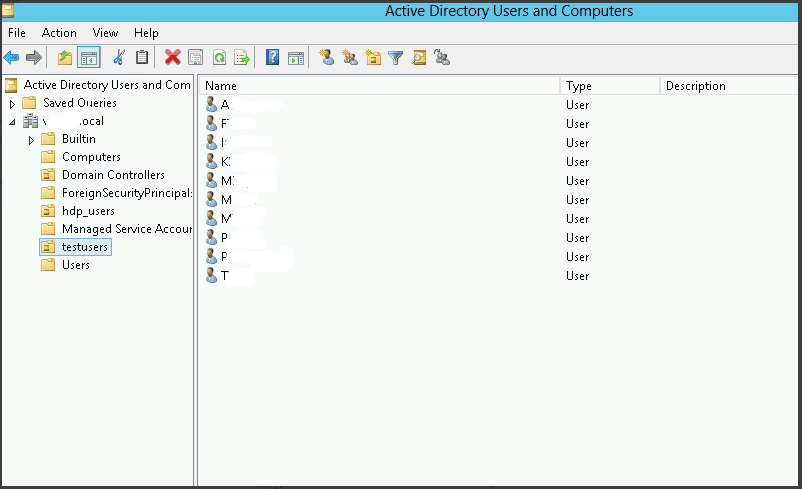
- In Microsoft Active Directory, identify the users you want to sync with Duo. It’s handy to keep the users in an AD user group. In the image below, the user group is called testusers:
- Log in to the Duo admin panel.
- Click Users in the left navigation bar.
- Click the Directory Sync button on the Users page.
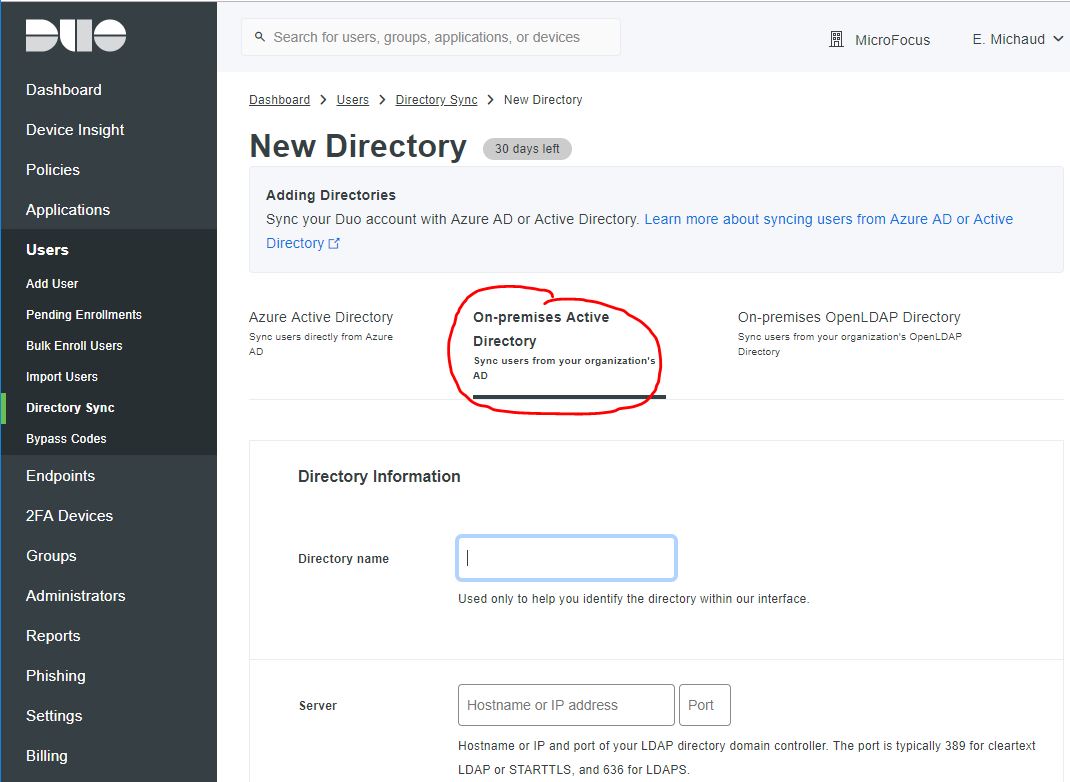
- On the Directory Sync page, click New Directory. Duo displays the New Directory screen.
- Click the On-premises Active Directory tab:
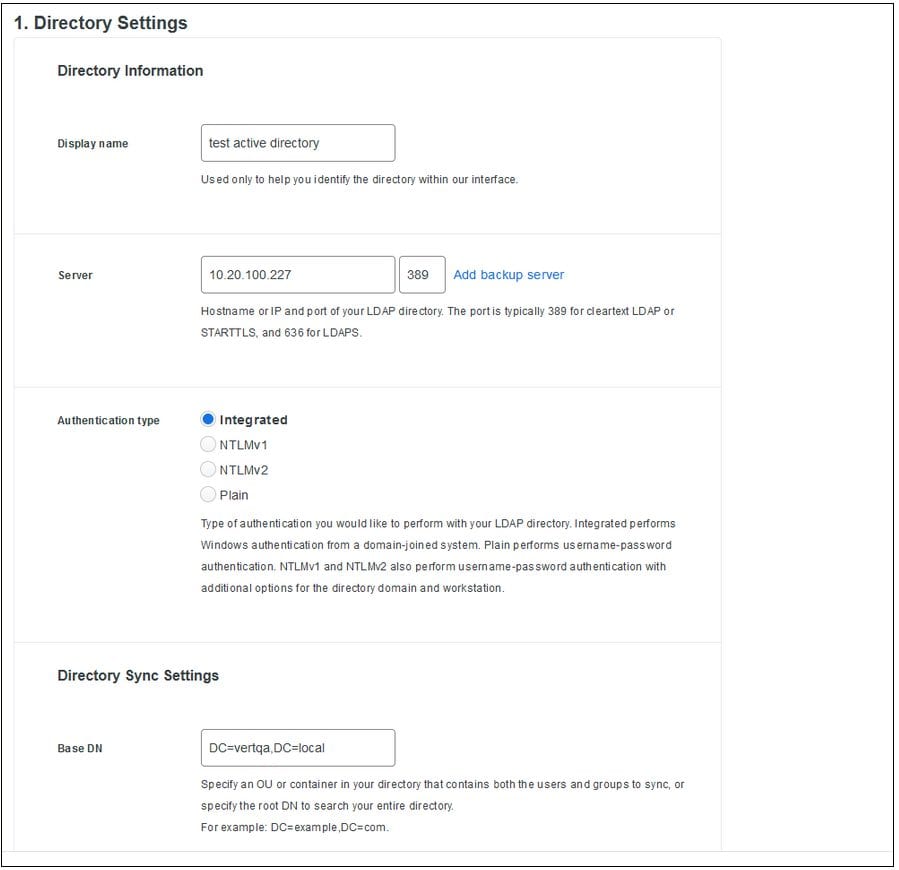
- Enter your Active Directory information. For example:
-
Download the most recent Authentication Proxy for Windows from https://dl.duosecurity.com/duoauthproxy-latest.exe. Note that the actual filename reflects the version, for example duoauthproxy-2.11.0.exe.
Note To verify the integrity of the download image, you can view checksums for Duo downloads here.
- Configure the Authentication Proxy according to the instructions on the screen.
- Start the proxy by typing the following command in a command prompt window, signed in as administrator:
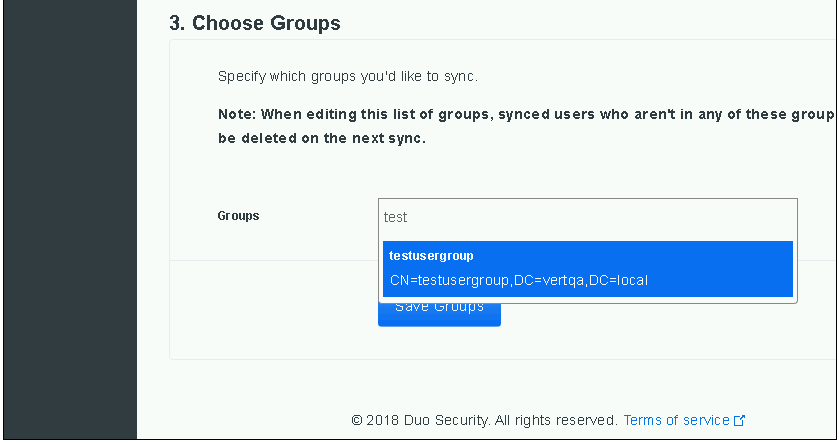
- Under Choose Groups, select the groups you want to sync. The following example selects testusersgroup:
- Now you can see that Duo is connected to AD and will sync the users in the group regularly with AD, as shown on the Status line:
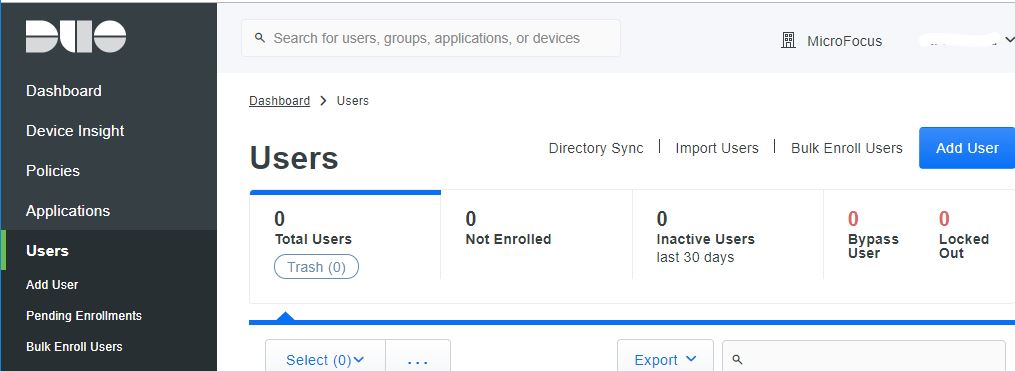
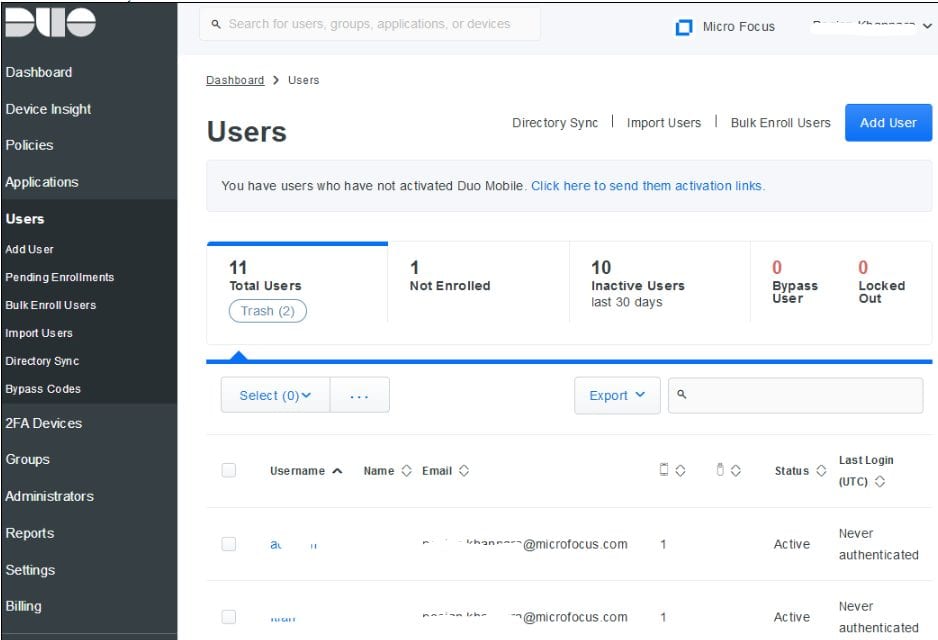
- To see the synced users listed individually, click Users in the left navigation pane:
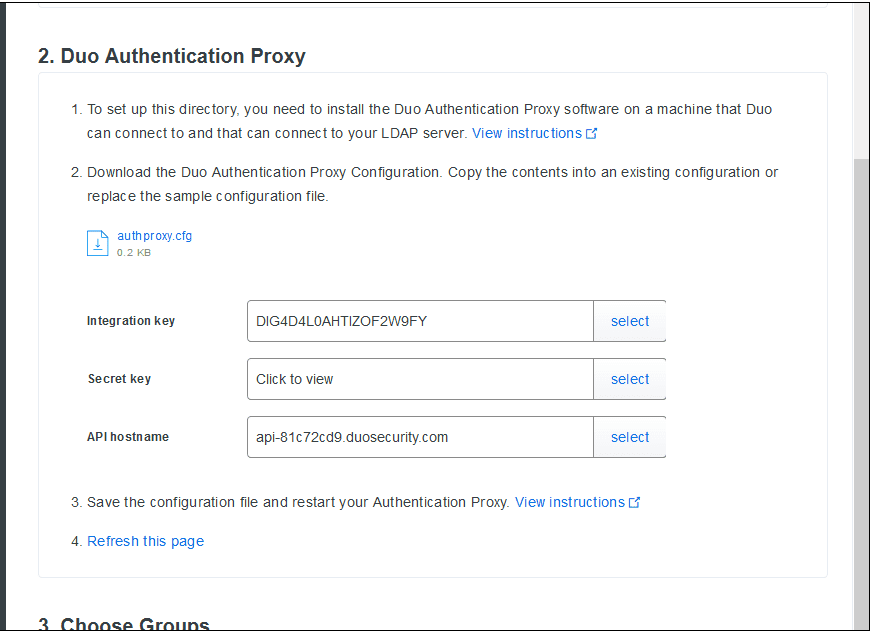
$ net start duoauthproxy

There’s a big advantage to configuring Duo to bulk-sync a list of users: when you add more users to that list later, Duo syncs the new users automatically.
For complete details on Duo’s features and configuration options, see https://duo.com/docs/rdp.

