


Vertica Integration with TIBCO Spotfire: Connection Guide
About Vertica Connection Guides
Vertica connection guides provide basic instructions for connecting a third-party partner product to Vertica. Connection guides are based on our testing with specific versions of Vertica and the partner product.
Vertica and TIBCO Spotfire Server: Latest Versions Tested
| Software | Version |
|---|---|
| Partner Product |
TIBCO Spotfire Server 11.8.1 |
| Client Product | TIBCO Spotfire Analyst 11.8.0 |
| Desktop Platform |
Windows Server 2019 Standard |
| Vertica Client |
Vertica ADO.Net 12.0 and JDBC 12.0 |
| Vertica Server |
Vertica Analytic Database 12.0.0-0 |
Note For this testing, we used TIBCO Spotfire Analyst. You can follow the same steps if you are using TIBCO Spotfire Desktop.
TIBCO Spotfire Overview
TIBCO Spotfire is an analytics and business intelligence platform that provides data analysis through predictive statistics. There are two ways you can achieve this using TIBCO Spotfire software. One is by using a TIBCO Sportfire Server and a client like TIBCO Spotfire Analyst. Alternatively, you can use TIBCO Spotfire Desktop to directly connect to Vertica and run your BI/Analytical queries.
TIBCO Spotfire connects to Vertica using ADO.NET and JDBC. In this document we tested the connection with TIBCO Spotfire Server and Analyst using ADO.NET and JDBC. However, the sequence of steps and configurations used for Spotfire Analyst can extended to Spotfire Desktop as well. This gives you the flexibility of not having to setup a Server to begin your analysis.
Installing TIBCO Spotfire
Download TIBCO Spotfire Server and Spotfire Analyst. For more information about downloading and installing the TIBCO Spotfire software, see the product documentation.
Installing the Vertica Client Drivers
To connect to TIBCO Spotfire Server to Vertica, you must install the Vertica ADO.NET or JDBC client.
Note If you need to use Security features such as OAuth or SSL, you must connect using JDBC.
- Go to the Vertica Client Drivers page.
- Download the Vertica client package that is compatible with your Vertica server version.
Note For more information about client and server compatibility, see Client Driver and Server Version Compatibility in the Vertica documentation.
Connecting TIBCO Spotfire to Vertica using ADO.NET
Note The following steps can be applied to TIBCO Spotfire Desktop software as well. If you are interested in running analytics without using the Server, you may download the Spotfire Desktop Software, and follow the same steps as Analyst.
- Open TIBCO Spotfire Analyst from Apps.
The Spotfire Analyst login dialog box appears. - Provide the TIBCO Spotfire Server credentials username, password, and server URL.

- Click Log in.
-
Click Connect to > Vertica. Provide the connection details.
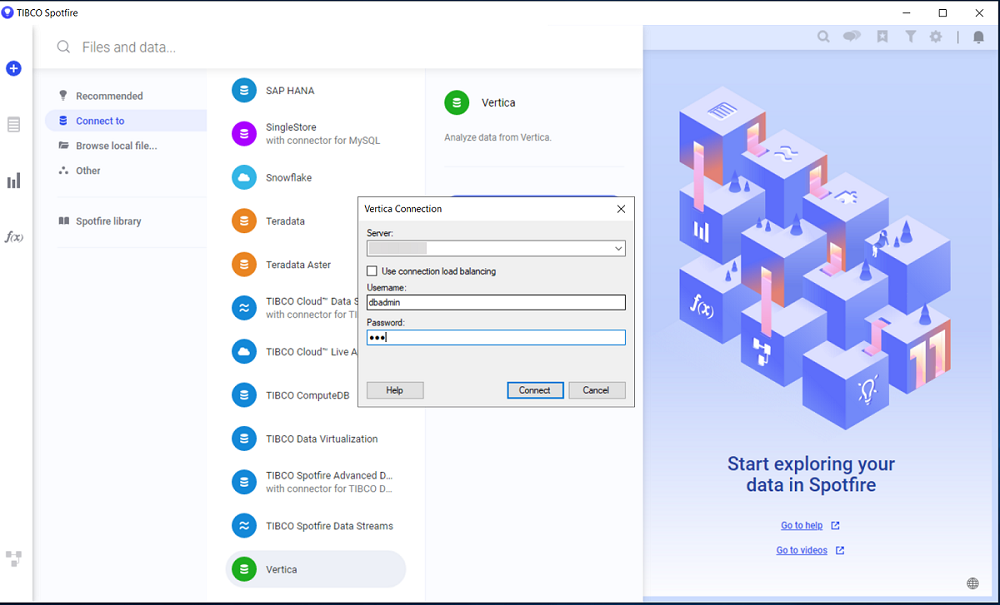
-
Click Connect. The Views in Connection window opens.
-
On the left panel, select the table(s) you want to add. In this example, the fact table Char1_Table is selected.
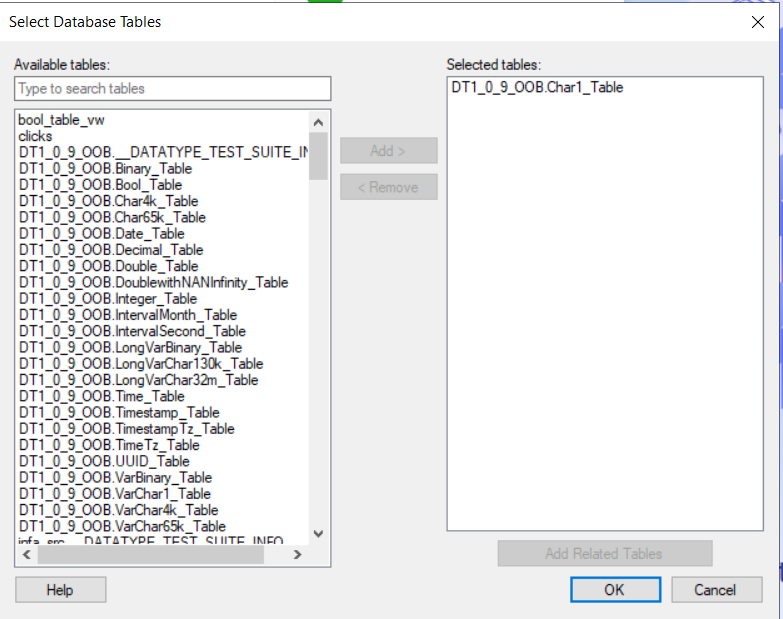
-
Click OK.
The Add Data to Analysis window appears. -
Under Load Method, select External.
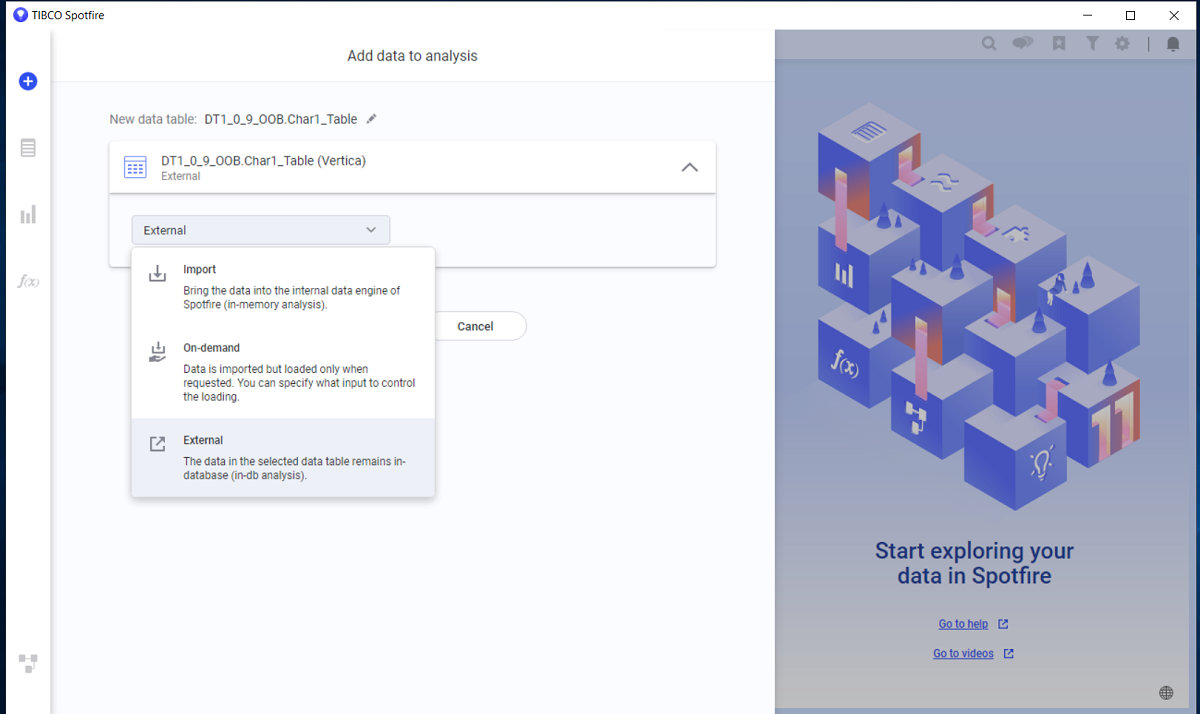
- Click OK.
You can now begin analyzing and visualizing your data.
Add New Data Tables
To add tables to your visualization, follow these steps:
-
Click Visualization > Add Visualization > Add Table from the list.
Table Visualization appears on the left.
-
If the connection has multiple tables, you will need to select the table you intend to analyze using the drop-down.
You can now select the tables you want to add to your visualization.
Connecting TIBCO Spotfire to Vertica using JDBC
Note The following steps are applicable to TIBCO Spotfire Server with TIBCO Spotfire Analyst. You must enable the data source on the TIBCO Spotfire Server before you connect using JDBC.
We recommend connecting using ADO.NET.
-
Upload the Vertica jar file in the location
<TIBCO_Home>\tss\11.7.0\tomcat\webapps\spotfire\WEB-INF\lib. -
On the TIBCO Spotfire Server, run Configure TIBCO Spotfire Server.
-
Select Data Source Template.
-
On the right-hand side, under Data Source, click Add New.
-
Enter Vertica as the name.
- Paste the following text in the Data Source Template field:
<jdbc-type-settings>
<type-name>Vertica</type-name>
<driver>com.vertica.jdbc.Driver</driver>
<connection-url-pattern>jdbc:vertica://host:port/db,dbadmin,dbpassowrd</connection-url-pattern>
<ping-command>SELECT 1 FROM DUAL</ping-command>
</jdbc-type-settings>
- Click Save.
- Select Enabled for Vertica to appear in the Data Source.
- Save the configuration.
To connect TIBCO Spotfire to Vertica using JDBC, follow these steps:
- Start TIBCO Spotfire Server.
- Start Spotfire.
- In Spotfire, select Tools > Information Designer.
- Click Data Sources and then click Data source.
- Click Setup Data Source.
- Enter the data source information as shown in the following image.
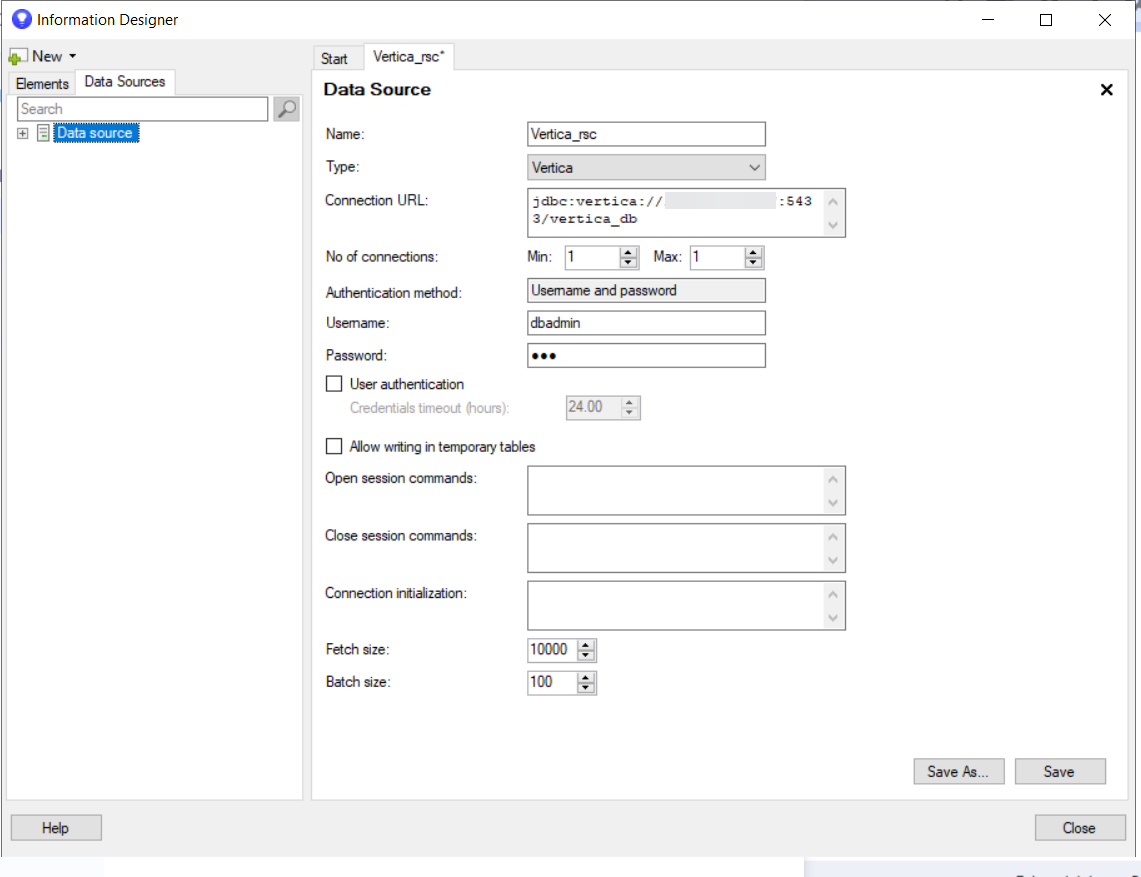
- Click Save As.
Known Limitations
ADO.NET
- INTERVAL MONTH, UUID, LONG VARCHAR, and LONG VARBINARY columns are not displayed.
- BINARY, VARBINARY, and INTERVAL SECOND data types are not displayed correctly.
- NUMERIC data type is rounded off after 15 digits.
- For DECIMAL data type, up to 30 digits are displayed.
- TIME, TIMETZ, TIMESTAMP, TIMESTAMPTZ data types are not displayed.
JDBC
- INTERVAL and UUID data types are not recognized by Spotfire.
- BINARY, VARBINARY, and LONG VARBINARY data types are not displayed correctly.
- DECIMAL data types are rounded off after 15 digits.
- For TIME, TIMETZ, TIMESTAMP, and TIMESTAMPTZ data types, milliseconds are not displayed.
- For LONG VARCHAR data types, a maximum of 65552 characters are displayed.
- Smallest Date(0001/01/01) values are not displayed.

