


Vertica Integration with DbVisualizer: Connection Guide
About Vertica Connection Guides
Vertica connection guides provide basic instructions for connecting a third-party partner product to Vertica. Connection guides are based on our testing with specific versions of Vertica and the partner product.
Vertica and DbVisualizer: Latest Versions Tested
| Software | Version |
|---|---|
| Partner Product |
DbVisualizer Free 13.0.4 |
| Desktop Platform |
Windows 10 Enterprise |
| Vertica Client |
JDBC 11.0.0 |
| Vertica Server |
Vertica Database 11.1.1 |
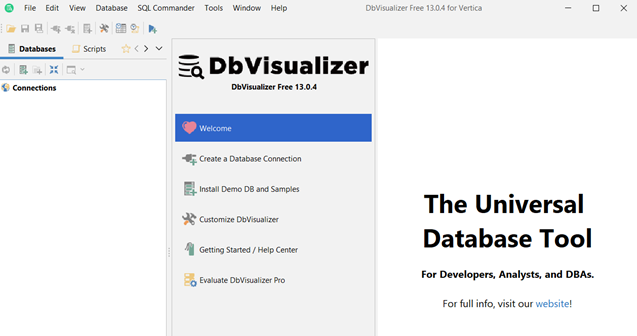
DbVisualizer Overview
DbVisualizer is a visual SQL client that includes the following main features:
- Broad database and platform support
- A SQL command tool
- Database browsing
- Object management
- Table data management
It is available in both Free and Pro Editions. The Free Edition is a subset of the Pro Edition’s capabilities. See the DbVisualizer website for complete details and comparisons.
Before You Begin
There have been some updates in how DbVisualizer Free for Vertica is distributed. Previously, there was a DbVisualizer Free for Vertica available on the Vertica Marketplace, and DbVisualizer Free and Pro Editions available on the DbVisualizer web site.
Now you can access DbVisualizer Free for Vertica by downloading and installing the DbVisualizer Free Edition from the DbVisualizer download page. Then downloading and installing a special license from Vertica. This license activates Vertica specific features in the DbVisualizer Free version, making it equivalent to the previously distributed DbVisualizer Free for Vertica.
Note DbVisualizer Pro Edition includes all the Vertica-specific features and uses the standard Pro license from DbVis.
Installing DbVisualizer
See the DbVisualizer site for:
For our tests we downloaded the Recommended Windows 64-bit distribution and ran the installer which includes the required Java JRE. If you choose an installer without the JRE it will check for the existence of the required Java JVM and provides the option to install it if it isn’t already present.
Installing the Vertica Client Drivers
No Vertica driver installation is necessary. DbVisualizer comes with a built-in Vertica JDBC driver. DbVisualizer versions prior to 10.0.14 have the Vertica 7.2 JDBC driver included. This driver is forward compatible with Vertica Server 7.2 and above. The latest DbVisualizer as of this testing, 13.0.4, includes the Vertica 11.0.0 driver which supports backward compatibility back to Vertica Server 7.2 and forward compatibility for future releases. See the Vertica Supported Platforms Guide for details.
Installing DbVisualizer Free for Vertica License
Right-click here and select Save link as... to download the special license key file needed to activate the Vertica features. Install the license as follows:
- Save
dbvisfreeforvertica.licensefile to your local disk. - Start DbVisualizer and select Help > License Key.
- Select License Key File as the License Type.
- In the License Key File field, enter the path to the newly saved
dbvis.licensefile. Or click the Browse button to the right of the field to browse for the license file. - Click Install License.
- When prompted, restart DbVisualizer .
The DbVisualizer main window should display DbVisualizer Free 13.0.4 for Vertica in the window title.
Connecting DbVisualizer to Vertica
To connect DbVisualizer to your Vertica database, first you need to create a Database Connection object as follows:
- From the home page menu, select Database > Create Database Connection.
- On the left drivers pane, scroll and find Vertica driver.

-
Double-click the Vertica driver.
- On the next screen, enter the following database information:
- Name: Enter a unique name that helps you identify the database, for example, “database name” or “on host name”.
- Settings Format: Select Server Info
- Database Server: Enter the IP address or hostname of the Vertica server
- Database Port: 5433
- Database name: Enter the name of the database running on the Vertica server
- Database Userid: Enter the name of the Vertica database user you want to connect with
- Database Password: Enter the password of the Vertica database user you are connecting with
- Auto Commit - Select the checkbox
- Save Database Password: Select Save Between Sessions
- Permission Mode: Select Development
Click the Ping Server button to verify connectivity. Upon a successful connection click Connect.
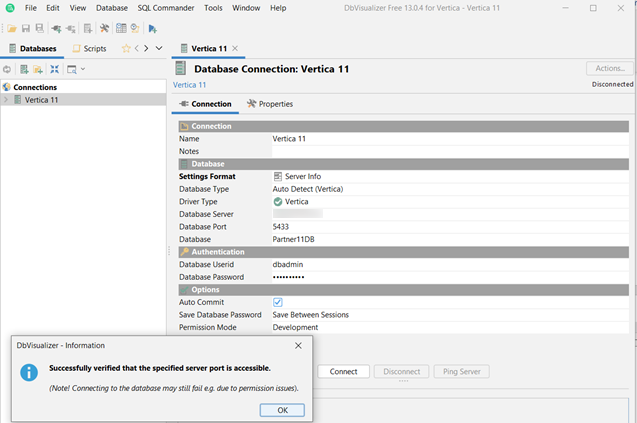
The Database Connection screen appears. Here you can view database and driver information. You can also manage data type handling, as well as connection, driver, and database properties.
For more information on the various options for Database Connection, see the DbVisualizer User Guide.
Troubleshooting
Creating a Vertica function in the SQL Commander window may result in an error such as:
[CREATE - 0 rows, 0.001 secs] [Code: 4856, SQL State: 42601] [Vertica][VJDBC](4856) ERROR: Syntax error at or near "EOL"
This is because CREATE FUNCTION has multiple statement end characters as part of the CREATE command syntax. You need to pass DbVisualizer hints in the SQL to change the delimiter temporarily. We used the @delimiter hint successfully. See the DbVisualizer User Guide section on Executing Complex Statements for more details.
It’s worth noting that under the Tools menu there’s a debug window which provides excellent detailed trace information for DbVisualizer and/or the JDBC driver. This could be a very useful tool in debugging any issues you may encounter, especially those related to connectivity or keep alive. For more information see the Debugging DbVisualizer documentation.
Known Limitations
Before using DbVisualizer with Vertica, be aware of the following known limitations:
- To get the desired display for different variations of numeric data types, you may need to change the formatting in the result screen formatting dialog, or in the Menu > Tools > Tool Properties > General tab under Data Formatting.
- Time with formatting can display up to milliseconds. Adding for microseconds adds leading zeros.
- If multilingual characters from Vertica appear corrupted, it is probably because your font cannot display them correctly. Go to Tool Properties > General > Appearance > Fonts to change the font.
The following image shows some fonts that usually display multilingual characters as expected: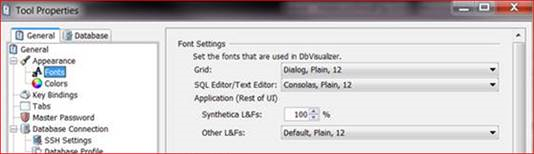
- We’ve seen cases where the connection status symbol displayed on the Connection alias in the Navigator window is inaccurate. An example would be if there’s a TCP or keep alive timeout which has dropped the connection, yet the Connection pane’s database alias status shows a green check mark indicating an active connection. Further, you may have to select disconnect before you can try to reconnect. It appears it can be partially disconnected and a full disconnect has to be initiated before a clean reconnect can be established.


