Vertica Integration with CloverDX Designer: Connection Guide
About Vertica Connection Guides
Vertica connection guides provide basic instructions for connecting a third-party partner product to Vertica. Connection guides are based on our testing with specific versions of Vertica and the partner product.
Vertica and CloverDX Designer: Latest Versions Tested
| Software | Version |
|---|---|
| Partner Product |
CloverDX Designer 5.5.2.7 |
| Partner Product Platform |
Windows 2016 Server Standard CentOS Linux 7.4.1708 (Core) |
| Vertica Client |
Vertica JDBC 9.3.1-0 |
| Vertica Server |
Vertica Database 9.3.1-0 |
CloverDX Overview
CloverDX provides tools for large scale data transformation and integration, and includes the following components:
- CloverDX Designer: A visual tool that lets you extract data from a source, transform it, and store it in a target.
- CloverDX Server: A platform to monitor and automate the execution of data jobs that you create in CloverDX Designer. CloverDX Server connects to Vertica using the connection information specified in CloverDX Designer when building your data jobs.
CloverDX Designer and Server are Java applications that run on any platform where Java 1.6 or later is supported, including Windows, Mac OS X, and Linux.
Note
This connection guide is based on testing Vertica on-premises with CloverDX Designer only.
Installing CloverDX Designer
To download a free trial version of CloverDX Designer,
- On the CloverDX website, click 45 days for free.
- Fill the registration form and click Start Download.
- Download the trial version for the required platform - Windows 64bit, Windows, MacOS X 64bit, or Linux 64bit.
- Follow the on-screen instructions to install CloverDX Designer.
About the Vertica Client Driver
CloverDX Designer bundles the Vertica JDBC driver version 9.1.1, so you do not need to download and install the Vertica JDBC driver to use CloverDX Designer with Vertica. Vertica JDBC driver version 9.1.1 is both backward and forward compatible.
For details about client driver and server version compatibility, see the Vertica documentation.
Note If you are using a more recent version of Vertica Server (later than 9.1.1) and you want to enable specific features introduced with that version, then you must install the appropriate driver.
Installing the Vertica Client Driver
- Navigate to Vertica Client Drivers.
- Download the JDBC driver package.
-
Follow the installation instructions in the Vertica documentation:
- Place the JDBC .jar file in a folder of your choice in the CloverDX Designer client directory.
Connecting CloverDX Designer to Vertica
- Launch CloverDX Designer.
-
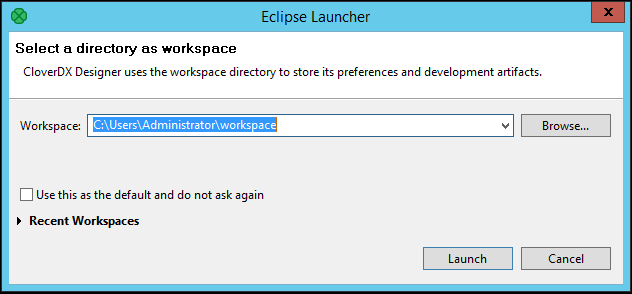
Select the Workspace directory and click Launch:
- Click File > New > CloverDX project to create a new project.
- Enter a project name and click Finish.
- Click File > New > Graph to create a new graph.
-
Select the parent project, then type the name of the graph and click Finish.
- In the Outline panel, right-click Connections > Create DB connection to create a connection to your Vertica database.
-
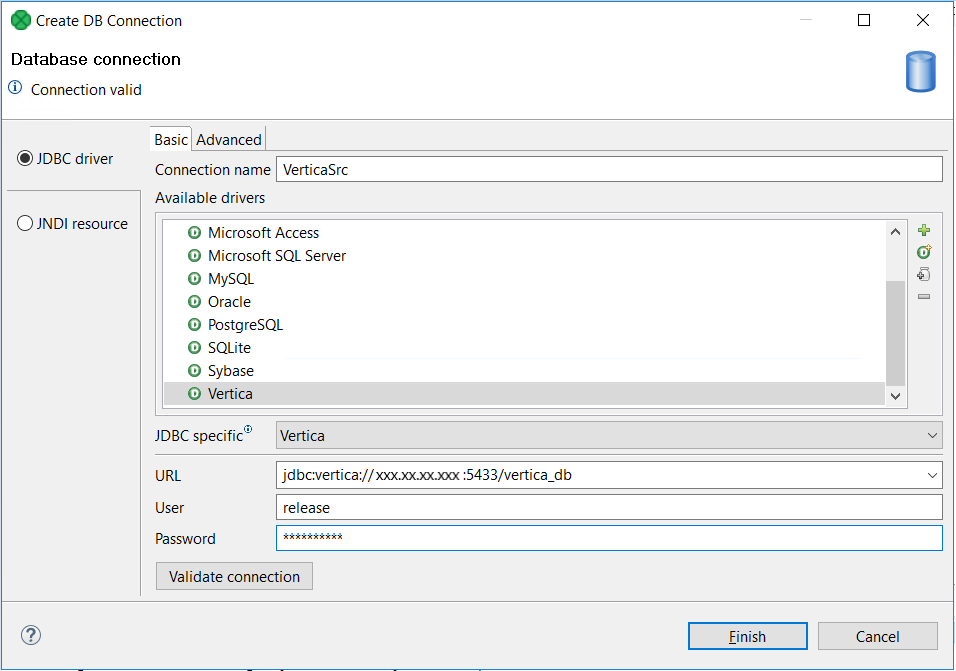
In the Create DB Connection dialog box, enter the values for the following required fields:
- Connection name: Enter your connection name.
-
Available Drivers: Select Vertica from the list of available drivers.
Note The Vertica JDBC driver version 9.1.1 is automatically bundled with CloverDX. If you require features that are available in a later version of Vertica, click the plus sign to manually add a different driver version. The newly added driver will be listed in Available drivers with the name com.vertica.jdbc.Driver.
- JDBC specific: Select Vertica from the drop-down list.
-
URL: Enter the JDBC connection string.
Example format:
jdbc:vertica://<ip_address or hostname>:<port_number>/<database_name>
- User: Enter your Vertica database user.
-
Password: Enter your database password.
-
Click Validate connection.
If the connection is valid, a notification is displayed at the top of the dialog box.
-
Click Finish.
You are now connected to Vertica through CloverDX Designer. Drag and drop elements from the Palette panel to read and write Vertica data.
For more information about advanced connection settings, see the CloverDX Documentation.
Configuring and Connecting Vertica Source and Target Using CloverDX Designer
Configuring a Vertica Source
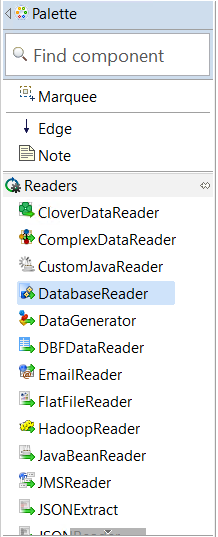
Use the DatabaseReader component from the Readers section of the Palette to read data from Vertica:
To configure the source,
- Double-click DatabaseReader.
- Select the source connection name from the drop-down list.
-
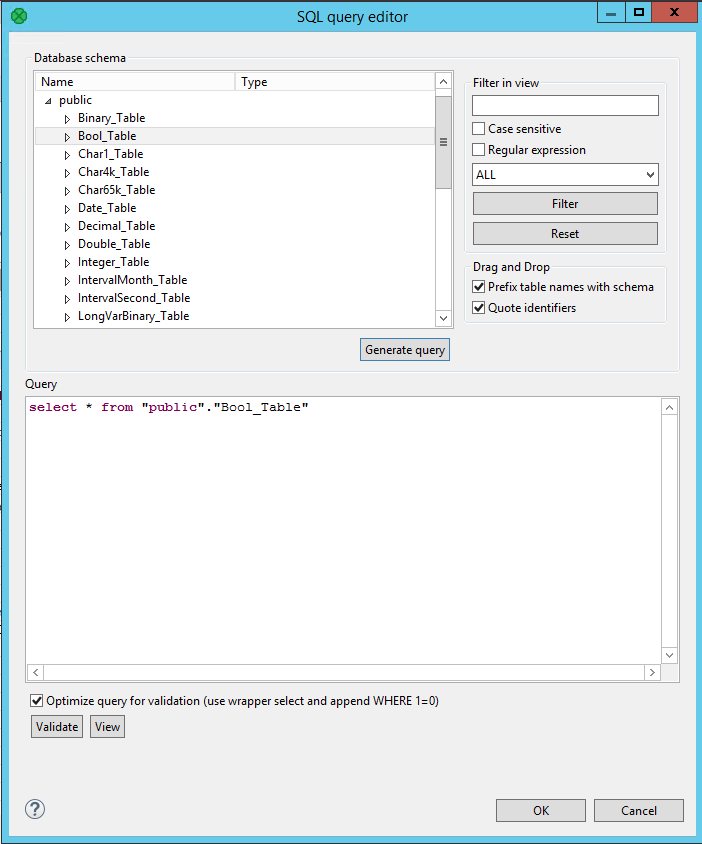
In SQL query property, click the box.
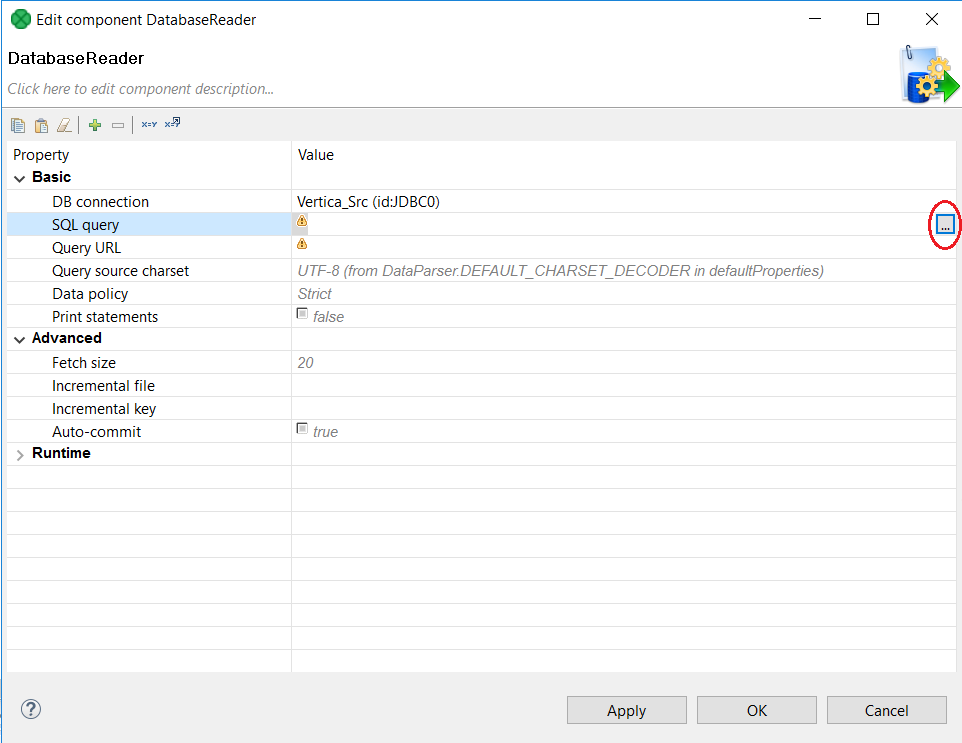
The SQL query editor window appears.
-
In the SQL query editor window, select the schema and table, then click Generate Query.
-
Validate the query, and then click OK.
Configuring a Vertica Target
Use the DatabaseWriter component from the Writers section of the Palette to write data to Vertica:
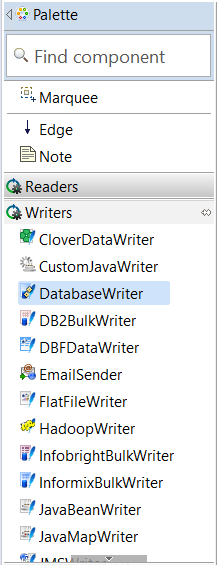
To configure the target
- Double-click DatabaseWriter.
-
Select the target connection name from the drop-down list.
-
In DB table property, click the box.
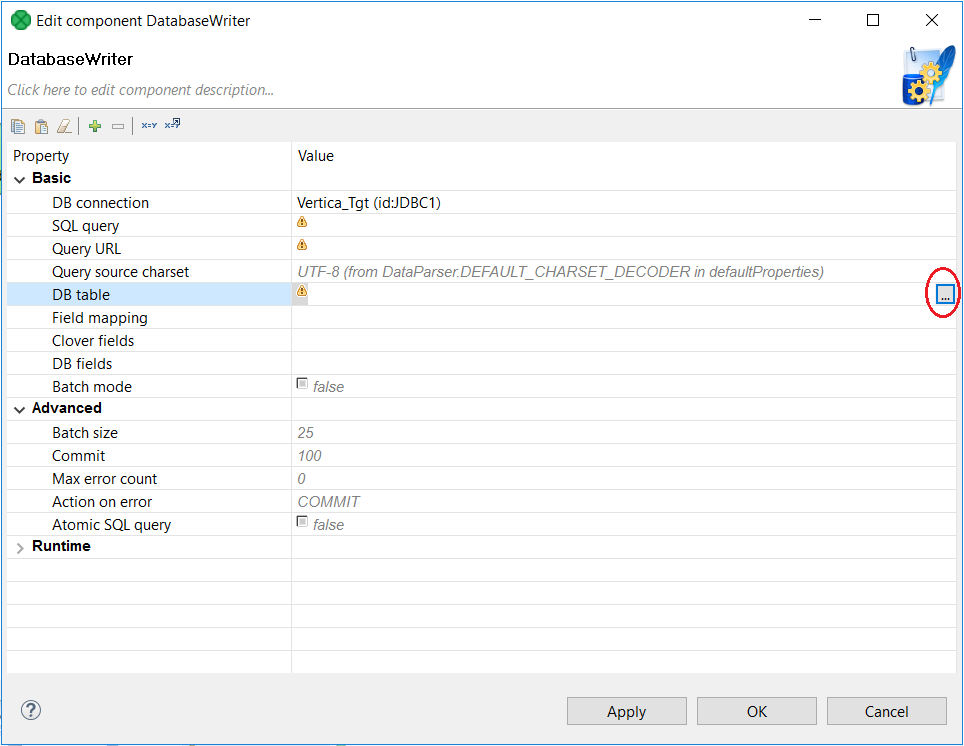
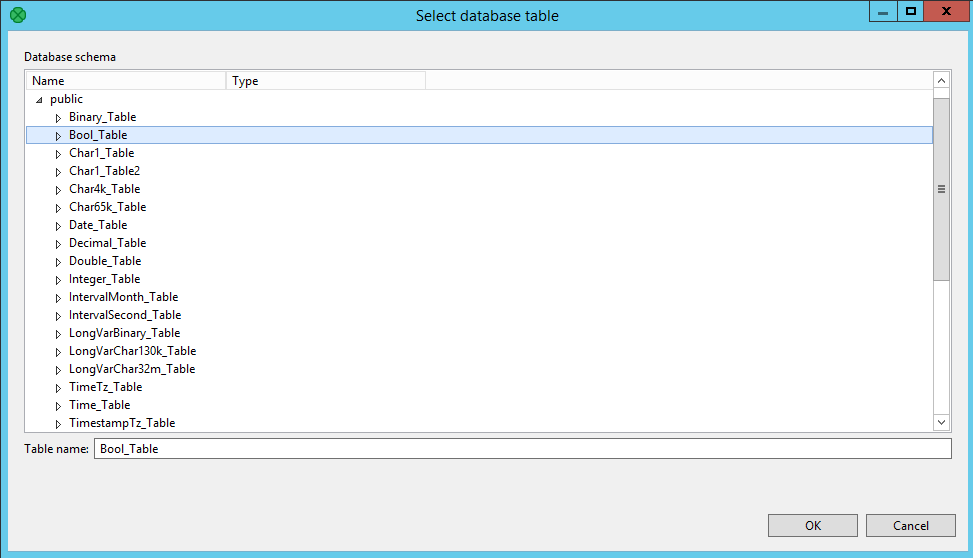
The Select database table window appears.
-
In the Select database table window, select the target schema and table, and then click OK.
Connecting the Source and the Target
Click Edge to connect the source and the target:
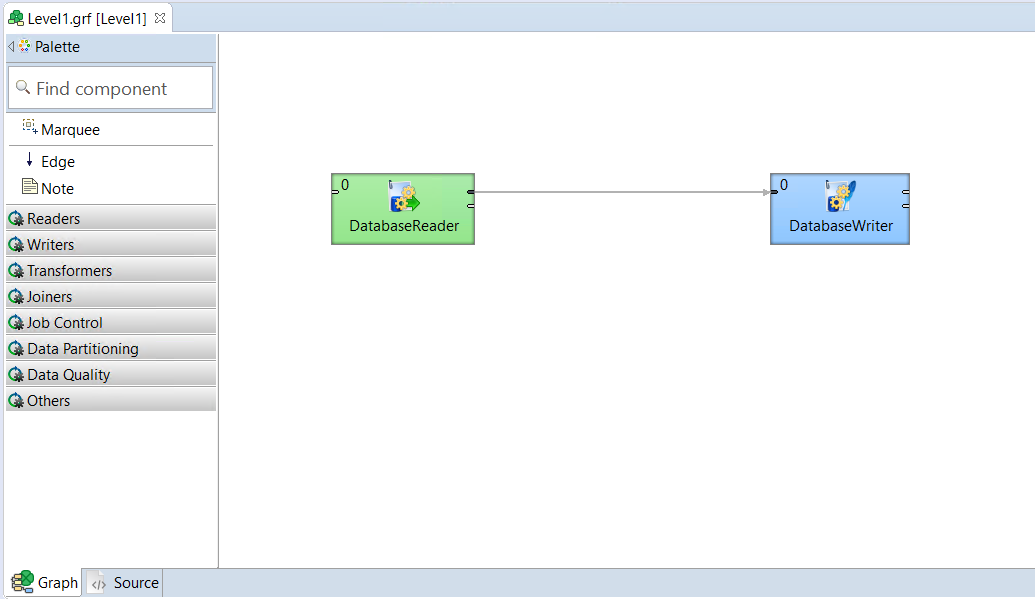
Note The dotted line connecting the source and target indicates that the source metadata has not been passed to the target.
To connect the source and target,
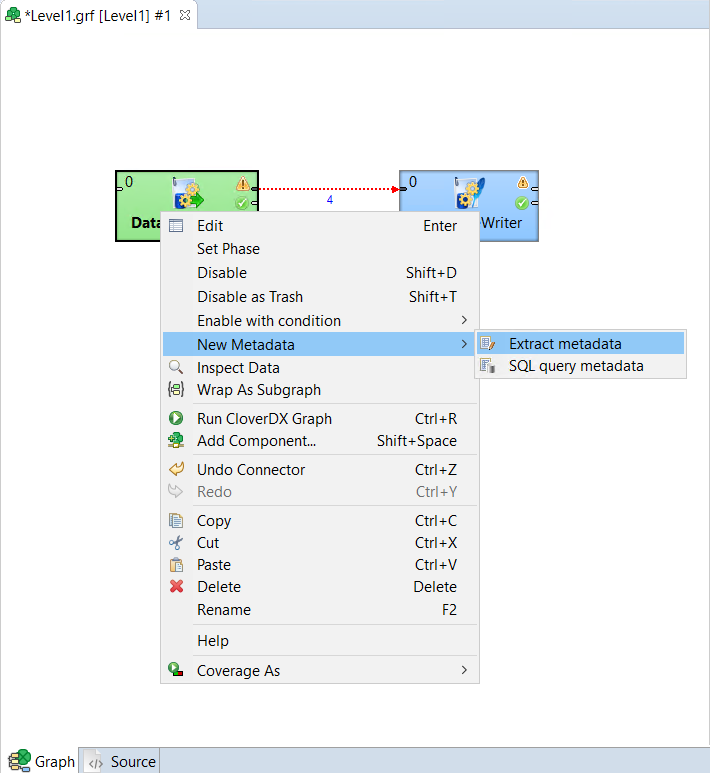
- Right-click DatabaseReader.
-
Select New Metadata > Extract metadata.
-
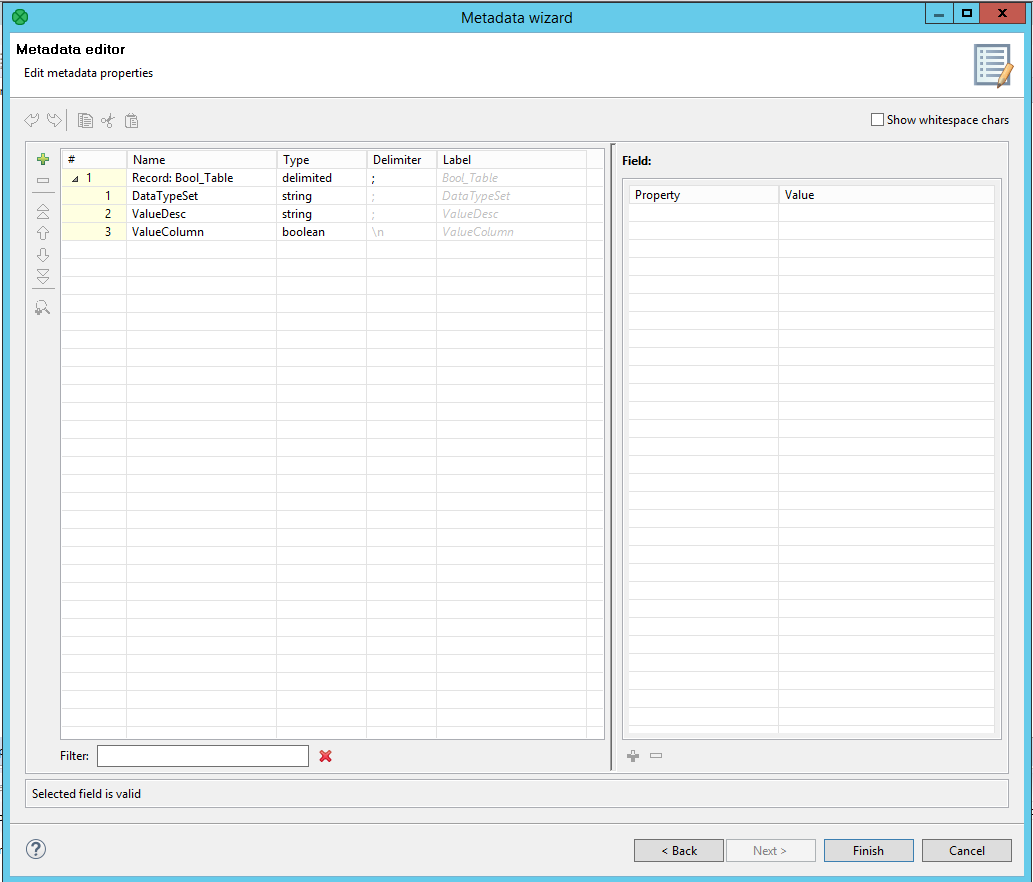
Check the incoming data type of the columns, and then click Finish.
-
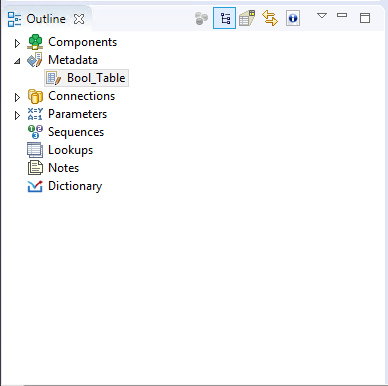
View the newly-extracted metadata in the Metadata component of the Outline panel.
-
Right-click Edge and select the newly-extracted metadata:
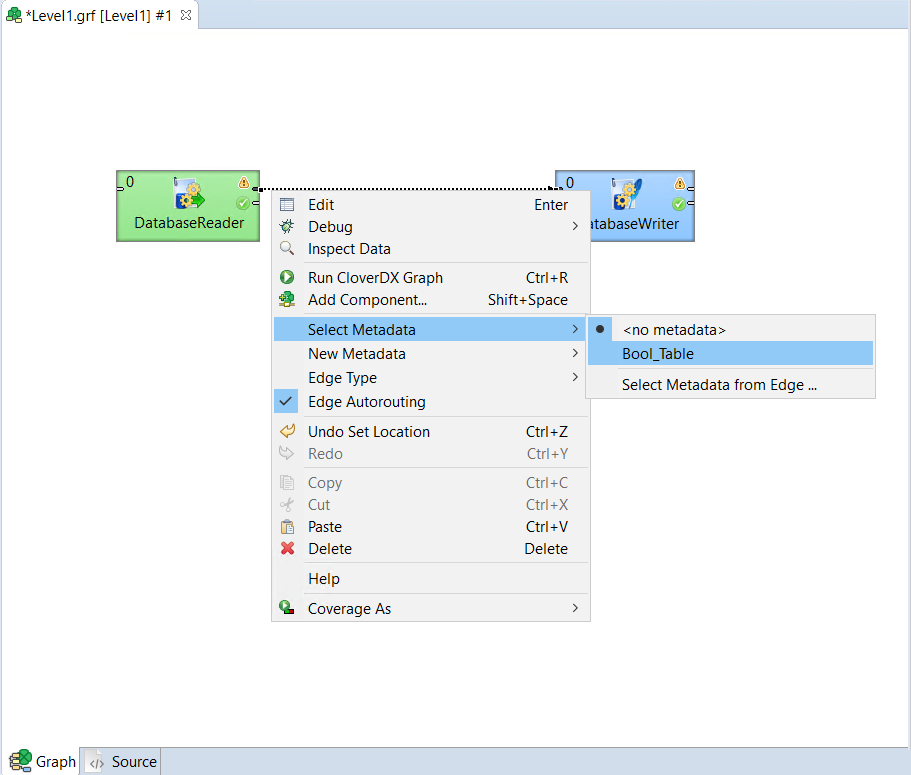
The dotted connection line changes to a solid line after you provide the metadata.
- Save the graph.
- From the toolbar menu, select Run to execute the graph.
Troubleshooting
Long String Processing
CloverDX Designer processes the default length of strings specified in the defaultProperties file in the CloverDX engine. In Designer, the path to the file is “C:\Program Files\CloverDX Designer\plugins\com.cloveretl.gui_5.4.0.8\lib\lib\cloveretl.engine.jar”. We do not recommend making any changes to this file.
If CloverDX Designer processes a value higher than the default defined value, the error “Reallocation of CloverBuffer failed” is displayed.
To resolve this error,
- Create a local file with the required value of string length. The default is 33554432.
-
To retrieve the properties from this local file, go to Window > Preferences > CloverDX > CloverDX Runtime and either define the path to the file in the CloverDX Engine Properties field or enter the following parameter in the VM parameters field:
-
Click Apply to restart CloverDX runtime, and then click Apply and Close.
Following is an example of various custom values for the required parameters:
Record.RECORD_LIMIT_SIZE = 74000040
Record.FIELD_LIMIT_SIZE = 33554432
Graph.DIRECT_EDGE_FAST_PROPAGATE_NUM_INTERNAL_BUFFERS = 1
-Dclover.engine.config.file=/full/path/to/file.properties

For more information, see CloverDX Designer Documentation.
Known Limitations
-
Char, VarChar, and LongVarChar data types support up to 247 characters in CloverDX Designer Display only. There is no issue while reading or writing data for these data types.
-
IntervalSeconds, IntervalMonths, and UUID data types are processed as string by default.
- Binary, VarBinary, and LongVarBinary data types are displayed in unreadable format by CloverDX Designer Display but data read and write operations work fine.
- In Time, TimeStamp, TimeTz, and TimeStampTz data types, milliseconds are truncated and rounded off to 3 places for both read and write operations.
-
Timezone offset is read correctly but not displayed in TimeTz data type and it is not supported in TimestampTz data type for both read and write operations.


