


Vertica Integration with RapidMiner Studio: Connection Guide
About Vertica Connection Guides
Vertica connection guides provide basic instructions for connecting a third-party partner product to Vertica. Connection guides are based on our testing with specific versions of Vertica and the partner product.
Vertica and RapidMiner Studio: Latest Versions Tested
| Software | Version |
|---|---|
| Partner Product |
RapidMiner Studio V9.10.011 |
| Partner Product Platform |
Windows Server 2019 |
| Vertica Client |
Vertica JDBC 12.0.1 |
| Vertica Server |
Vertica Analytic Database 12.0.1 |
| Vertica Server Platform | Linux RHEL 8.7 |
RapidMiner Studio Overview
RapidMiner is a flow-based programming tool used to streamline data science tasks from data analytics to developing predictive models. It offers pre-built templates such as churn prediction, market basket analysis, fraud detection, and others.
Installing RapidMiner Studio
To install RapidMiner Studio
- Go to https://rapidminer.com/get-started/
- Click Download.
-
Follow the installation instructions at Installing RapidMiner Studio.
Installing the Vertica Client Driver
To install RapidMiner Studio,
Before connecting Vertica to RapidMiner Studio, you must install the Vertica JDBC driver. Follow these steps:
- Navigate to the Client Drivers page on the Vertica website.
-
Download the JDBC driver package.
Note
For details about client and server compatibility, see Client Driver and Server Version Compatibility in the Vertica documentation.
-
Follow the installation instructions.
Connecting RapidMiner Studio to Vertica
- Open RapidMiner Studio.
-
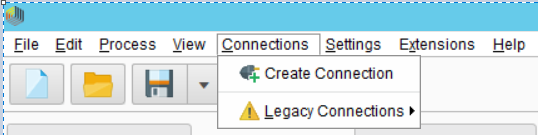
Click Connections > Create Connection.
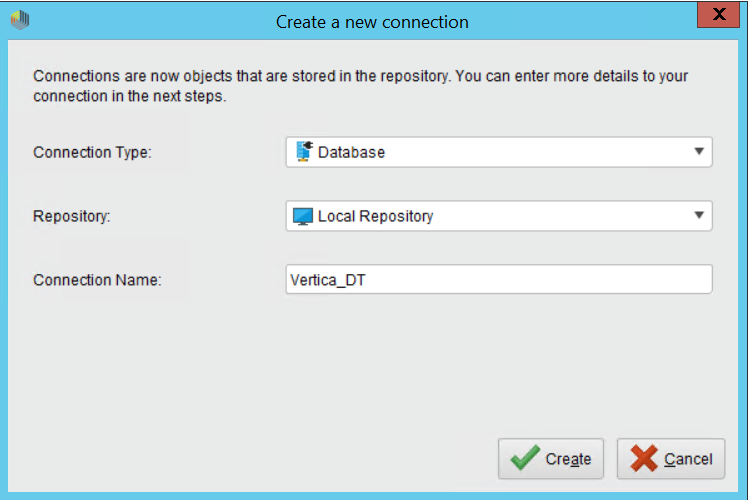
- In the Create a new connection window, provide the following details:
- Connection Type: Select Database.
- Repository: Select Local Repository.
- Connection Name: Type a connection name.
-
Click Create.
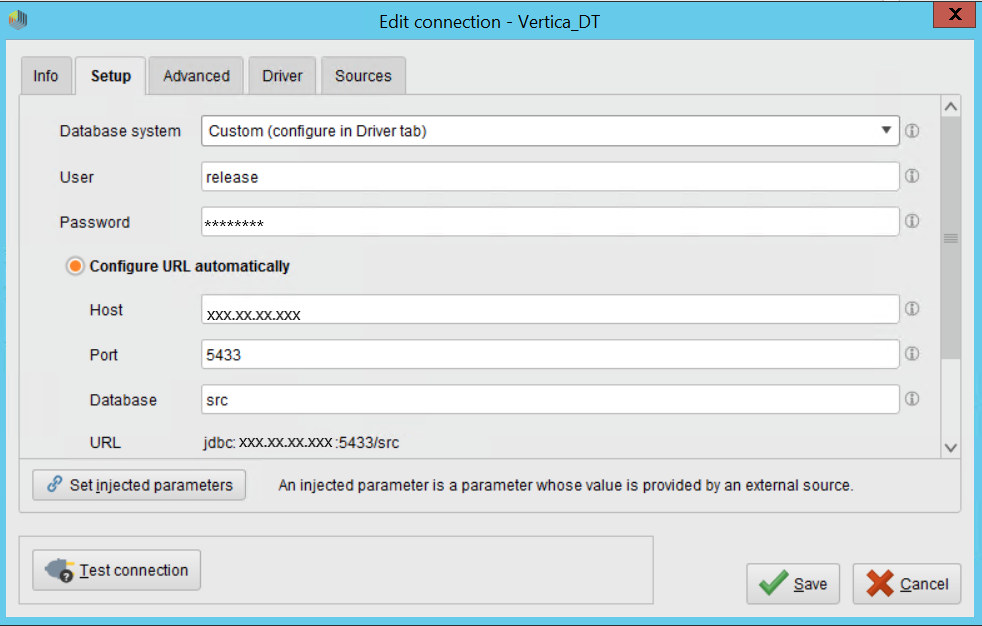
- In the Edit connection window, click the Setup tab and provide the following details:
- Database system: Select Custom (configure in Driver tab)
Provide the database details.
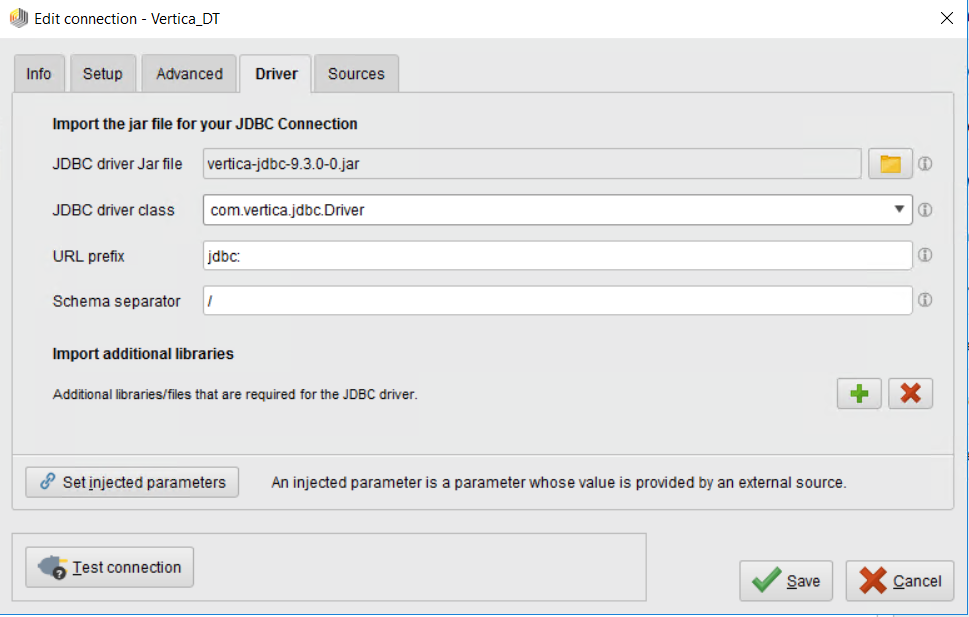
- Click the Driver tab and provide the following details:
JDBC driver Jar file: Browse to the JDBC driver JAR file and click Open.
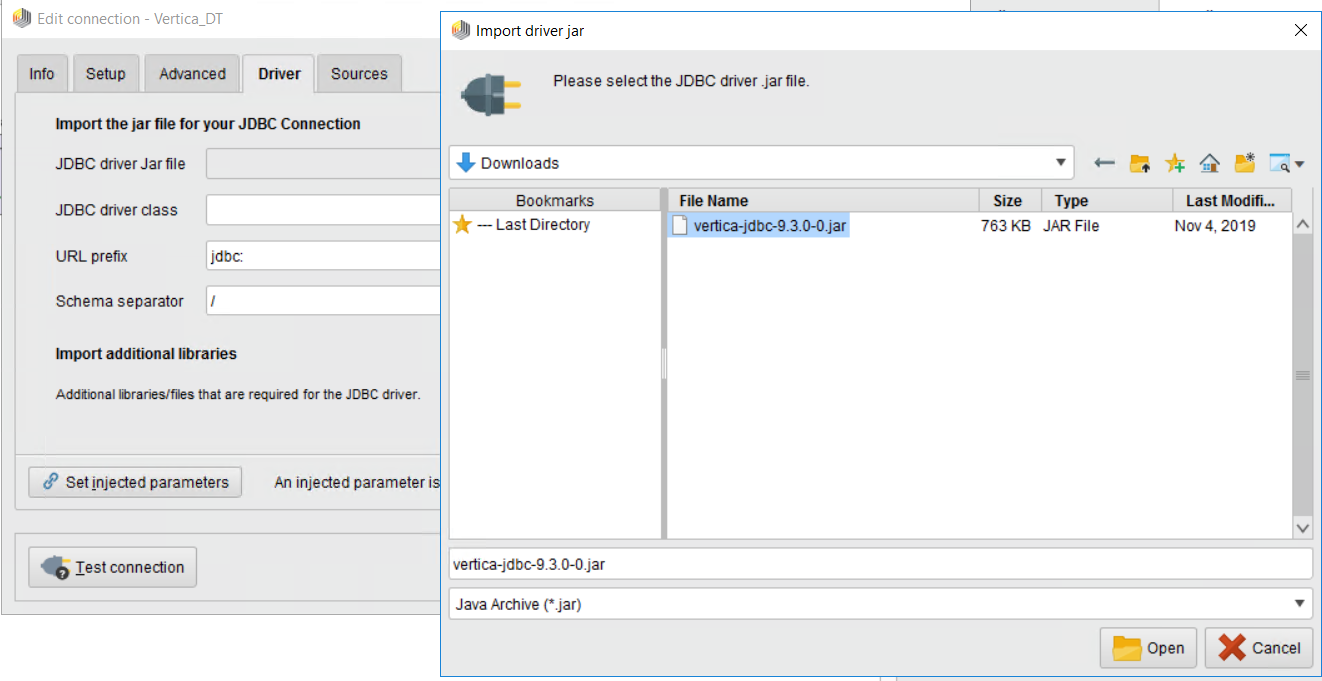
After you select the JAR file, the screen should look as follows:
-
Click Test connection to verify the connection. After a successful connection, click Save to save it in the local repository.

Sample Workflow for Vertica
-
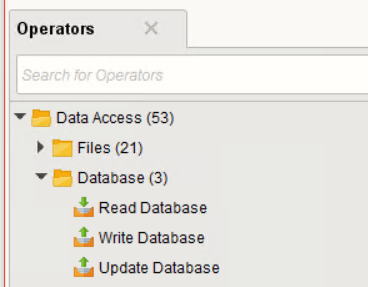
In the Operators window, expand Database.
-
Read Database operator is for reading data from the specified SQL database.
-
Write Database is for writing to a specific SQL database.
-
-
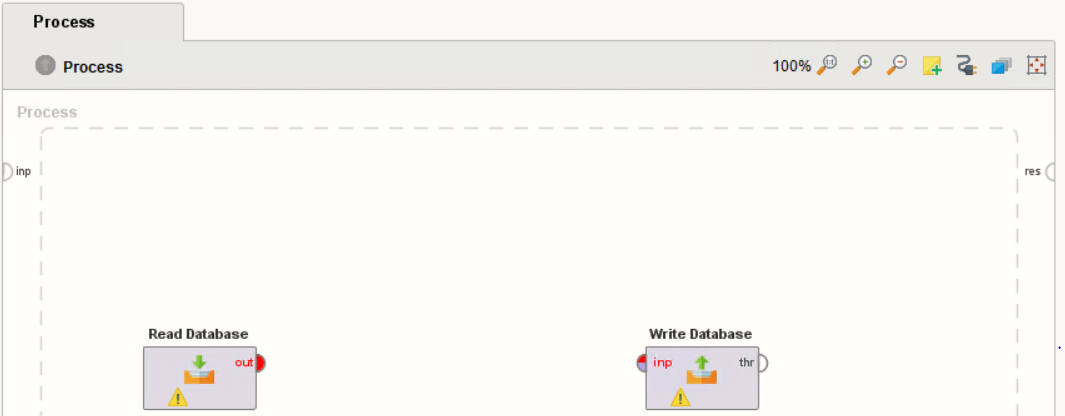
Drag and drop Read Database and Write Database onto the Process pane.
- Click Read Database.
- In the Repository Browser, select the Vertica source connection.
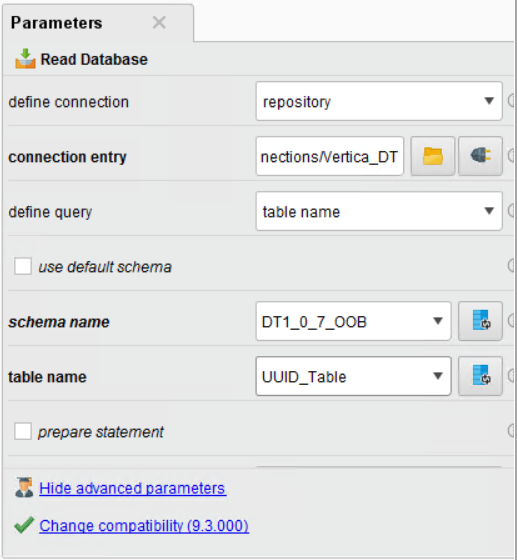
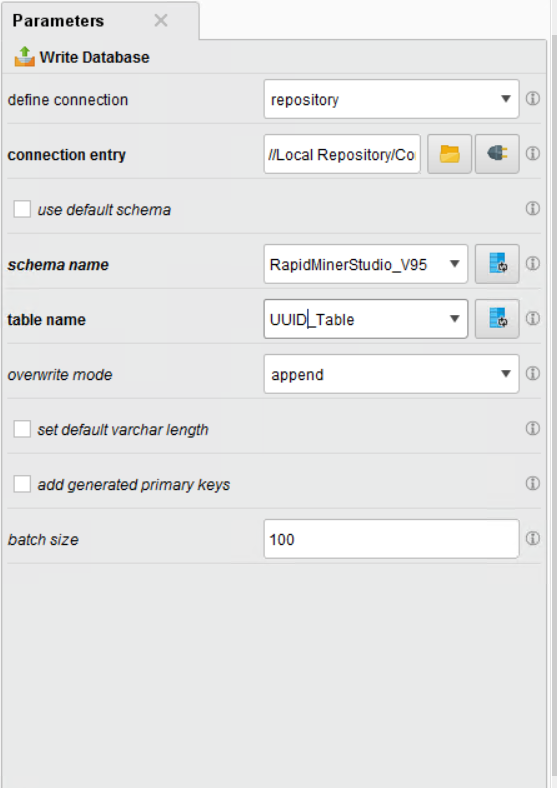
- In the Parameters window on the right pane
- define connection: Select repository.
- connection entry: Select the connection you created from the local repository list.
- schema name: Select the schema name.
table name: Select the table name.
-
Click Write Database and repeat step 3 to select the target database from the repository.
-
After you have selected the tables for Read and Write databases, connect Read Database and Write Database.

- Click
 to execute the process.
 -
The check mark on both the operators indicates successful completion of the process.

-
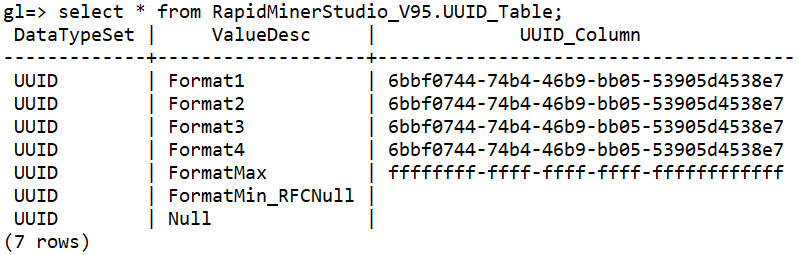
Verify the target table via VSQL as follows:
Known Limitations
Preview data limitations
-
For TIMETZ, TIMESTAMP, and TIMESTAMPTZ data types, milliseconds are truncated and incorrect value is displayed for time zone.
-
For TIME data type, milliseconds are rounded off after 3 digits.
-
For DATE data type, date is incorrect.
-
For INTEGER data type, values are rounded off after 15 digits.
-
For NUMERIC and FLOAT data type, values are rounded off after a scale of 3 digits and and infinity is displayed if the precision is beyond 310 digits.
Write data limitations
-
LONGVARBINARY data type is not loaded.
-
For TIMETZ, TIMESTAMP, and TIMESTAMPTZ data types, milliseconds are truncated.
-
For TIME data type, milliseconds are rounded off after 3 digits.
-
For INTEGER and DECIMAL data type, values are loaded as either exponential or rounded off. Infinity is displayed if the precision is beyond 310 digits.

