


Vertica Integration with Pyramid Analytics: Connection Guide
About Vertica Connection Guides
Vertica connection guides provide basic instructions for connecting a third-party partner product to Vertica. Connection guides are based on our testing with specific versions of Vertica and the partner product.
Vertica and Pyramid Analytics: Latest Versions Tested
| Software | Version |
|---|---|
|
Partner Product |
Pyramid Analytics 2020.13.100 |
| Partner Product Platform |
Windows Server 2016 |
| Vertica Client |
Vertica JDBC Driver 10.0.1 |
| Vertica Server |
Vertica Analytic Database 10.0.1 |
| Vertica Server Platform | CentOS 7.4 |
Pyramid Analytics Overview
Pyramid is an analytical platform that can be deployed in Windows, Linux, Kubernetes, Cloud, and Tablet/Phone. It is used to prepare data, deploy machine learning, and build data models. You can interact with data using different models and make new discoveries. Using the visualization features in Pyramid, you can customize and publish work-flows and charts to illustrate processes.
Installing Pyramid Analytics
To install Pyramid Analytics
- Navigate to https://www.pyramidanalytics.com/download.
-
Download the free trial Windows version of Pyramid Analytics valid for 30 days.
Follow the instructions on the wizard to install Pyramid Analytics.
Installing the Vertica Client Driver
Pyramid Analytics uses JDBC to connect to your Vertica database. Pyramid already has the Vertica driver bundled with the software.
If you need a newer version of the JDBC jar file or your Vertica version is newer than the available JDBC jar, follow these steps.
Note This document is based on our testing of Pyramid with Vertica JDBC driver 10.0.1.
-
To download the Vertica client driver, navigate to the Client Drivers page on the Vertica website.
-
Download the JDBC driver.
Note For more information about client and server compatibility, see Client Driver and Server Version Compatibility in the Vertica documentation.
-
Navigate to C:\Program Files\Pyramid\lib folder and replace the old version of the JDBC jar with the new version and restart the tool.
Connecting Pyramid Analytics to Vertica
Connecting to Vertica as Source
-
Open Pyramid Analytics.
Provide the username and password that you created when installing the application.
-
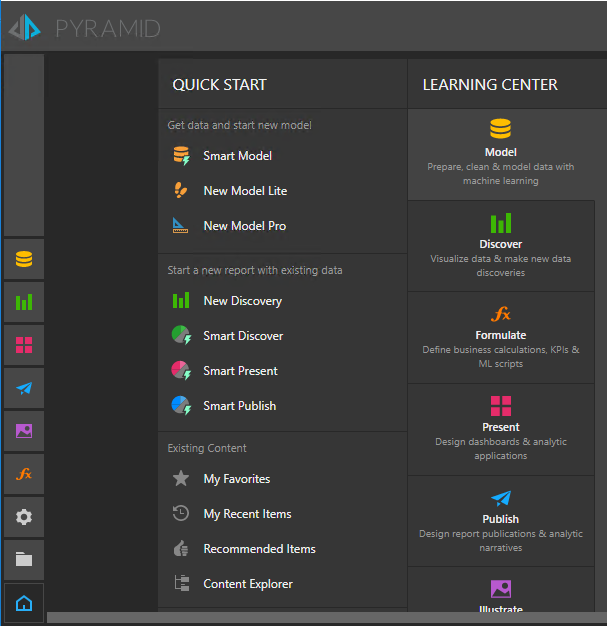
From QUICK START, click New Model Pro.
-
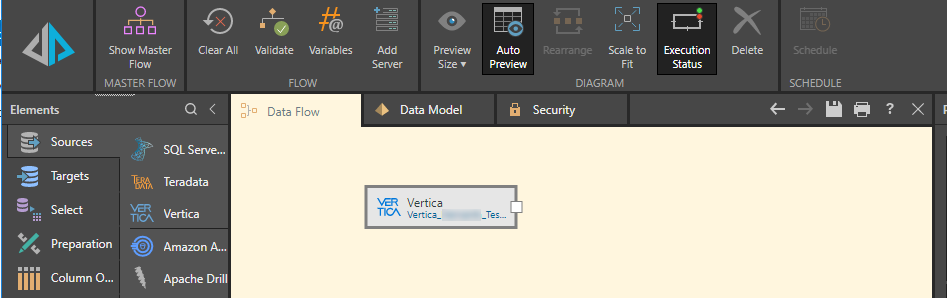
In the Elements pane, click Sources.
Drag and drop Vertica onto the Data Flow designer.
-
Click Vertica in the Data Flow designer. The properties pane on the right displays details of the Vertica Server source.
-
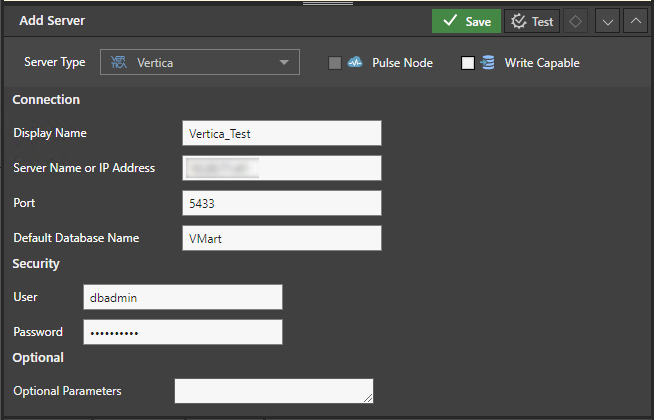
To add a new Vertica connection, in the Properties pane, click
 .
.
-
Enter the Display Name, IP Address, Port, Database Name, User, and Password.
-
Click Test to check the connection.
-
Click Save after the connection is successful.
-
In the Properties pane, select the Vertica database connection and the Database from the drop-downs respectively in the Vertica Server Source pane.
-
In the Tables pane, you can view the list of tables in the selected Vertica database.
Connecting to Vertica as Target
-
In the Elements pane, click Target.
Drag and drop Vertica onto the Data Flow designer.
-
Click Vertica in the Data Flow designer on the layout.
The Properties pane on the right displays details about the Vertica Target.
-
To add a new Vertica Target connection, in the Properties pane, click
 .
. -
Enter the details of the target Vertica server and click Test to check the connection.
-
Click Save.
-
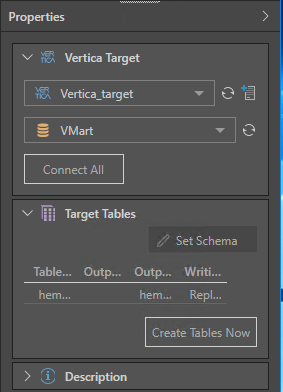
Select the Vertica database connection and the Database from the drop-down respectively in the Vertica Target pane.
-
In the Target Tables pane, click Set Schema.
-
In the Custom Target Schema window, enter the schema name, and click Apply.
-
Click Create Tables Now to create tables in the Vertica Target.
Running a Model
-
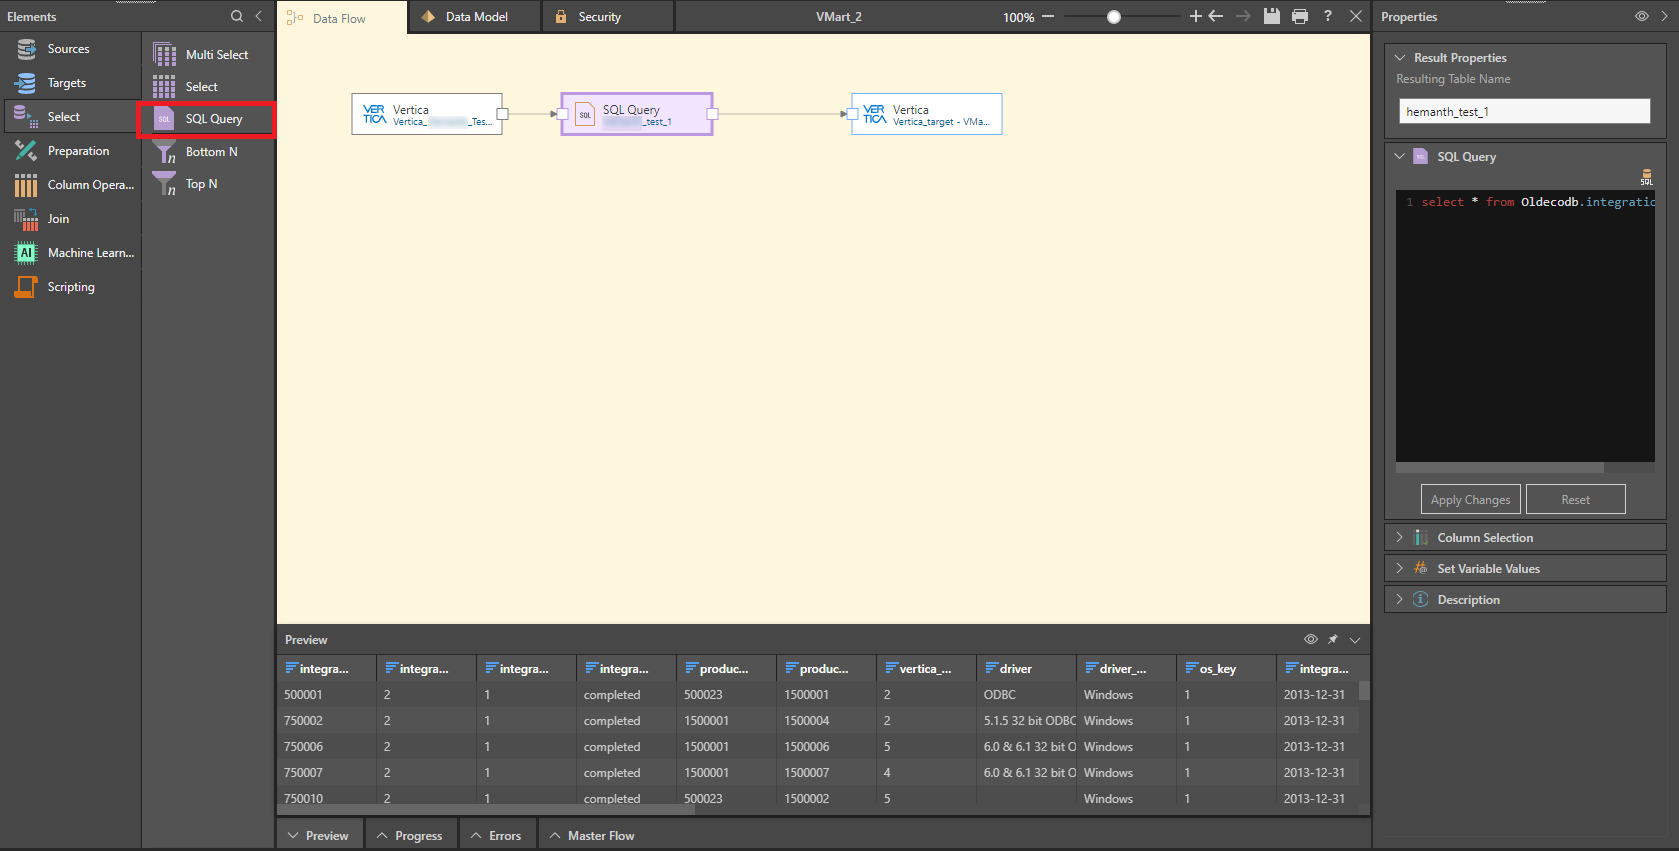
In the Elements pane, click Select.
Drag and drop SQL Query onto the Data Flow designer.
-
Connect the Vertica Source and SQL Query in the Data Flow designer.
-
Click SQL Query.
-
In the Properties pane you can enter a SQL statement in the SQL Query section and click Apply Changes.
-
You can see the data preview of the SQL query that is executed.
-
Drag and drop the Vertica Target connection onto the Data Flow designer and connect Vertica target to SQL query as shown above.
-
Click Validate in the menu to check if the current flow is valid.
-
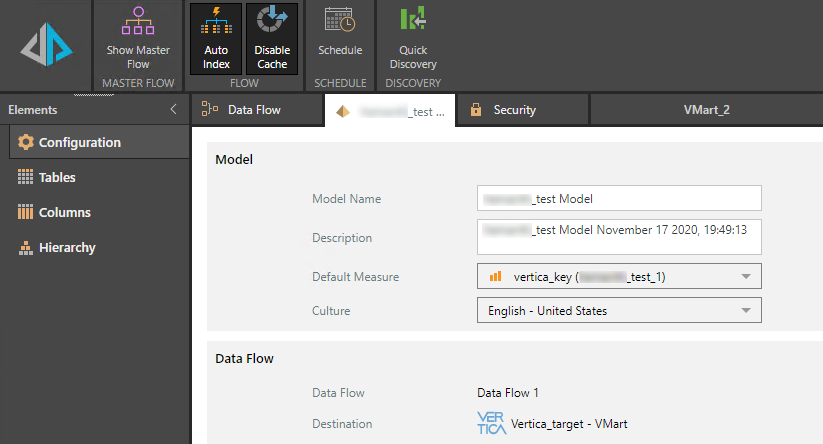
Click Data Model to see the Model details and Data flow summary.
-
Click
 .
. -
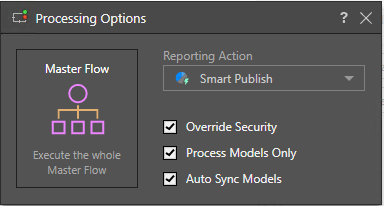
In the Processing Options dialog box, select the default options.
-
From the reporting action drop-down list, select the Smart publish option.
-
Click Master Flow to execute the flow.
-
After the process is queued for execution, a publication window will appear in which the user can select the data to be published.
Known Limitations
-
INTEGER data types are rounded off after 15 digits.
- NUMERIC data type is not supported.
-
For TIMESTAMP and TIME data types, milliseconds are not supported.
-
TIMESTAMPTZ and TIMETZ data types are not supported and displayed as a string.
-
INTERVAL SECONDS and INTERVAL MINUTES are not supported and displayed as a string.

