


Vertica Integration with IBM SPSS Modeler: Connection Guide
About Vertica Connection Guides
Vertica connection guides provide basic instructions for connecting a third-party partner product to Vertica. Connection guides are based on our testing with specific versions of Vertica and the partner product.
Vertica and IBM SPSS Modeler: Latest Versions Tested
This document is based on our testing using the following versions:
| Software | Version |
|---|---|
| Partner Product | IBM SPSS Modeler 18.3 |
| Desktop Platform |
Windows Server 2019 Standard |
| Vertica Client |
Vertica ODBC 11.0.0-0 |
| Vertica Server |
Vertica Analytic Database 11.0.0-0 |
IBM SPSS Modeler Overview
The IBM SPSS Modeler is a powerful predictive analytics platform that enables you to leverage statistical and data mining algorithms without programming. Its intuitive graphical interface allows you to build predictive models and perform machine learning tasks. You can easily access data from different sources, consolidate this data, and use modeling to get more accurate predictions and make better business decisions.
Installing IBM SPSS Modeler
- Navigate to the IBM SPSS Modeler download page.
- Scroll down the page to log into the IBM Passport Advantage website.
- Download IBM SPSS Modeler and follow the installation instructions.
To view the release notes for the tested version of IBM SPSS Modeler 18.3, go to the IBM Support Knowledge Center.
Installing the Vertica Client Driver
IBM SPSS Modeler uses the Vertica ODBC driver to connect to your Vertica database. To download and install the Vertica client package:
- Navigate to the Vertica Client Drivers page.
- Download the Vertica client package that is compatible with the Vertica server version.
- Double-click the installer and follow the prompts. When prompted to select one or more drivers, select ODBC only.
- Follow the installation instructions in Installing the Client Drivers and Tools on Windows.
- Create an ODBC Data Source Name (DSN) as described in Creating an ODBC Data Source Name (DSN).
Note For details about client and server compatibility, see Client Driver and Server Version Compatibility in the Vertica documentation.
Connecting IBM SPSS Modeler to Vertica and Creating the Workflow
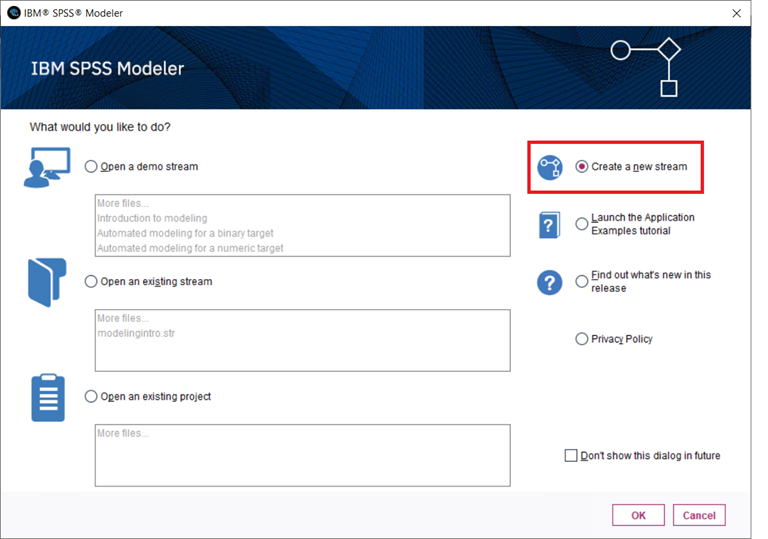
- Open IBM SPSS Modeler.
The IBM SPSS Modeler home screen appears.
-
Select Create a new stream and click OK.
- To create and configure the Source Database node:
Click Insert > Sources > Database to add a source database node on the canvas.
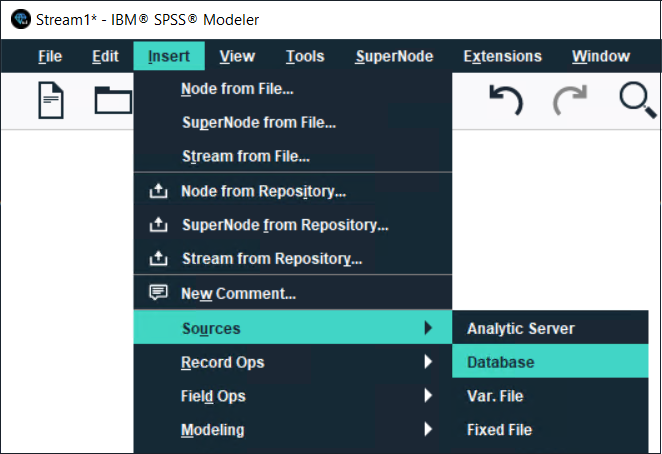
Alternatively, from the Module Palette, click the Sources tab and drag and drop the Database node onto the canvas.
Double-click the Source Database node.
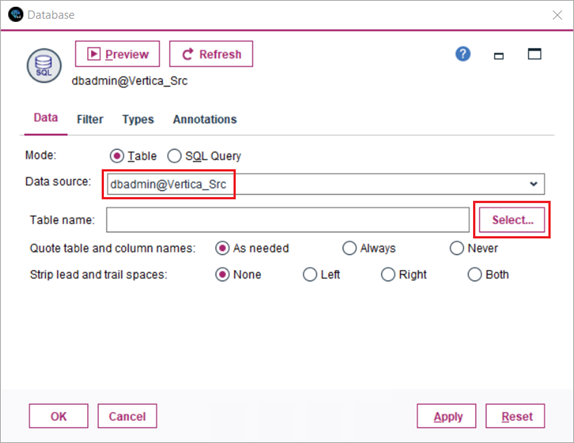
- In the Data tab, select Table.
Click Data source drop-down and click < Add new database connection.. >
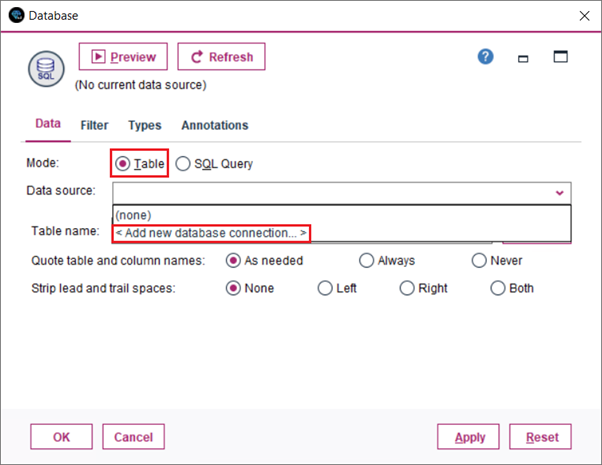
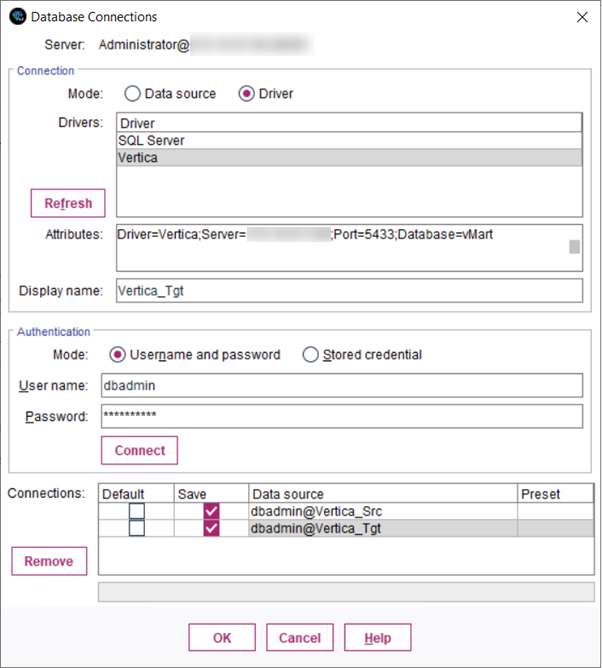
The Database Connections details dialog box appears.
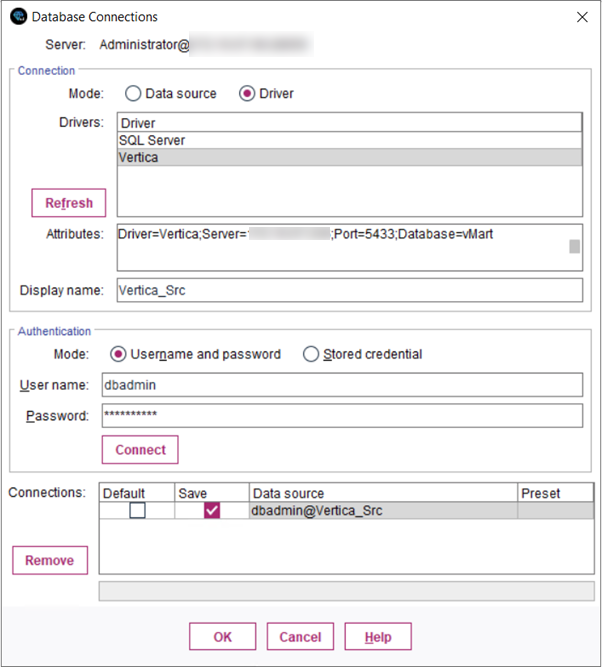
Connection Pane:- Mode: Click Driver.
- Drivers: Select Vertica.
- Attributes: Type the Vertica ODBC connection string. For example, Driver=Vertica;Server=XXX.XX.XX.XXX;Port=5433;Database=<Database_Name>
- Display name: Type a name for the Vertica connection.
Authentication Pane:
- Mode: Select Username and password.
- User name: Type the database user name.
- Password: Type the database password.
Click Connect.
The database connection name appears in the Connections pane after you are successfully connected.Select Save and then click OK.
The Vertica database connection appears in the Data source drop-down.
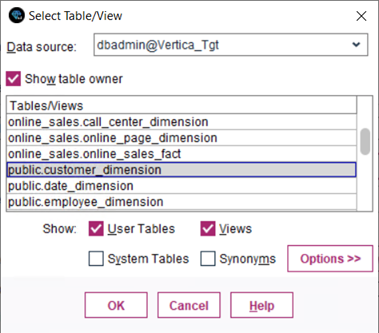
To select the Vertica database source table, click Select.
Select the required table and click OK to return to the Database window.

If you want to preview data from the Vertica source database, click Preview.
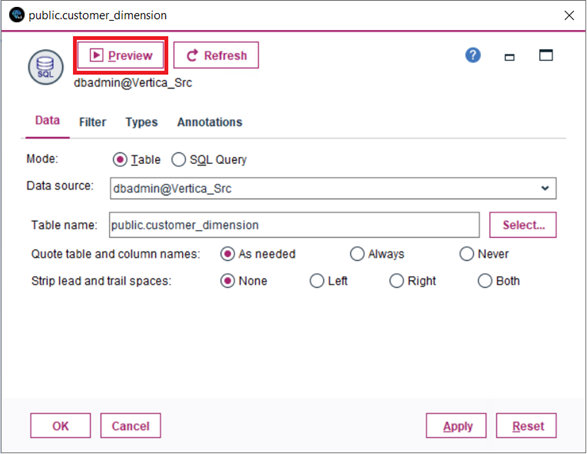
Click OK to return to the canvas.
The Select Table/View dialog box appears.
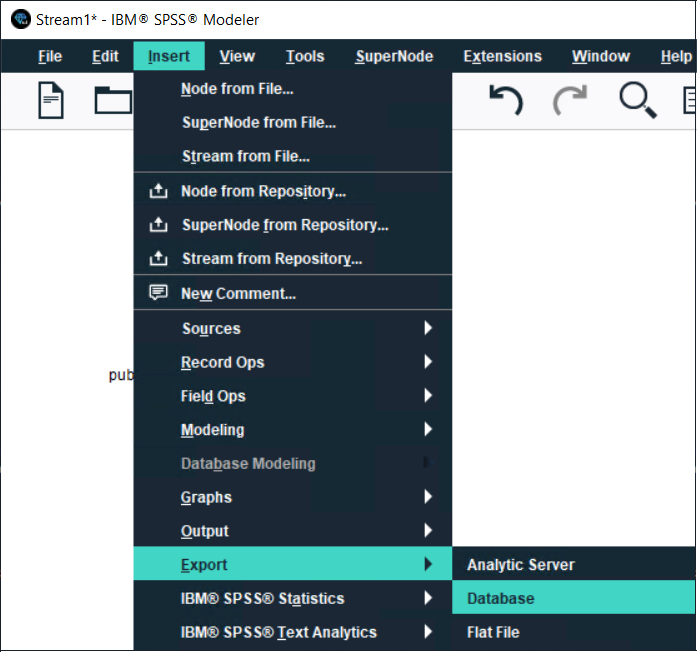
- To create and configure the Target Database node:
Click Insert > Export > Database to add a target database node to the canvas.
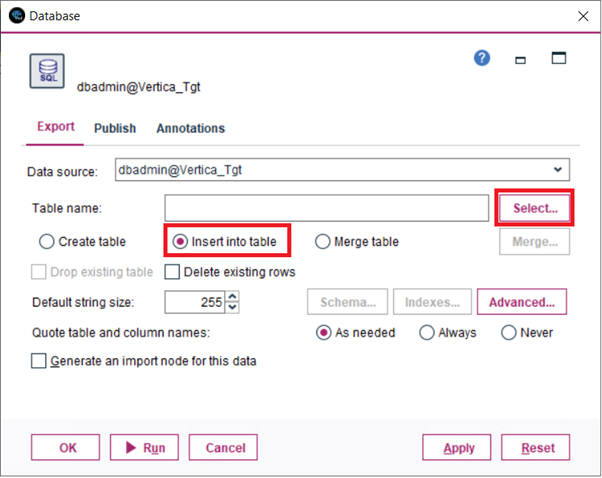
Double-click the Target Database node.
In the Export tab, click the Data source drop-down list and then click < Add new database connection… >.
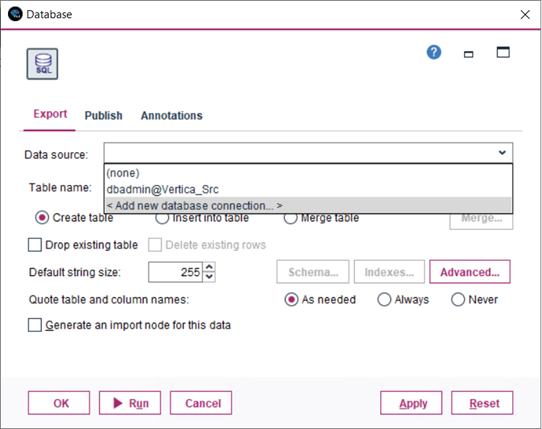
The Database Connections window appears.
Connection Pane:- Mode: Click Driver.
- Drivers: Select Vertica.
- Attributes: Type the Vertica ODBC connection string. For example, Driver=Vertica;Server=XXX.XX.XX.XXX;Port=5433;Database=<Database_Name>
- Display name: Type a name for the Vertica connection.
Authentication Pane:
- Mode: Select Username and password.
- User name: Type the database user name.
- Password: Type the database password.
Click Connect.
The Database connection name appears in the Connections window after you are successfully connected.
Select Save and then click OK.
The Vertica database connection appears in the Data source drop-down list.
Select Insert into table and then click Select to select the Vertica database target table.
The Select Table/View window appears.
- Select the required target table and click OK to return to Database window.
Click OK again to return to the canvas.
-
Right-click the source database node and select Connect.
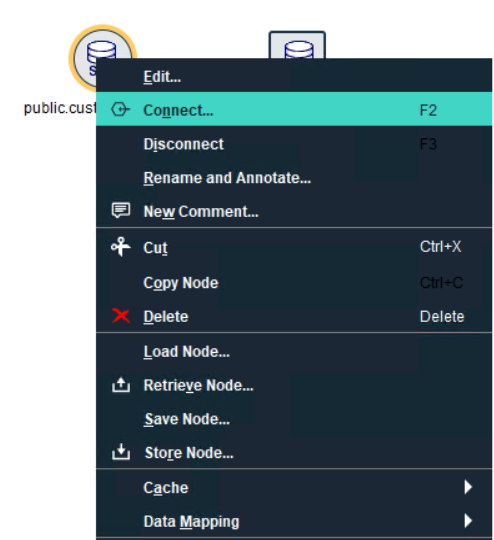
-
Click the target database node.
The source database node will now get connected to the target database node. - Click Run to execute the stream.
Troubleshooting
String data truncation
Issue: IBM SPSS Modeler truncates string data when data size exceeds 2048 characters for read and write operations without any error message.
Solution: To resolve the default limit error, open the options.cfg file located in <SPSS_Installation_Directory>\ModelerServer\18.3\config.
Change the value of max_sql_string_length variable to the desired value. Default is 2048.
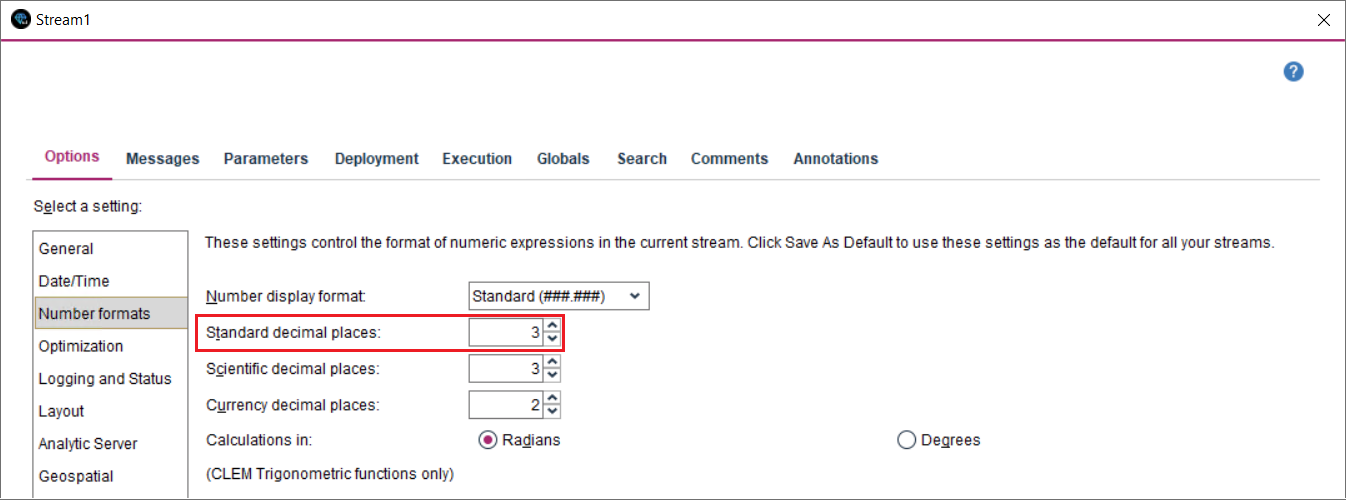
Numeric data truncation after 3 digits to the right of decimal
Issue: IBM SPSS Modeler truncates numeric data after 3 digits to the right of decimal.
Solution: Click File > Stream Properties.
The properties dialog box appears. Click the Options tab and then click Number formats.
Change the value of Standard decimal places to the desired value. Default is 3.
Known Limitations
- For DECIMAL and DOUBLE data types, a maximum of 15 digits are supported beyond which the value is either truncated or rounded off.
- For TIME and TIMESTAMP data types, Milliseconds are truncated.
- For Timetz and TIMESTAMPTZ data types, milliseconds and timezone offset are truncated
- BINARY, VARBINARY, and LONG VARBINARY data types are displayed incorrectly and not supported.
- For LONG VARBINARY data types, NULL is displayed if the byte size increases from the default value (2048 bytes). To write values more than 2048 byte size, change the value of max_sql_string_length variable to the required value in the options.cfg file.
- UUID data type is not supported.

