


Vertica Integration with Domo: Connection Guide
About Vertica Connection Guides
Vertica connection guides provide basic instructions for connecting a third-party partner product to Vertica. Connection guides are based on our testing with specific versions of Vertica and the partner product.
Vertica and Domo: Latest Versions Tested
| Software | Version |
|---|---|
| Partner Product |
Domo Workbench 5.1 Domo Server (SaaS) |
| Domo Workbench Platform |
Microsoft Windows 10 Enterprise |
| Vertica Client |
Vertica ODBC Driver 12.0.1 (For Domo Workbench) Vertica JDBC Driver 12.0.1 (Bundled with the Cloud version) |
| Vertica Server | Vertica Analytic Database 12.0.1 |
Domo Overview
Domo is a cloud-based reporting tool that can import and use data from Vertica and many other data sources. Domo includes the following components:
-
Domo Workbench: A windows-based data modeling tool. Domo Workbench deploys data models to Domo Server.
-
Domo Server: A cloud-based web application that is managed by Domo as Software as a Service (SaaS).
How Vertica Works with Domo
Domo Workbench
With Domo Workbench, you can define DataSets using Vertica data and publish them to Domo Server.
You must install the Vertica ODBC client driver before you can connect Domo Workbench to Vertica. The Vertica database can be installed on premises or on the cloud.
Domo Server
With Domo Server, you can access Vertica DataSets that were published from Domo Workbench or loaded directly from a cloud deployment of Vertica.
Diffferent versions of the Vertica JDBC driver are bundled with Domo Server and is managed by Domo as part of its SaaS offering. Domo Server connects to Vertica on the cloud and requires a public IP address for the connection.
Creating a Domo Account
You can create a trial account for thirty days, or you can purchase a Pro license.
To create a trial account,
- Navigate to www.domo.com and click TRY FREE.
-
Provide your work email and a phone number.
Your work email will be your user name.
- Create a password and answer additional questions to create an account.
After the account is created, note that the page URL now includes your domain name:
https://your_domain.domo.com/
Note Your domain is the domain of your work email. You will need to provide your domain name whenever you sign into your account.
-
After you create your account, each time you log in, navigate to www.domo.com and click the User icon.
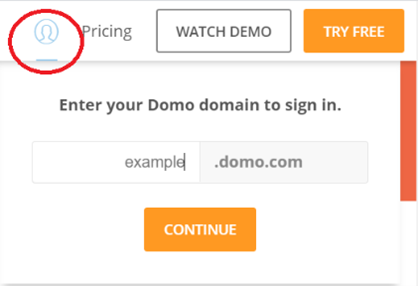
- Provide your domain name and click Continue.
- Provide your user name and password.
Note The first time you sign in, you will be asked to complete your profile.
Installing Domo Workbench
- Sign in to your account on www.domo.com.
-
Click the
 icon to the left of your profile picture and then click ADMIN.
 -
Click the three dots for more options from the menu on the left of the page.
- Select Tool Downloads.
-
Click DOWNLOAD DOMO WORKBENCH.
-
Double-click the Domo Workbench installer and follow the on-screen instructions to install Domo Workbench.
Installing the Vertica Client Driver
Domo Workbench uses the Vertica ODBC driver with a System DSN to connect to Vertica. To install the driver, follow these steps:
- Navigate to the Client Drivers page on the Vertica website.
-
Download the client driver package that is compatible with your Vertica server version.
Note For details about client and server compatibility, see Client Driver and Server Version Compatibility in the Vertica documentation.
-
Follow the installation instructions in the Vertica documentation.
-
Follow the steps in the next section to create the Vertica DSN to use with Domo Workbench.
Creating an ODBC Data Source Name (DSN)
After you have installed the Vertica ODBC driver, you must create a DSN to connect to Vertica from Domo Workbench.
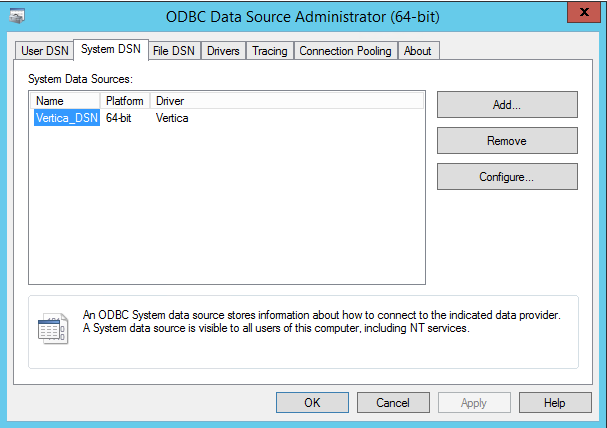
-
In the Windows ODBC Data Source Administrator, open the System DSN tab and click Add.
Note Domo Workbench requires a System DSN. If you create a User DSN or a File DSN, it will not be available in Domo Workbench.
- Specify values for DSN Name, Database, Server, Port, User name, and Password, then click OK.
-
Click OK to create the ODBC DSN.
Connecting Domo to Vertica
Follow these steps to connect Domo Server or Domo Workbench to Vertica:
Connecting Domo Server to Vertica
-
Sign in to your account on www.domo.com and click the + icon to expand the menu, and then select Data.
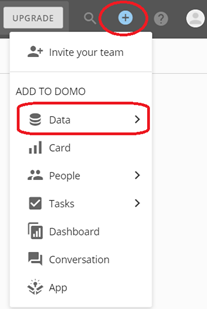
- Select Database to open the Data Connectors page.
-
Select Vertica.
-
In the Select Account drop-down, select Add Account.
-
Enter the database details:
- JDBC Driver: Select the Vertica JDBC Driver that you want.
-
HOST: Hostname or IP Address of the Vertica Server.
- PORT NUMBER: Port number on which the database is working. Default port is 5433.
- USERNAME: User name of database.
- PASSWORD: Password of database.
- DATABASE NAME: Database name.
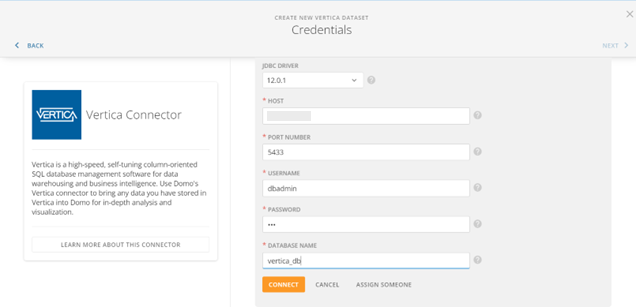
-
Click Connect. The Vertica account will be saved.
-
Click Next and select the required option in the QUERY TYPE drop-down list.
We used Custom Query in our testing. The Query Builder option can be selected if you want to select the table from the list of tables in your database.
-
Provide a query. For example:
SELECT product_dimension.category_description,
	product_dimension.department_description,
	online_sales.online_sales_fact.sales_dollar_amount
  FROM product_dimension INNER JOIN
	online_sales.online_sales_fact ON
	product_dimension.product_key =
	online_sales.online_sales_fact.product_key
	AND product_dimension.product_version =
	online_sales.online_sales_fact.product_version;
Note The VMart example database must be installed to use this sample query. Follow the instructions in the Vertica Documentation for setting up the VMart database.
-
Click Next. You will get an option for configuring the schedule.
- On the Scheduling page, click Next again.
-
In the DATASET NAME box, type a name for the Vertica DataSet and click SAVE AND RUN.
The query results will be loaded in memory in the Domo Server.
Connecting Domo Workbench to Vertica
-
Open Domo Workbench.
-
On the welcome screen, click the key icon to open the Accounts page.
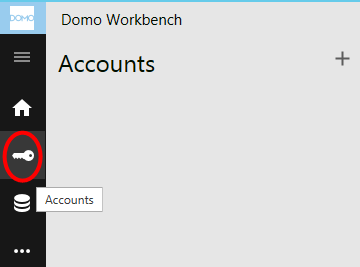
-
On the Accounts page, click the + icon to add a new server account.
-
Provide your domain name and click Authorize.
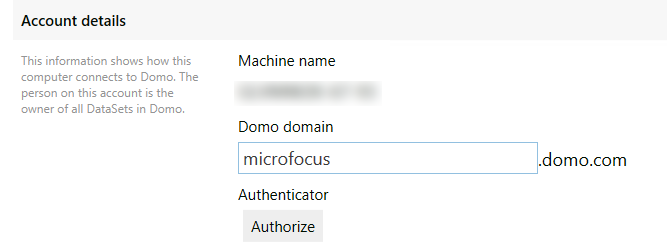
The authorization link and authorization code appear.
-
Open the authorization link and provide the authorization code to link Domo Workbench with your Domo Server account.
-
Click the Save icon on the top right before leaving the page.
-
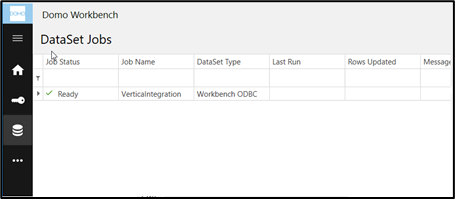
Click the jobs icon to open the Jobs page.
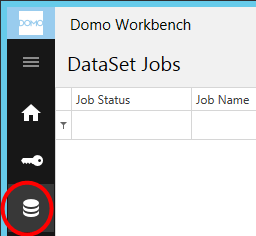
-
Click the + icon to create a new job.
-
Provide the following details about the job:
- Job Name: User defined name for the job.
- Transport Type: Select ODBC Connection Provider.
- Reader Type: Select Database Query.
- Dataset Name: Enter any name for dataset.
- Dataset Type: Select Workbench ODBC.
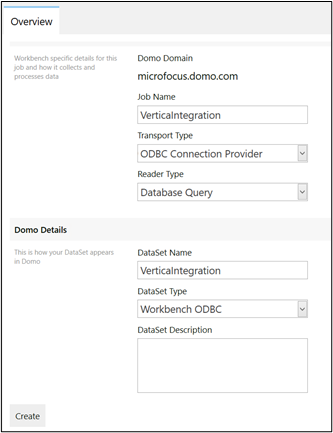
-
Click Create to create the job.
-
Open the Configure tab and click Source > Edit.
The ODBC Connection Provider Editor opens.
-
Provide these values in the following fields:
- Connection Type: System DSN.
- System DSN: The ODBC DSN you created in Installing the Vertica Client Driver
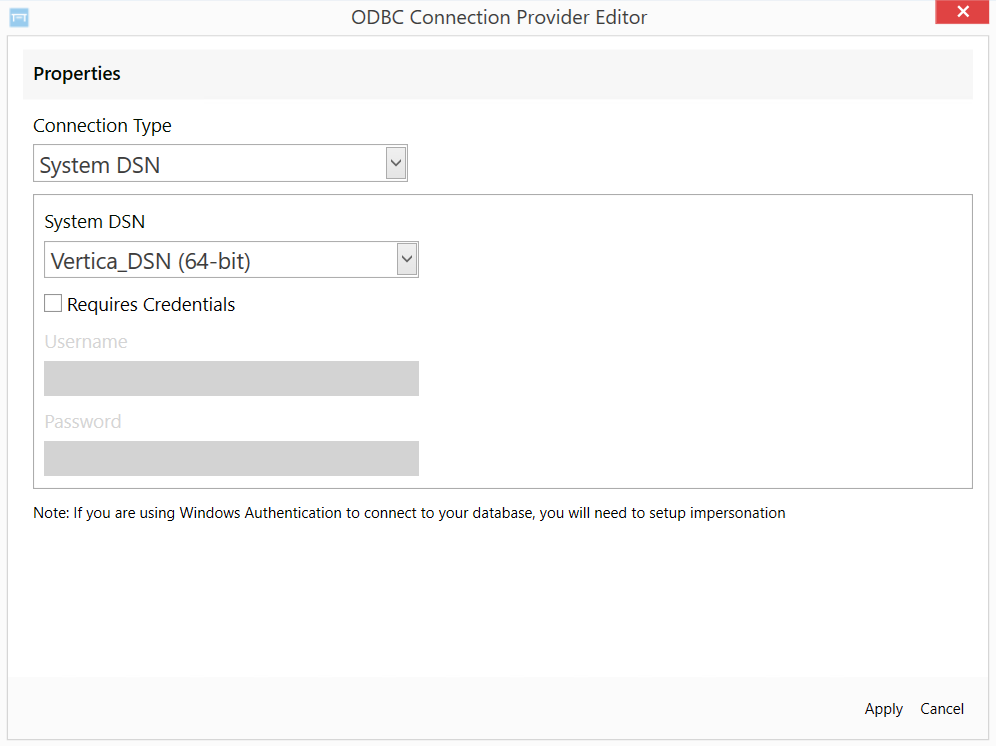
- Click Apply and then click the save icon.
Deploying a Project from Domo Workbench to Domo Server
- After following the steps in Connecting Domo Workbench to Vertica , open the Jobs tab.
-
Double-click the job you created. The job opens in edit mode.
-
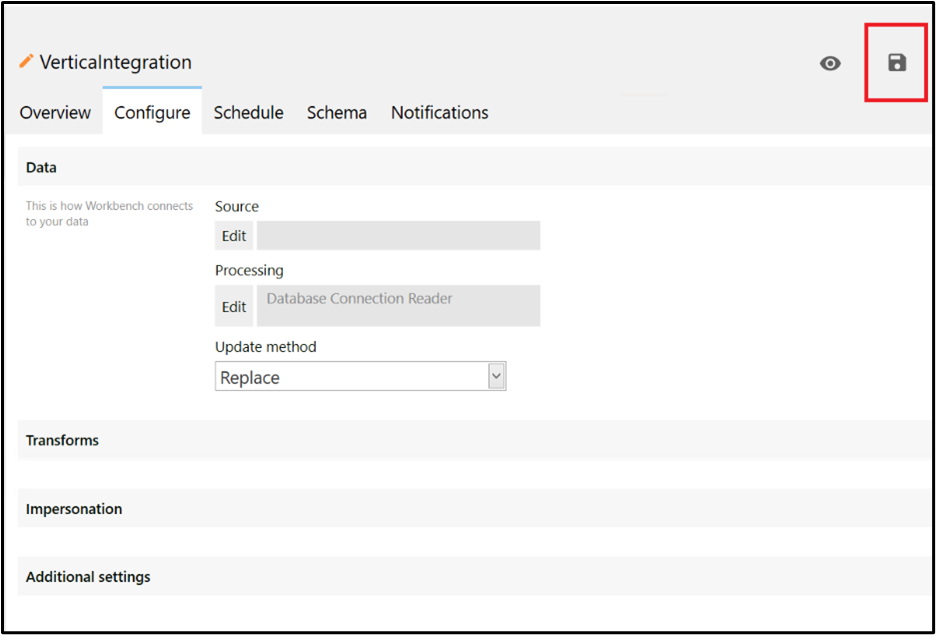
Open the Configure tab and click Processing > Edit.
-
In the Database Query Editor, provide a query. For example:
SELECT product_dimension.category_description,
	product_dimension.department_description,
	online_sales.online_sales_fact.sales_dollar_amount
  FROM product_dimension INNER JOIN
	online_sales.online_sales_fact ON
	product_dimension.product_key =
	online_sales.online_sales_fact.product_key
	AND product_dimension.product_version =
	online_sales.online_sales_fact.product_version;
Note The VMart example database must be installed to use this sample query. Follow the instructions in the Vertica Documentation for setting up the VMart database.
-
Click Apply.
-
Click the save icon on the top right corner to save the changes in the job.
-
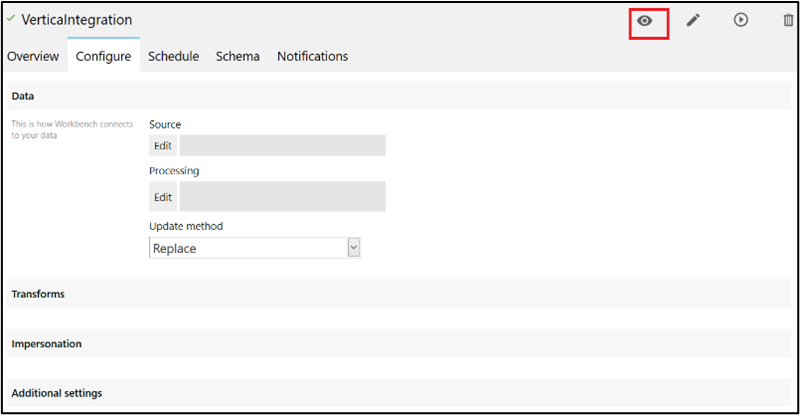
Click the preview icon to view the output of the query.
-
Click the Execute icon to deploy the Dataset to Domo Server.
The query results will be imported to the Domo Server.
Known Limitations
Data Type Limitations for both Domo Server and Domo Workbench with Domo Server
- For CHAR, VARCHAR and LONGVARCHAR data types, up to 1024 characters are displayed beyond which the values are truncated.
- FLOAT data type is displayed up to 15 digits of precision and 6 digits of scale.
- For TIME, TIMETZ, TIMESTAMP, and TIMESTAMPTZ data types, milliseconds are truncated.
- BINARY, VARBINARY, and LONG VARBINARY data types are not displayed correctly.
Data Type Limitations Specific to Domo Server (JDBC)
- NUMERIC data types are displayed up to 15 digits of precision and 6 digits of scale.
-
For TIMETZ and TIMESTAMPTZ data types, timezone offset is adjusted with time.
-
For DATE and TIMESTAMP data types, date lower than 0032-01-01 is not displayed.
Data Type Limitations Specific to Domo Workbench with Domo Server (ODBC)
-
INTERVAL data type displays the Workbench error Unknown SQL type - 112.
-
INTEGER data type is displayed up to 15 digits.
-
NUMERIC data type is supported up to 15 digits of precision and 6 digits of scale. Maximum length supported to the left of the decimal is 13.
- For TIMETZ and TIMESTAMPTZ data types, timezone offset is truncated.

