


Vertica Integration with IBM Cognos Analytics: Connection Guide
About Vertica Connection Guides
Vertica connection guides provide basic instructions for connecting a third-party partner product to Vertica. Connection guides are based on our testing with specific versions of Vertica and the partner product.
Vertica and Cognos Analytics: Versions Tested
| Software | Version |
|---|---|
| Partner Product |
IBM Cognos 11 Analytics Release 11.1.7 |
| Desktop Platform |
Windows Server 2019 |
| Vertica Client |
Vertica JDBC 12.0.0-0 |
| Vertica Server |
Vertica Database 12.0.0-0 |
Cognos Analytics Overview
IBM Cognos Analytics is a web-based solution for building applications that perform reporting and analysis. You can use Cognos Analytics on cloud or on-prem.
For details about IBM Cognos Analytics, see the IBM Cognos Analytics documentation.
Installing Cognos Analytics
You can download and install a free trial of Cognos Analytics for cloud deployment. Follow these steps:
- Navigate to the Cognos Analytics Support portal.
- Check the prerequisites and follow the instructions on the download page.
Installing the Vertica JDBC Driver
IBM Cognos Analytics server uses the Vertica JDBC driver to connect to Vertica. To install the JDBC driver:
- Navigate to the Vertica Client Drivers page.
-
Download the JDBC driver.
Note For details about client and server compatibility, see Client Driver and Server Version Compatibility in the Vertica documentation.
-
Place the JDBC .jar file in the Cognos driver directory:
Cognos_Install_Directory\drivers
Note If you want to upgrade the JDBC driver version, you must repeat these steps to replace the .jar file.
Connecting Cognos Analytics to Vertica
-
Open the Cognos Analytics home page:
http://Machine_IP:9300/bi/index.html?perspective=home
- Click Manage and then click Data server connections.
-
Click the plus (+) sign to add a data server:

-
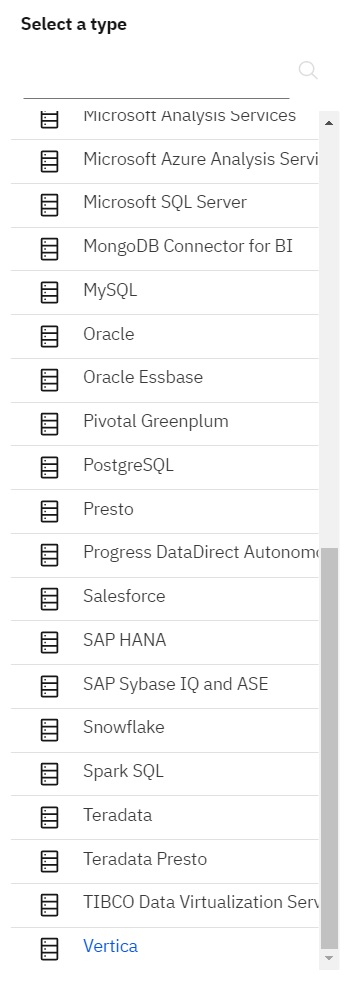
From the list of databases, select Vertica:
-
Provide the database connection name and JDBC URL, and then click Test.
When the connection is successful, the Success button turns green:
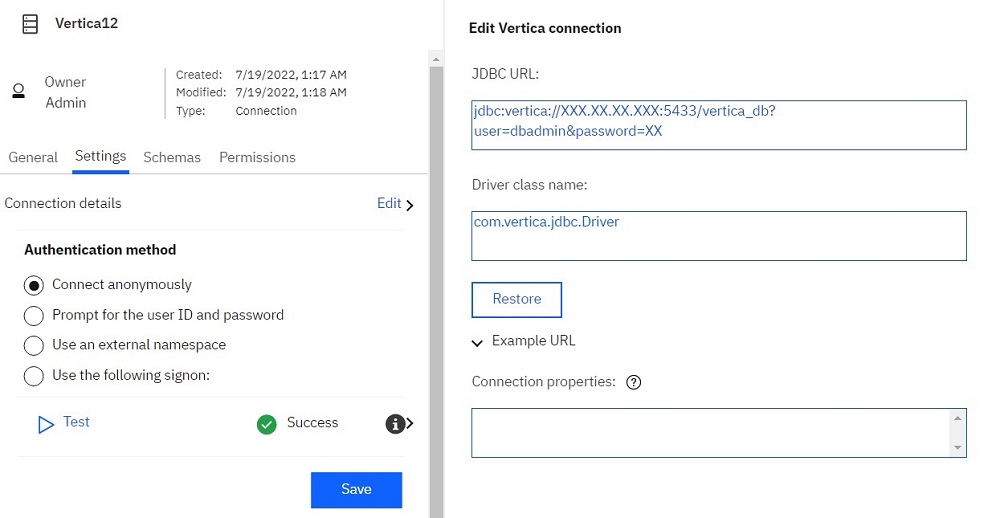
- Click Save.
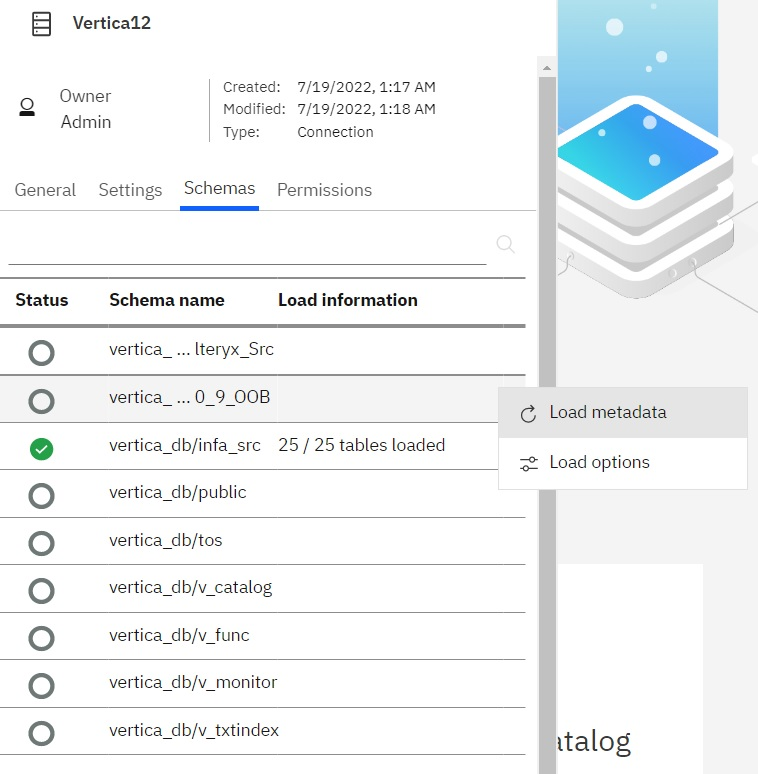
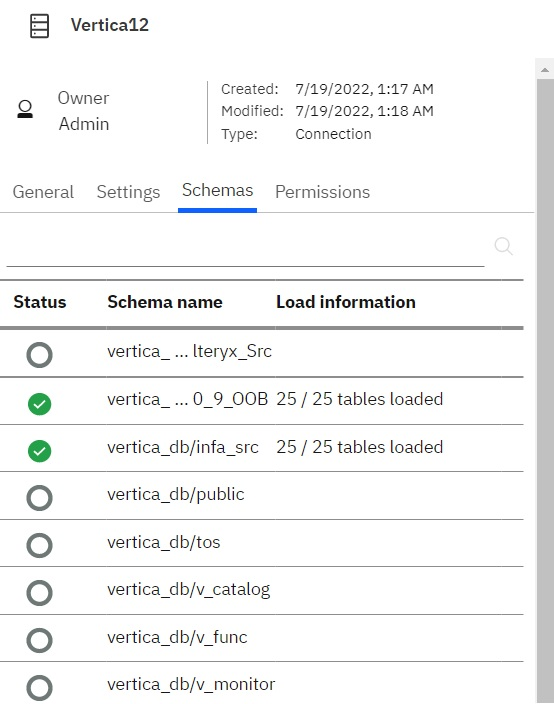
- Click the Schemas tab.
-
Select the schema and click Load metadata.
-
Once the tables are loaded, you can see the status and the table count.
-
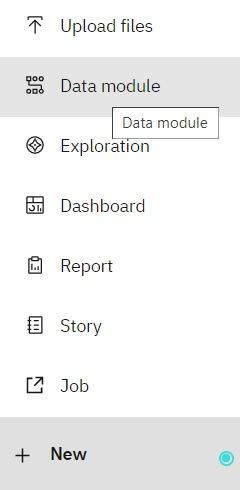
Select New and click Data module.
-
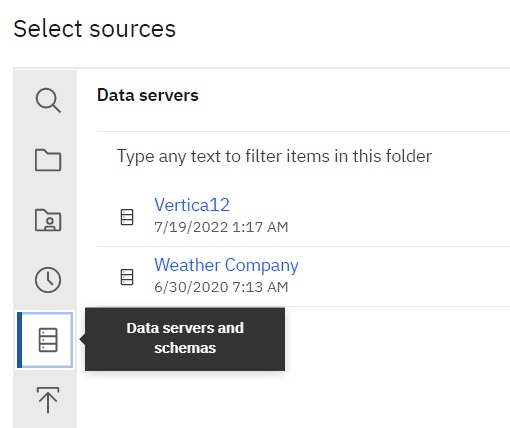
Click Data Servers and Schemas and select Vertica:
-
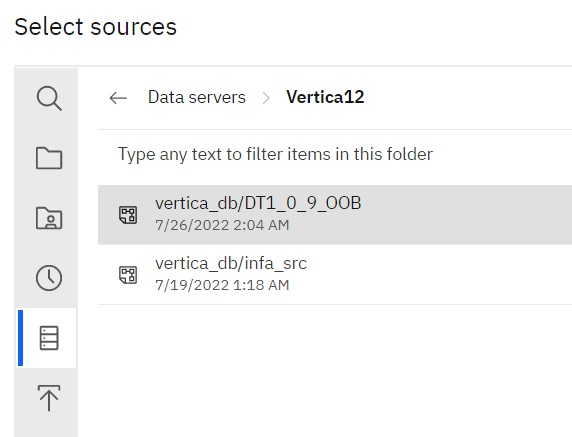
Select the schema and click OK.
-
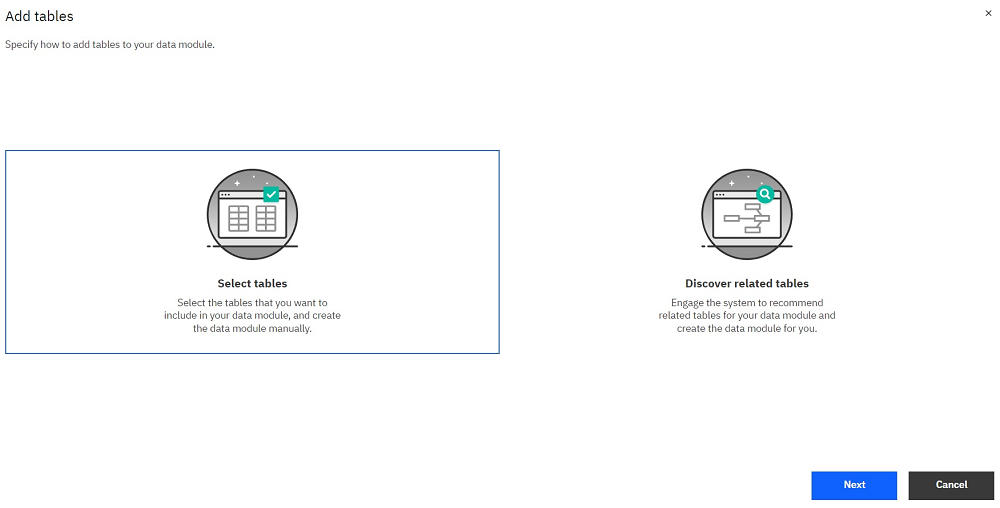
Click Select tables and click Next.
-
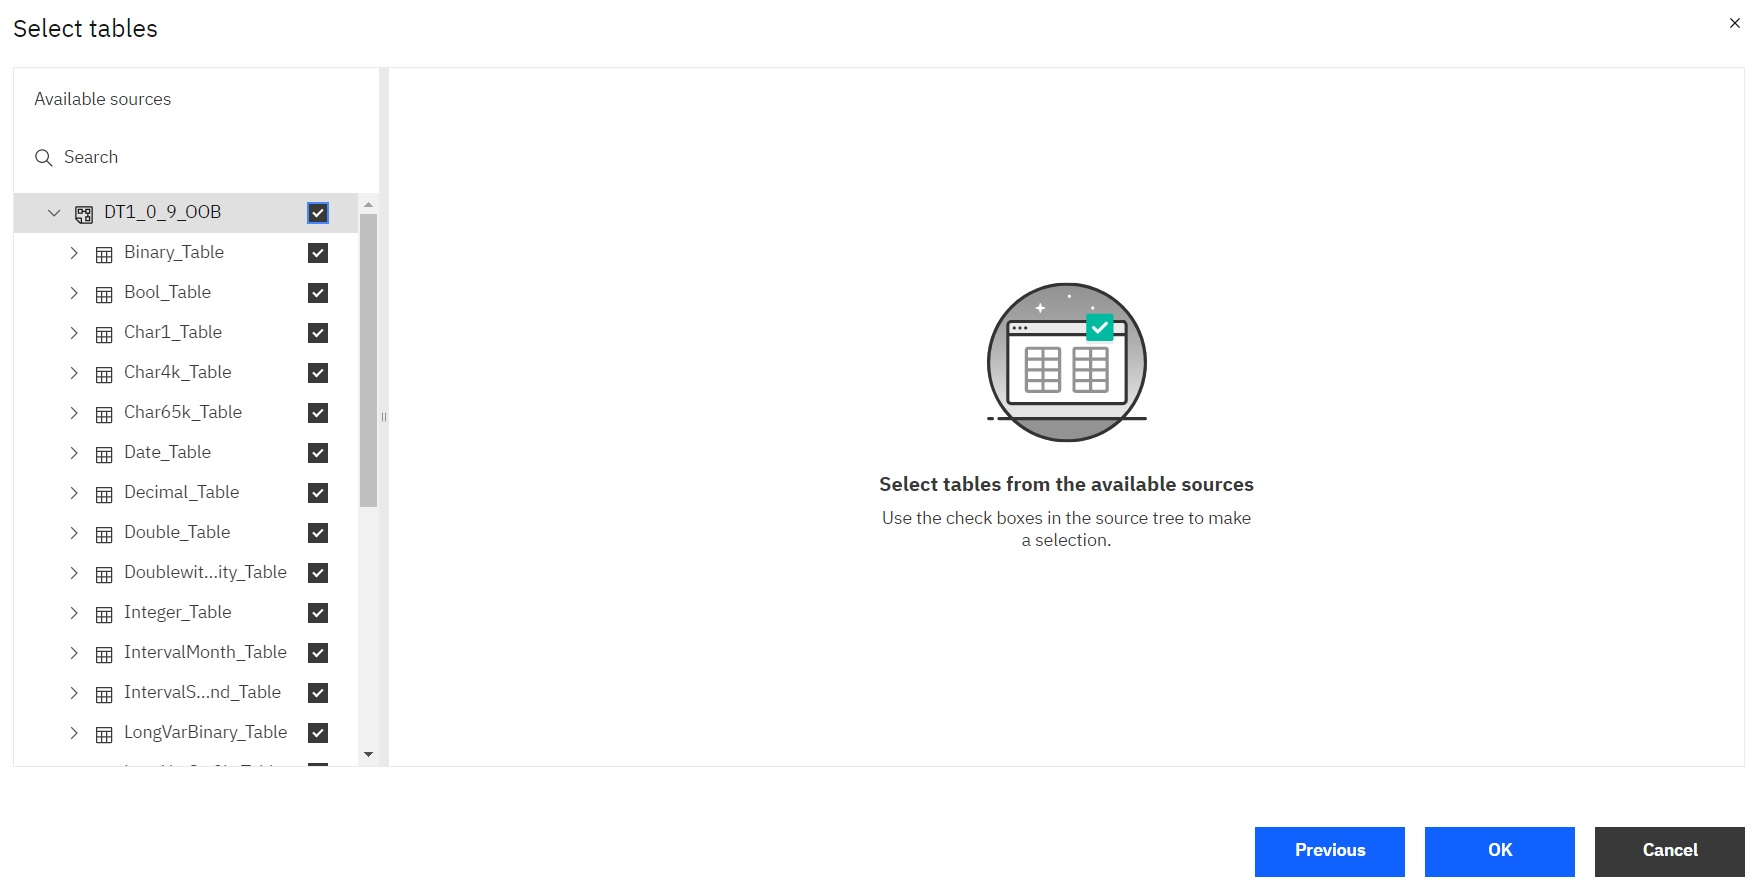
Select the tables you want to include in your data module and click OK.
-
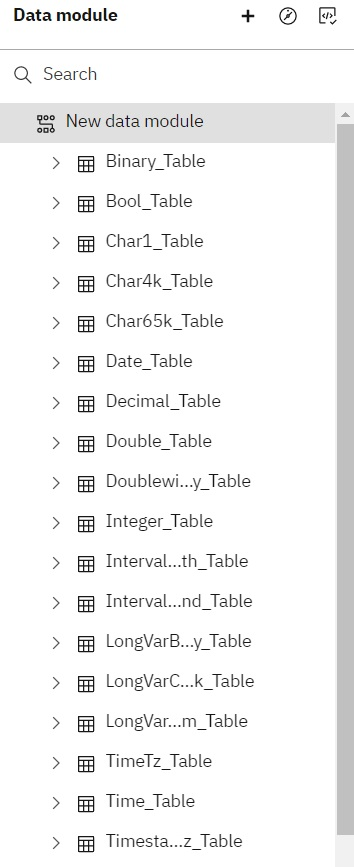
The tables appear in your newly created Data module. You may now create reports or dashboards using this module.
Known Limitations
-
BOOLEAN, INTERVALMONTH, INTERVALSECONDS, BINARY, VAR BINARY, LONG VARBINARY, and UUID data types are not displayed.
-
For TIME, TIMESTAMP, TIMETZ, and TIMESTAMPTZ data types, milliseconds are not displayed.
- NUMERIC data type is displayed up to 40 digits.

