


Vertica Integration with Ascend: Connection Guide
About Vertica Connection Guides
Vertica connection guides provide basic instructions for connecting a third-party partner product to Vertica. Connection guides are based on our testing with specific versions of Vertica and the partner product.
Vertica and Ascend: Latest Versions Tested
| Software | Version |
|---|---|
| Partner Product |
Ascend 3.31 |
| Partner Product Platform | On Cloud |
| Vertica Client | Vertica JDBC Driver 10.1.0 |
| Vertica Server | Vertica Analytic Database 11.1.0 |
| Vertica Server platform | Red Hat Enterprise Linux 7.9 |
Ascend Overview
Ascend is a single unified cloud platform for end-to-end data ingestion, transformation, and data orchestration. It guarantees data integrity and optimize data workloads. It can run various transformations using SQL, Python, Java, and Scala.
Creating an Ascend Account
You can create a trial account at https://www.ascend.io/trial/ and you will get a link to login in your email.
Note Ascend uses JDBC to connect to your Vertica database. Ascend installs the bundled Vertica 10.1.0 JDBC driver. You do not need to install the driver separately.
Connecting Ascend to Vertica
Follow the steps to read data from a table and write it to another table.
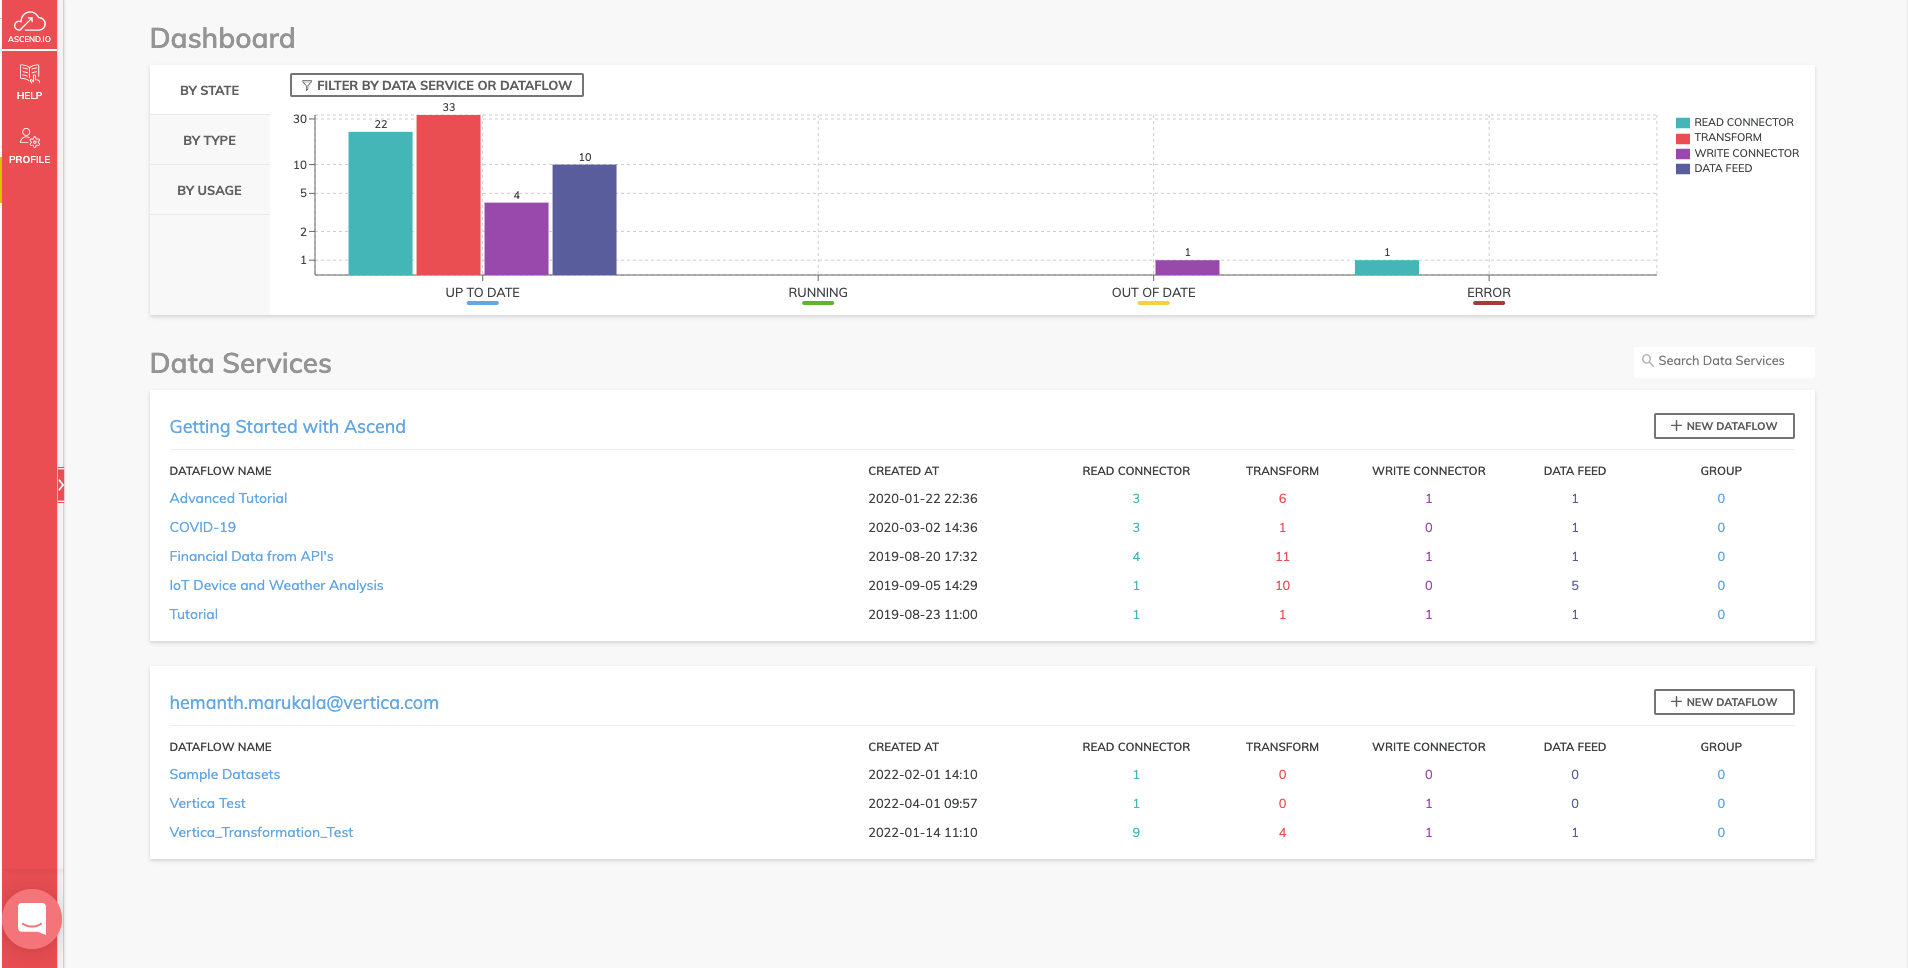
- Log in using the link provided in your email. This will open the dashboard page.
-
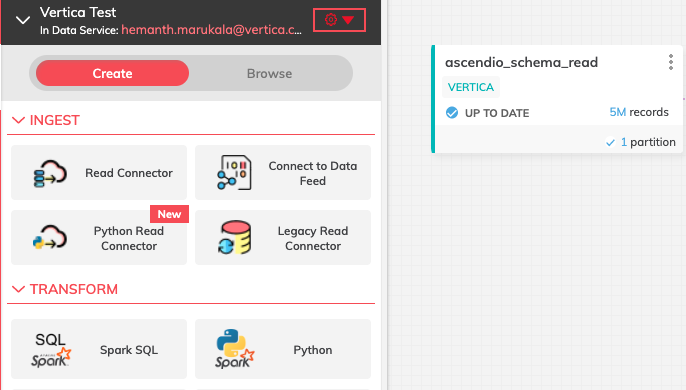
In the Data Services section, click New Dataflow to create a new data flow. Provide a name and description for the data flow and click CREATE.
- After the successful creation of the dataflow, you can view the services available.
-
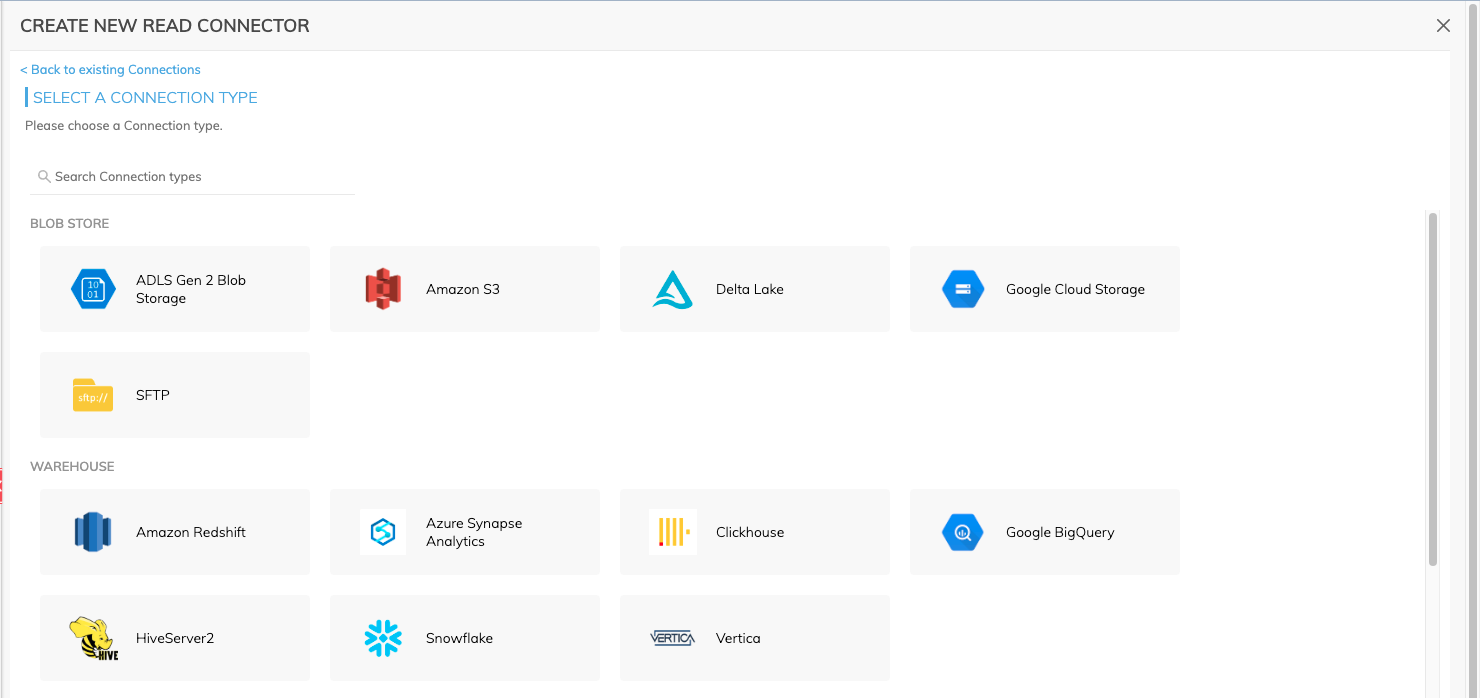
Click Read Connector and CREATE NEW READ CONNECTOR page will pop up in the workspace.
-
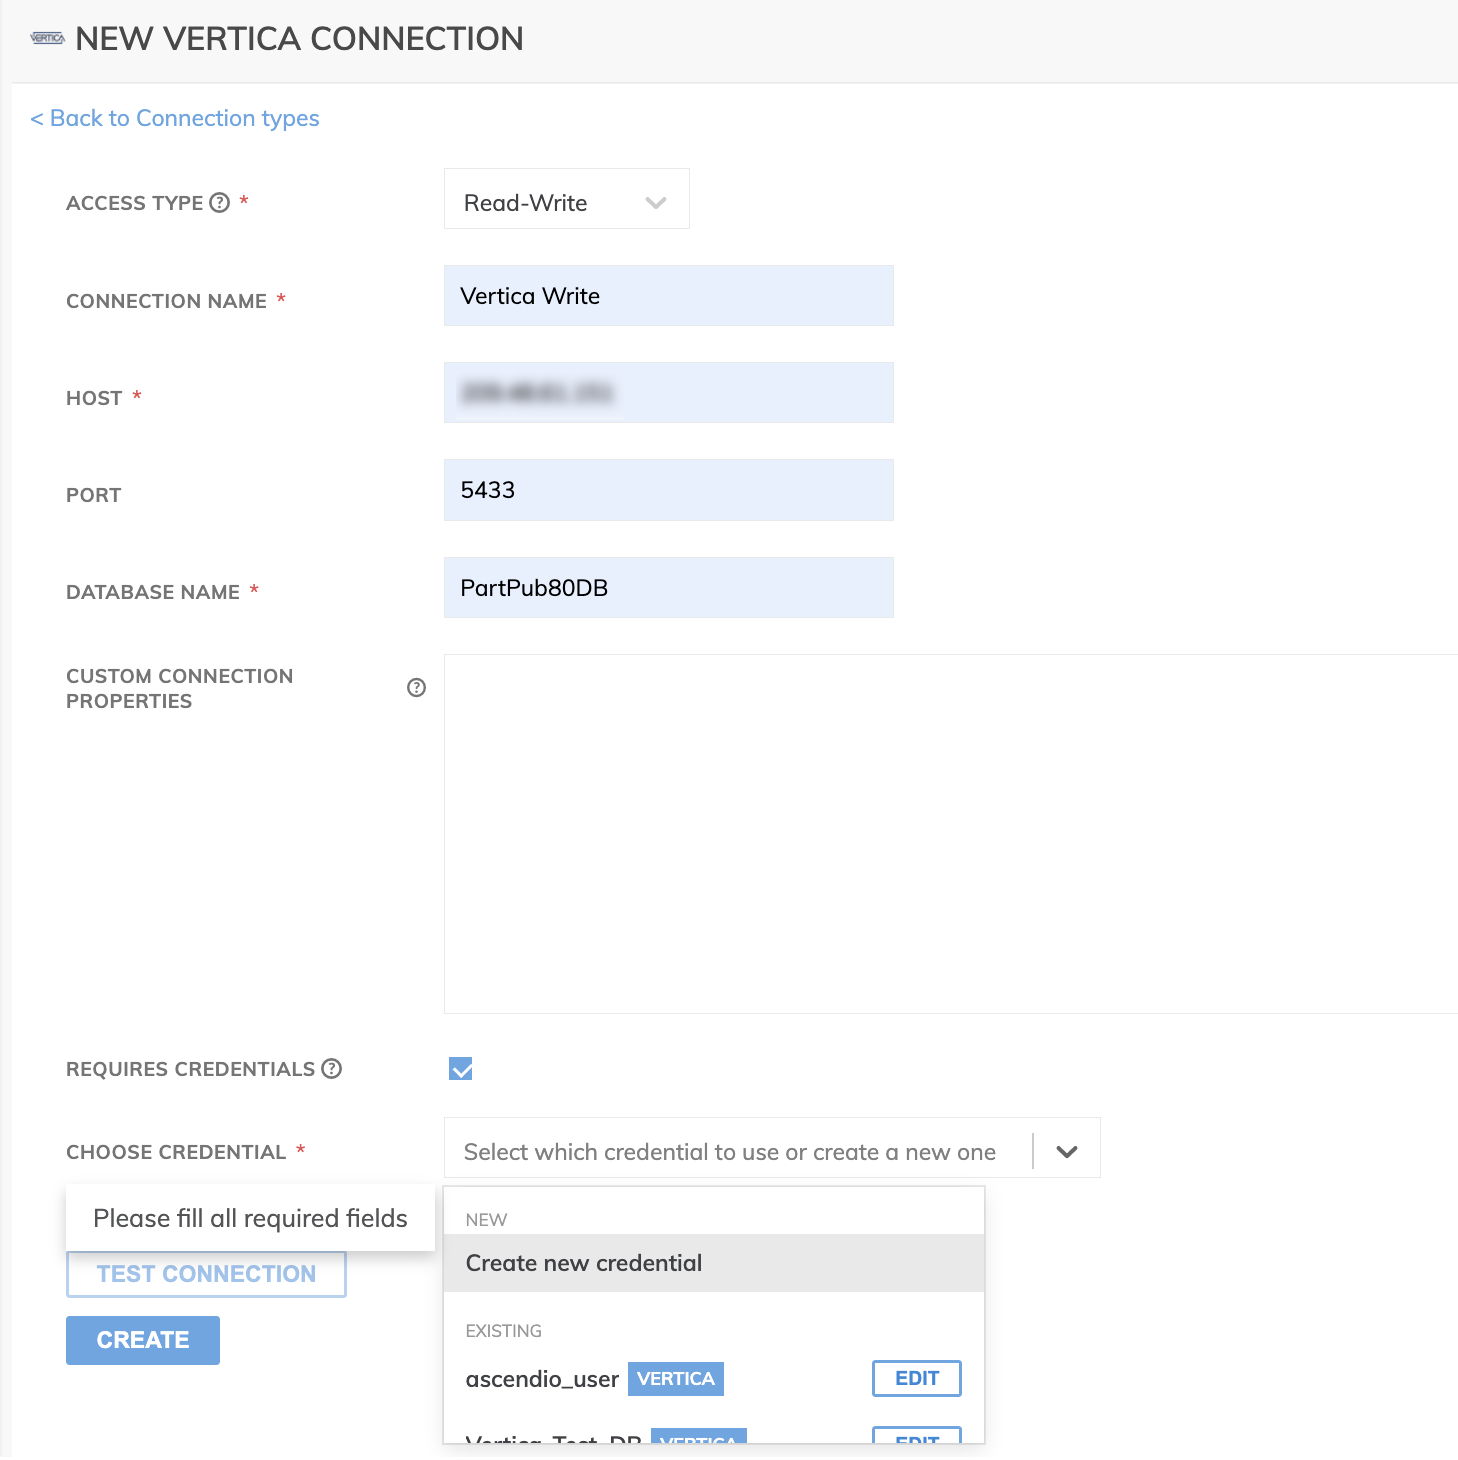
Click NEW CONNECTION and select Vertica.
-
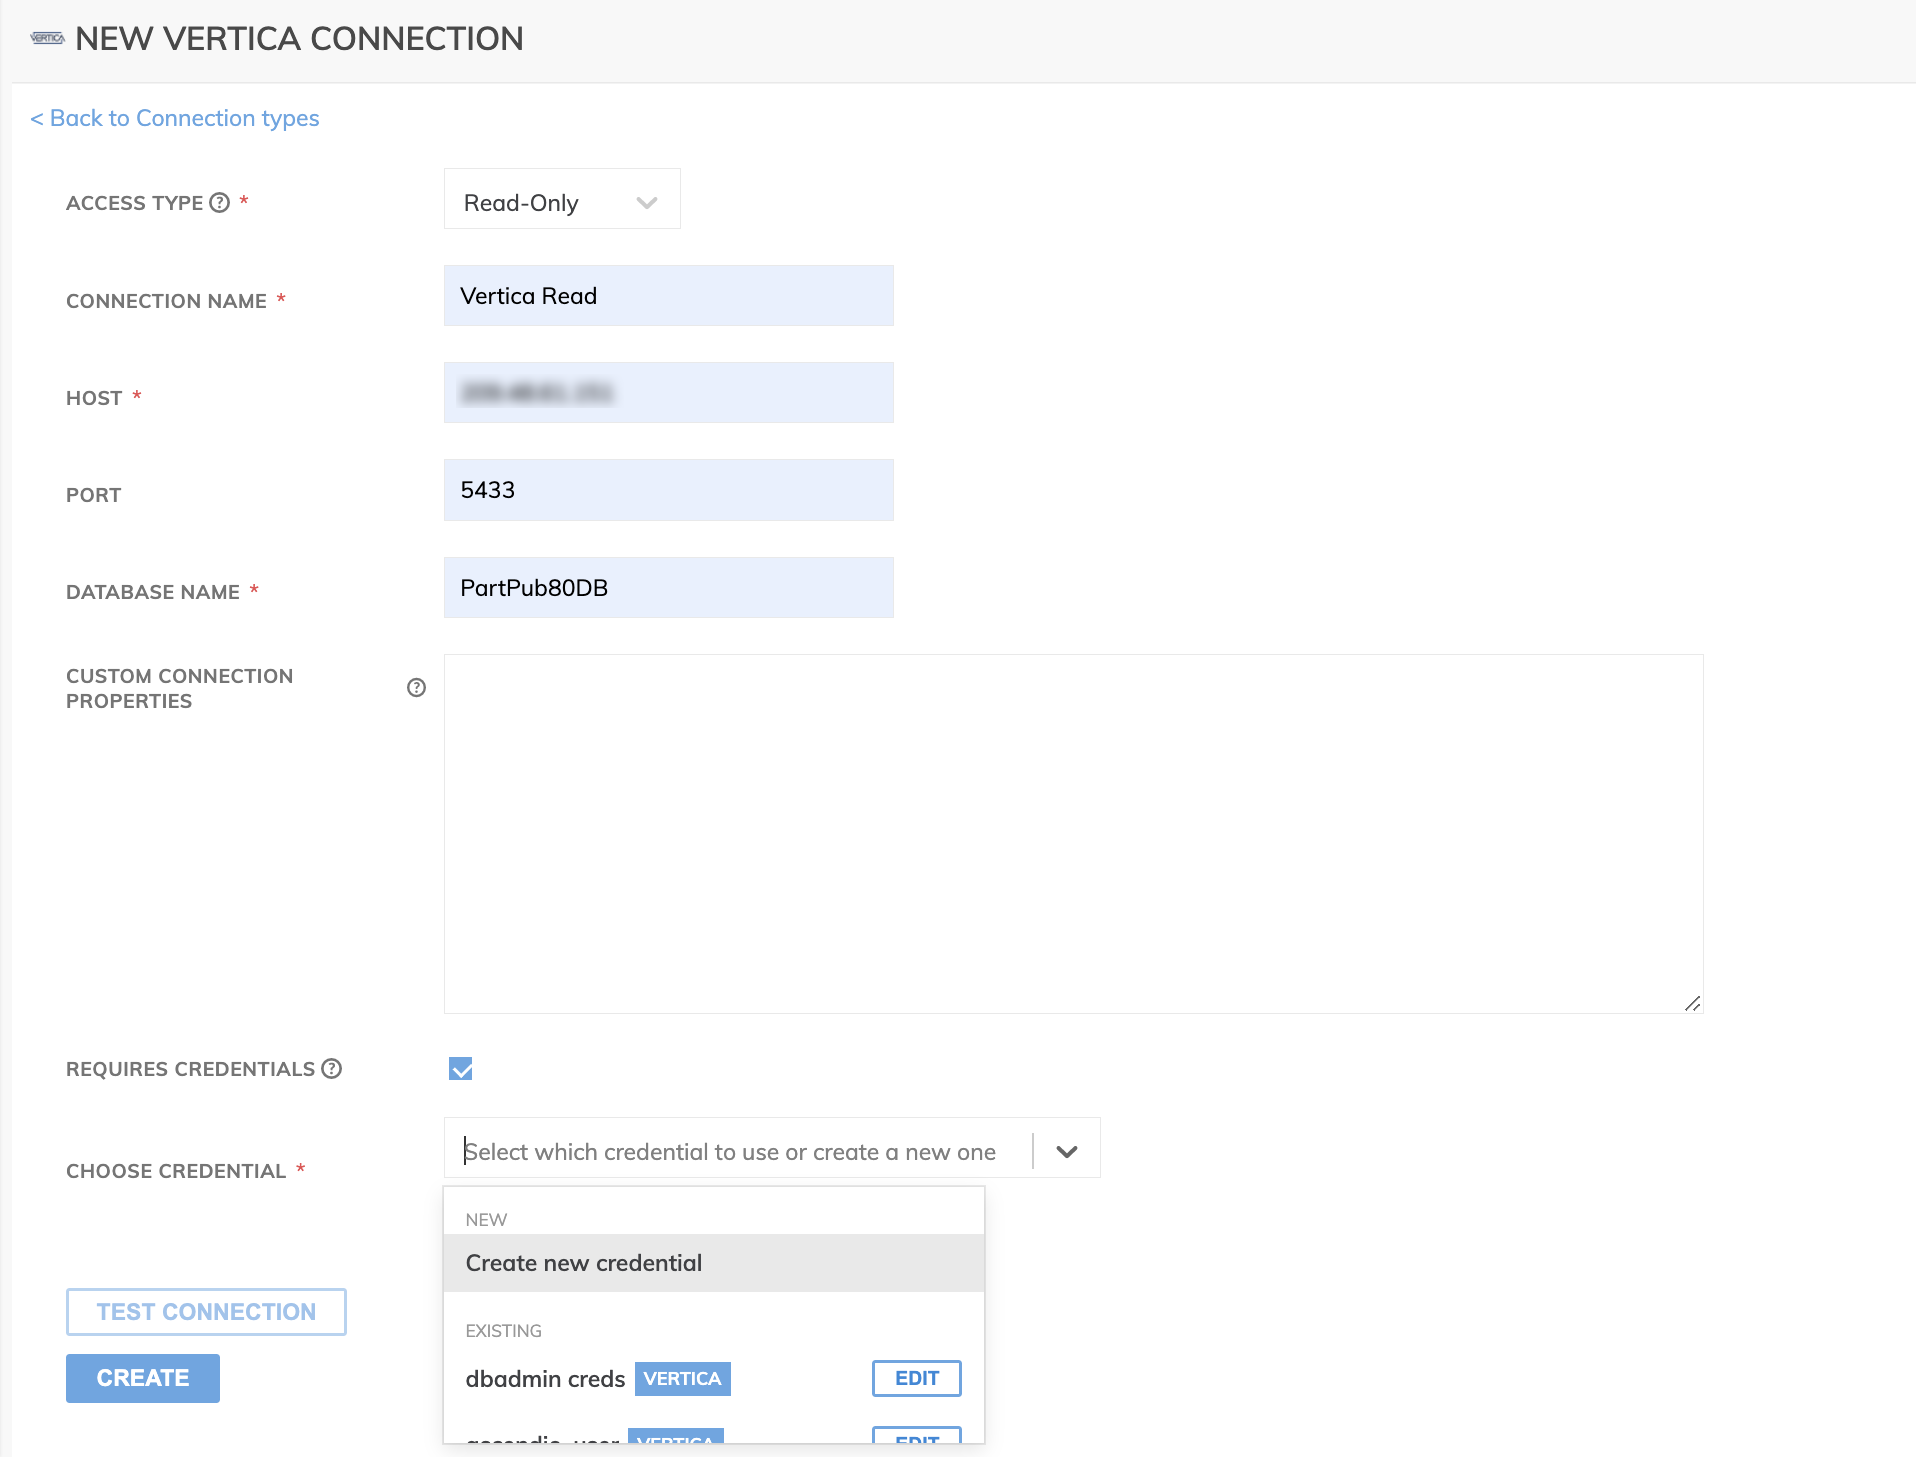
Provide the Vertica connection details in the NEW VERTICA CONNECTION window.
-
Select REQUIRES CREDENTIALS and the CHOOSE CREDENTIAL drop-down box appears.
-
Select Create new credential and enter the name, user, and password to connect to the Vertica database and click CREATE.
-
Choose your credentials you just created and click TEST CONNECTION. Click CREATE after successful validation.
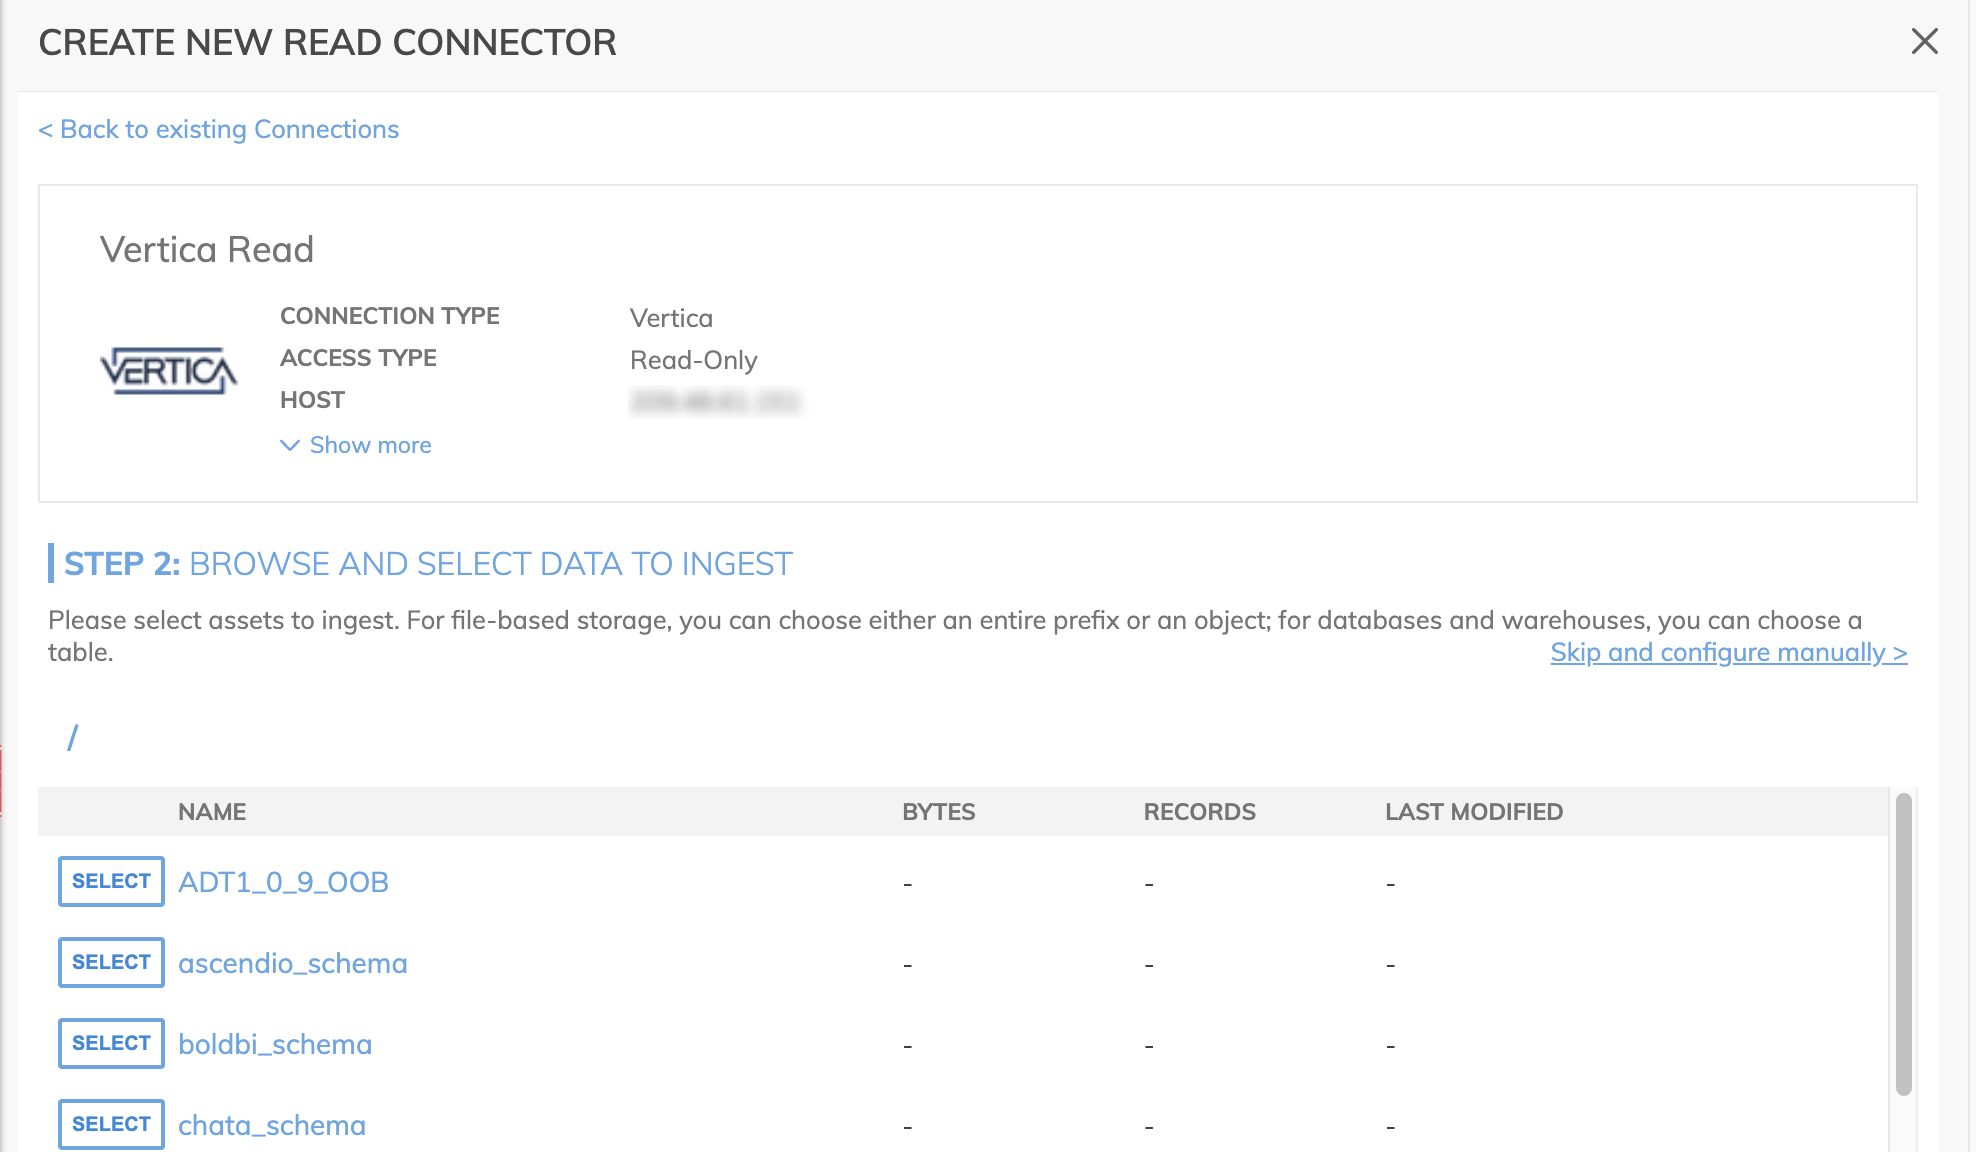
- In the CREATE NEW READ CONNECTOR window, click USE.
-
Select the table that you want to import into Ascend platform.
-
Provide a table name and select a replication strategy from the drop-down.
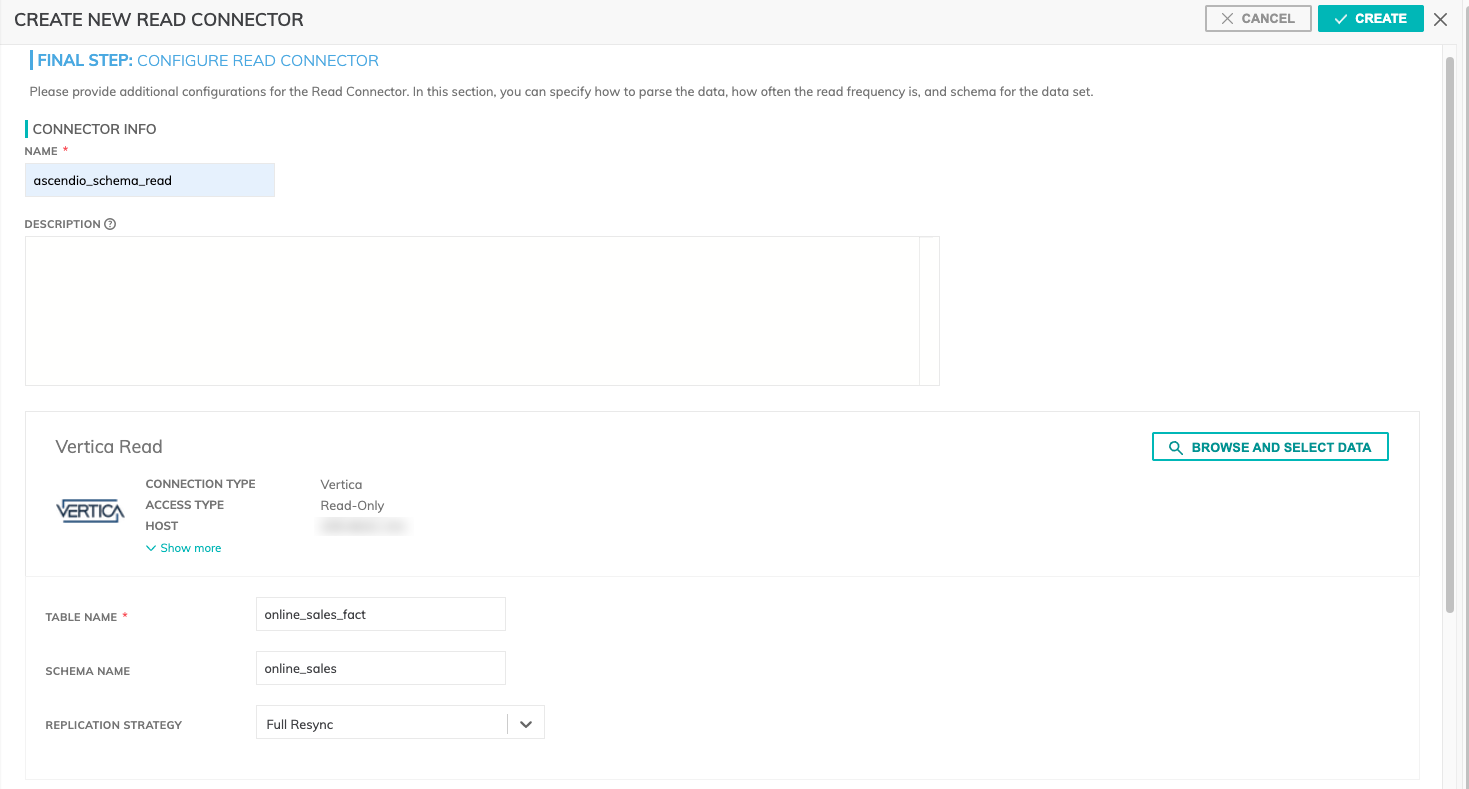
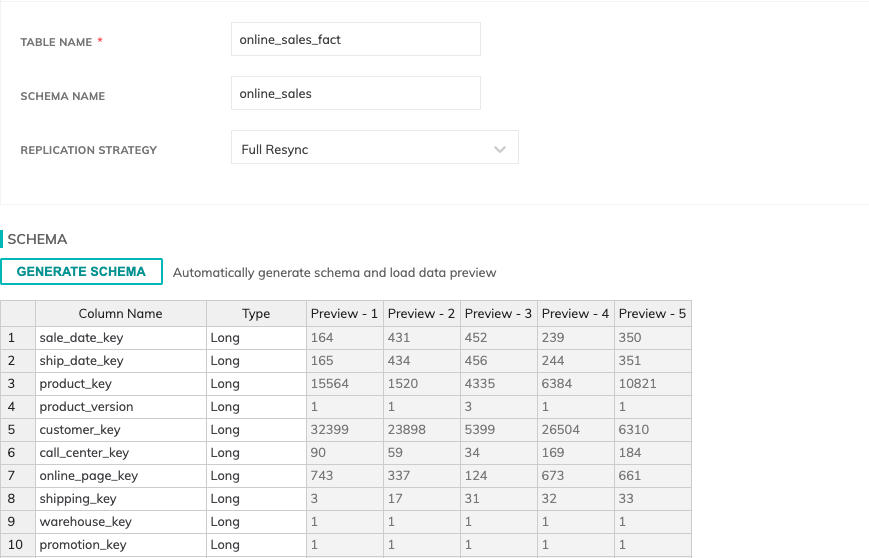
- Scroll down to the schema section in the same window and click GENERATE SCHEMA to generate the schema and load data preview, and click CREATE.
-
The connector is added to the workflow.
-
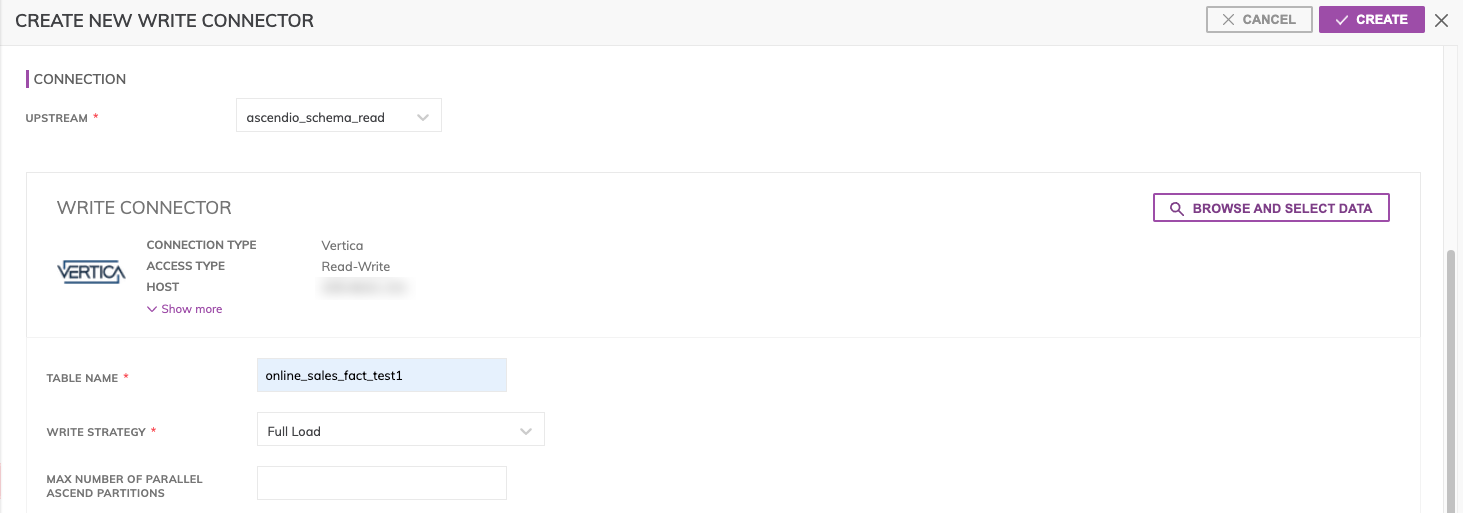
Click Write Connector under DELIVER and select Vertica to create a new connection to write data.
-
Give the Vertica credentials to connect to Vertica and click CREATE.
-
Click USE and provide the configuration details for the write connector.
-
Select the upstream, from which the write connector must write data from, the table name, schema and the write strategy for the connector and click CREATE.
-
The write connector is created in the data flow.
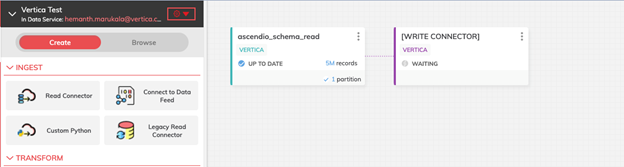
After you create the read and write connectors, Ascend starts verifying the workflow and executes it.
Known Limitations
-
TIMETZ and INTERVAL data types are not displayed.
-
DECIMAL data type is displayed up to a precision of 38 digits.
-
LONG VARBINARY and UUID data types are not displayed.

