


Vertica Integration with Alteryx Designer: Connection Guide
About Vertica Connection Guides
Vertica connection guides provide basic instructions for connecting a third-party partner product to Vertica. Connection guides are based on our testing with specific versions of Vertica and the partner product.
Vertica and Alteryx Designer: Latest Versions Tested
| Software | Version |
|---|---|
| Partner Product |
Alteryx Designer 2023.1.1.200 |
| Desktop Platform |
Windows Server 2019 Standard |
| Vertica Client |
Vertica ODBC 23.3.0 |
| Vertica Server | Vertica Analytical Database 23.3.0 |
| Vertica Server Platform | RHEL 8.7 |
Alteryx Designer Overview
Alteryx Designer prepares, blends, and analyzes data using repeatable workflows. It provides visually accessible predictive and spatial analysis. Its workflow designer is intuitive and allows you to drag and drop components easily. Alteryx Designer is available for Windows as a 64-bit application and uses ODBC to connect to your Vertica database.
Installing Alteryx Designer
To install a trial version of Alteryx Designer:
- On the Alteryx website, click Free Trial.
- Click Download Now in New To Alteryx? Request a free 30-day license.
- Provide the registration information and click Submit.
- Follow the installation instructions in the Alteryx documentation.
Installing the Vertica Client Driver
Before you can connect Alteryx Designer to Vertica, you must install the Vertica ODBC client driver. Follow these steps:
- Navigate to the Client Drivers page on the Vertica website.
-
Download the client driver package that is compatible with your Vertica server version.
Note For details about client and server compatibility, see Client Driver and Server Version Compatibility in the Vertica documentation.
-
Double-click the installer and follow the prompts. When prompted to select one or more drivers, select ODBC only.
-
Create a 64-bit ODBC DSN as described in the Vertica documentation.
Connecting Alteryx Designer to Vertica
-
Launch Alteryx Designer.
The Altreyx Designer home screen appears.
-
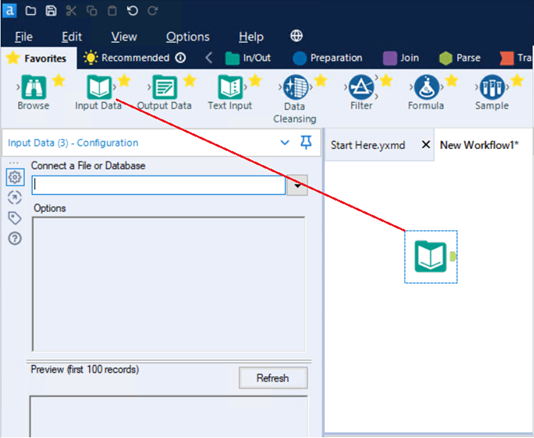
Drag Input Data component from the toolbar and drop it onto the workflow canvas.
-
In the left pane, click Connect a File or Database.
The Data connections dialog box appears.
-
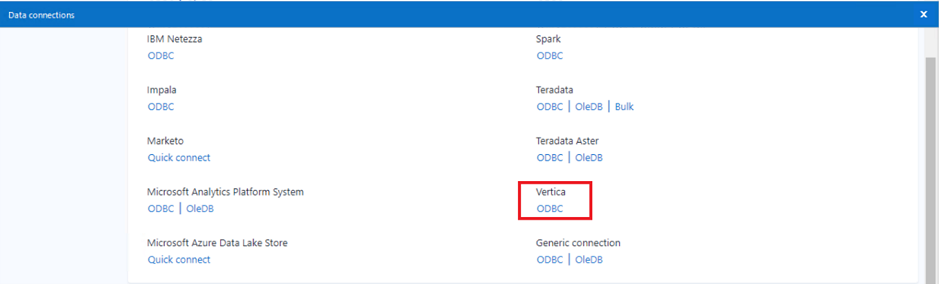
Click Data sources and scroll down to select Vertica ODBC.
-
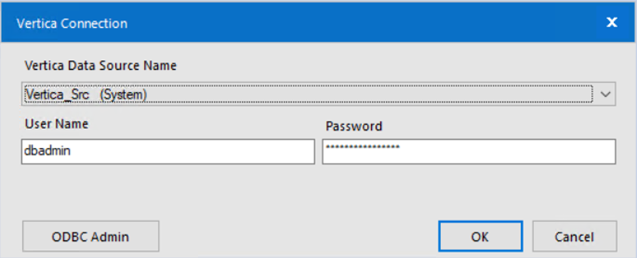
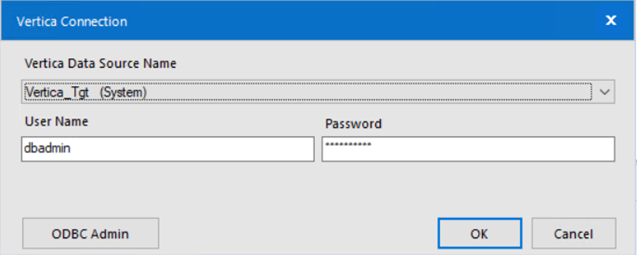
Select the source DSN from the drop-down list, enter the database credentials, and then click OK.
-
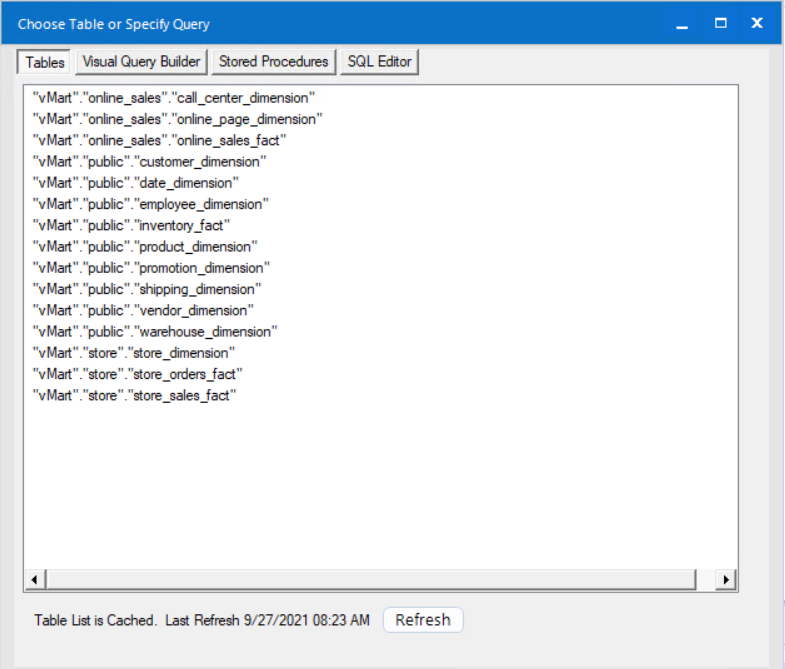
Select the required table(s) and click OK.
-
Drag Output Data from the toolbar and drop it onto the workflow canvas.
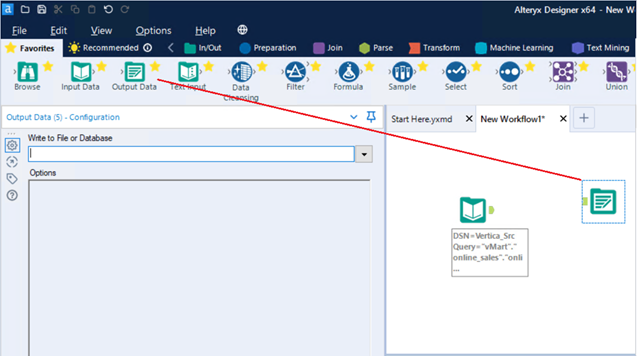
-
In the left pane, click Write to File or Database.
The Data connections dialog box appears.
-
Click Data sources and scroll down to select Vertica ODBC.
-
Select the target DSN from the drop-down list, enter the database credentials, and then click OK.
-
In the Output Table window, type the name of the target table and click OK.
-
To connect the input and output tables, place your cursor on the green dot on the Input icon, click and drag it to the green dot on the Output icon.
-
Click the Run button to execute the workflow.
Alteryx Designer In-DB Tools and Pushdown Optimization
Alteryx Designer provides In-Database tools that enable blending and analysis of huge data sets without moving data from the database. In-Database tools connect to Vertica and data is processed in the database instead of moving data over the network to the local computer.
The following Alteryx Designer In-DB tools are supported with Vertica:
- Connect In-DB Tool
- Data Stream In Tool
- Data Stream Out Tool
- Browse In-DB Tool
To achieve full pushdown optimization, we recommend you to have both the source and target tables in the same database. If the source or target database is different, you will need to stream the data out into Alteryx Designer over the network causing extra processing time.
Configuring Vertica Connection for Full Pushdown Optimization
- Create a 64-bit ODBC DSN as described in the Vertica documentation.
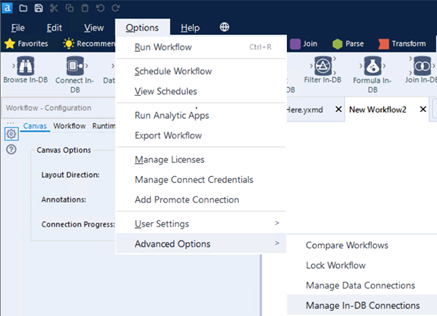
- In Alteryx Designer, click Options > Advanced Options > Manage In-DB Connections.
- In the Manage In-DB Connections dialog box, provide the Vertica connection details.
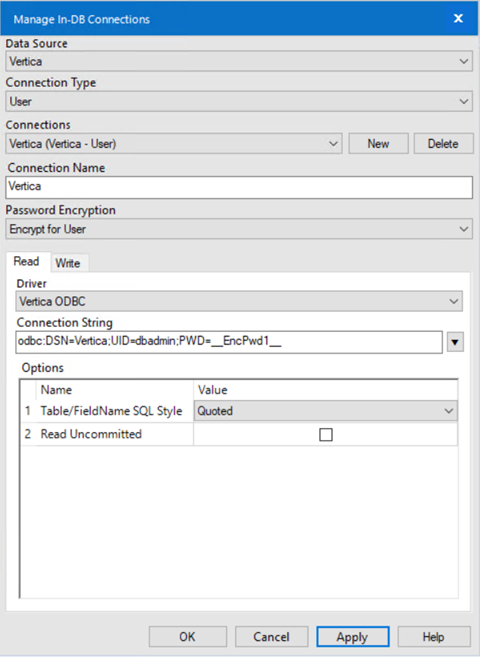
- Data Source: Select Vertica from the drop-down list.
- Connection Type: Select System from the drop-down list.
- Connections: Click New if you are creating a new connection or select the existing connection from the drop-down list.
- Connection Name: Type the Vertica database connection name.
- Password Encryption: Select any of the required encryption methods from the drop-down list.
For the Source database table, in the Read tab, configure the Vertica connection.
- Driver: Select Vertica ODBC from the drop-down list.
- Connection String: Click the Connection String drop-down list, and select New Database Connection.
The Vertica Connection dialog box appears.
Select the required ODBC DSN from the drop-down. Type the database username and password, and click OK.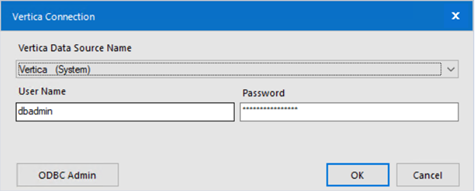
In the Options section, select the value of Table/FieldName SQL Style from the drop-down list. You can select Read Uncommitted based on your requirement.
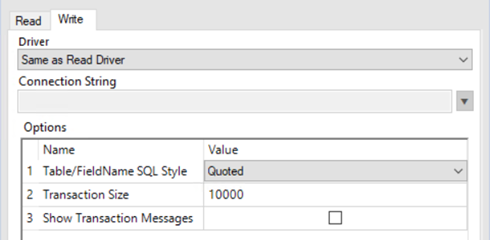
For the Target database table, in the Write tab, configure the Vertica connection.
• Driver: Select Same as Read Driver.
• In the Options section, select the value of Table/FieldName SQL Style from the drop-down list. Type the value for Transaction Size. You can select Show Transaction Messages based on your requirement.
- Click OK.
Creating Full Pushdown Optimization Workflow:
- Drag and drop the Connect In-DB tool from the In-Database tools palette onto the canvas.
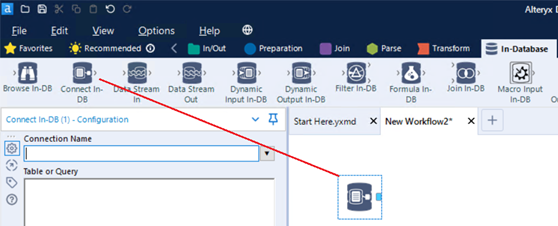
- In the left pane, click the down arrow adjacent to the Connection Name box and select the previously created DSN from the drop-down list.
- Select the required table(s), and click OK.
- Drag and drop the Write Data In-DB tool from the In-Database tools palette onto the canvas.
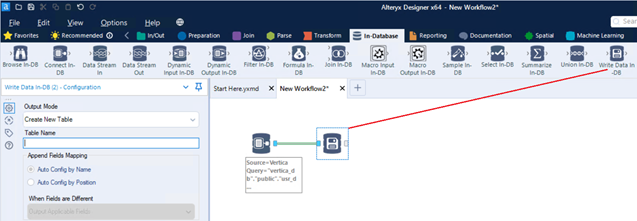
- In the left pane, select the required value from the drop-down list for Output Mode and type the target table name in the Table Name box.
- Click Run to execute the workflow.
Known Limitations
-
For TIMETZ and TIMESTAMPTZ data types, milliseconds and time zone values are truncated.
-
For TIME and TIMESTAMP data types, milliseconds are truncated.
-
NUMERIC data type supports up to 132 digits of precision.
-
CHAR and VARCHAR data types support displaying up to the first 256 characters.
- LONG VARBINARY supports writing up to 2 million bytes beyond which the following error may be displayed:
DataWrap2ODBC::SendBatch: ERROR 2052: COPY: Row size 32000028 is too large¶ Insert into <my-schema>.<my-target-table>(<col1>,<col2>,<col3>) Values (?,?,?)
-
LONGVARCHAR data type supports approximately 8 million characters beyond which the following error is displayed:
The Designer x64 reported: InboundNamedPipe GetOverlappedResult: The pipe has been ended..

