Reviving an Eon Mode Database in MC
An Eon Mode database keeps an up-to-date version of its data and metadata in its communal storage location. After a cluster hosting an Eon Mode database is stopped, this data and metadata continue to reside in communal storage. When you revive the database later, Vertica uses the data in this location to restore the database in the same state on a newly provisioned cluster.
If MC has been installed using a CloudFormation template from the AWS Marketplace, you can use the Provision and Revive wizard in MC.
You can only revive an Eon Mode database if it is version 9.1.0 or higher.
During a revive of your database, when you select a Vertica that is higher than the version of the original database in the communal storage, Vertica upgrades your database to match the Vertica version you selected. This upgrade may cause the database revive to take longer. To bypass this upgrade, select the Vertica version of your original database.
After your Vertica database has been upgraded, you can not downgrade your database later.
See Shutting Down and Reviving An Eon Mode Database for how to revive a database using admintools.
If you need to revive your database on a previously existing cluster, you must revive it using admintools, not MC. For example, use admintools if you stopped a cluster whose hosts use instance storage where data is not persistently stored, and plan to bring back the database on the same cluster.
Prerequisites
- Communal storage location (an AWS S3 bucket) of the stopped Eon Mode database you plan to revive (For how to stop or terminate a cluster using MC, see Viewing and Managing Your Cluster.)
- Username and password of the Eon Mode database you plan to revive
- AWS account with permissions to create a VPC, subnet, security group, instances, and roles
- Amazon key pair for SSH access to an instance
Revive the Database
You use a wizard in MC to provision a new cluster and revive a database onto it. For the new cluster, MC automatically provisions the same number of instances used by the database when it was last shut down.
Using the same communal storage location for multiple running databases causes data corruption. To avoid corruption, never use the revive functionality to simultaneously run the same Eon Mode database on different clusters.
- From the MC home page, click Provision and Revive an Eon Mode Database. The Provision and Revive an Eon Mode Database wizard opens.
-
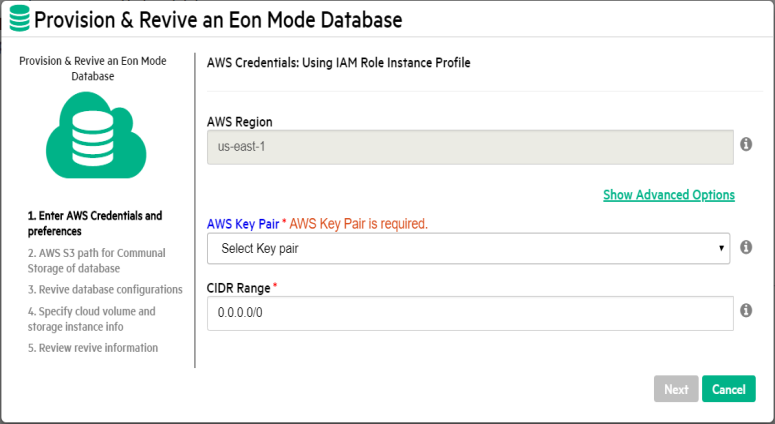
Enter your AWS credentials and cluster preferences. Your cluster must be in the same region as your communal storage location's AWS S3 bucket. To revive the cluster in a new region, you must
- Create a new S3 bucket in the new region.
- Copy the previous S3 bucket's contents into it.
- Provide the new S3 bucket URL in Step 3.
-
By default, Vertica creates your cluster in the same subnet as your MC instance. If you want to manage all Vertica clusters in the same VPC, you can provision your Vertica database in a different subnet than the MC instance. To do so, on the AWS Credentials page, select Show Advanced Options and enter a value in the Subnet field.
If you specify a different subnet for your database, make sure to secure the subnet.
- Enter the AWS S3 URL of the database you are reviving. When you enter an S3 bucket location, MC discovers all known Eon Mode databases.
- Select the correct database to revive.
- Provide the database administrator credentials for the database you are reviving. These credentials are the same as the ones used by the database in the previous cluster.
-
In the Database Version field, choose the desired Vertica database version. Select from the latest hotfix of recent Vertica releases. For each Vertica version, you can select from a list of associated Linux operating systems.
If you select a Vertica version that is higher than the version of the original database in the communal storage, Vertica upgrades your database to match the Vertica version you selected. This upgrade may cause the database revive to take longer. To bypass this upgrade, select the Vertica version of your original database.
After your Vertica database has been upgraded, you can not downgrade your database later.
- Choose instance types for the cluster. Management Console provisions the same number of instances used by the database when it was last shut down.
- Choose whether to encrypt your EBS volumes. Only c4, r4, and m4 instances support encrypting EBS volumes.
- Optionally, you can tag the instances. In the Tag EC2 instances field, if another cluster is already running, Management Console fills those fields with the tag values for the first instance in the cluster. You can accept the defaults, or enter new tag values.
- Review your choices, accept the license agreement, and click Create to revive the database on a new cluster. If the version of MC you use to revive is higher than that of the database, MC first notifies you that it is about to automatically upgrade the database. After starting the revive process, the wizard displays its progress. After a successful revive, the database starts automatically.
- When the revive process is complete, click Get Started to navigate to the Fast Tasks page.