Creating an ODBC DSN for Macintosh OS X Clients
You can use the Vertica ODBC Driver to set up an ODBC DSN. This procedure assumes that the driver is already installed, as described in Installing the ODBC Driver on Macintosh OS X.
Setting Up a DSN
-
Using your web browser, download and install the Apple ODBC Administrator Tool.
-
Locate and open the ODBC Administrator Tool after installation:
- Navigate to Finder > Applications > Utilities.
- Open the ODBC Administrator Tool.
-
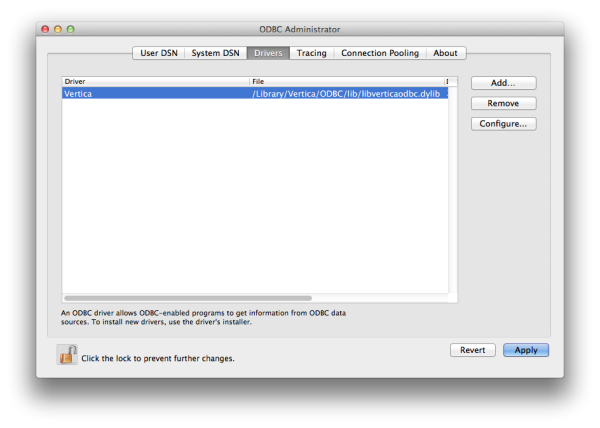
Click the Drivers tab, and verify that the Vertica driver is installed.
-
Specify if you want all users on your client system to be able to access the DSN for the Vertica database:
- If you want all users to have access, then click the System DSN tab.
- Otherwise, click the User DSN tab to create a DSN that is only usable by your Macintosh user account.
- Click Add... to create a new DSN to connect to the Vertica database.
- Scroll through the list of drivers in the Choose A Driver dialog box to locate the Vertica driver. Select the driver, and then click OK. A dialog box opens that requests DSN parameter information.
- In the dialog box, enter the Data Source Name (DSN) and an optional Description. To do so, click Add to insert keywords (parameters) and values that define the settings needed to connect to your database, including database name, server host, database user name (such as dbadamin), database password, and port. Then, click OK.
- In the ODBC Administrator dialog box, click Apply.
See Data Source Name (DSN) Connection Properties for a complete list of parameters including those specific to Vertica.
After configuring the ODBC Administrator Tool, you may need to configure additional driver settings before you can use your DSN, depending on your environment. See Additional ODBC Driver Configuration Settings for details.
If you want to test your connection, use the iodbctest utility. For the procedure, see Testing a DSN Using iodbctest.