Running Queries in Management Console
You can use the Query Runner to run SQL queries on your database through Management Console (MC). After executing a query, you can also get the query plan and profile information for the query on this page.
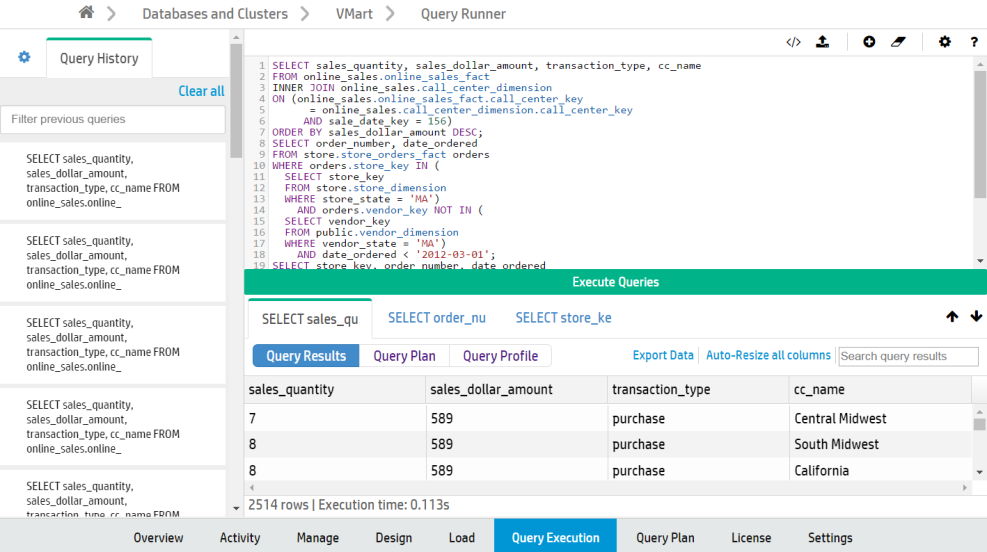
To reach the Query Runner, select your database from the Home page or the Databases and Clusters page to view your database's Overview page. Select Query Execution at the bottom of the Overview page.
+
To familiarize yourself with how queries work in Vertica, you can refer to the Queries section of the documentation, as well as the SQL Reference Manual.
Limitations
You cannot execute COPY LOCAL statements using the Query Runner. To do so, use the vsql client installed on the server. See Using vsql. (To use MC to import data from Amazon S3 storage to your Vertica database, see Loading Data From Amazon S3 Using MC.)
Manually commit any transactions (INSERT and COPY statements) you perform by adding the COMMIT statement in the text box after the transaction statements. If you do not do so, the transaction rolls back.
In the following example, to insert values into table1, include a COMMIT statement in the text box and execute the two statements together:
INSERT INTO table1 VALUES (1,2);
COMMIT;

Format
To input a series of queries, delimit them with a semicolon (;).
To automatically format the SQL text you have input, click the Format icon ( ).
).
Privileges
It is important when running queries in MC that the database administrator has correctly set up MC user privileges. The administrator must map all MC user profiles to their corresponding database user.
The Query Runner only permits MC users to perform actions that their corresponding Vertica database roles allow.
To set up user mappings, go to Home > MC Settings > User Management.
For more about how mapping MC user profiles to database users works, see Granting Database Access to MC Users. For information about database-level users and privileges, see the Database Users and Privileges section of the documentation.
Execute a Query
The Query Runner provides several ways to input a query to run:
- Input text. Enter the text for a query or series of queries into the text box.
- Import a SQL script. Click the Upload icon (
 ) to the top right of the text box to upload a SQL script (plain text file, typically with an extension of
 .sql). The queries from that file appears in the text box. - Enter a previous query from the Query History tab. The Query History tab, on the left side of the page, displays the last 100 queries you have executed using the Query Runner on your current device and browser. Click any previous query in this tab to enter that query into the text box.
Hover over a query in the Query History tab to view all the query text. To clear queries from your history, hover over an individual query and click x, or click Clear all at the top of the tab. Click the star to the left of any query to favorite it, so it won't be cleared when you click Clear all.
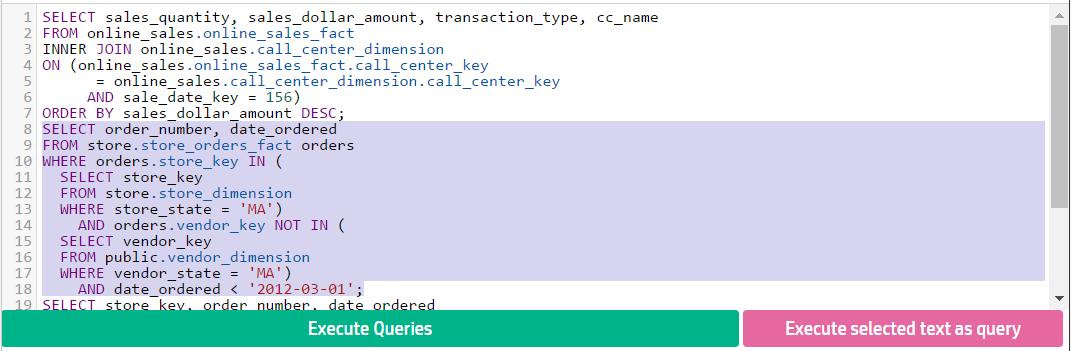
Cick Execute Query to run the queries you have input.
You can also execute only a portion of the text entered into the text box, as long as the selected text is a valid query. To do so, select that portion of the text. The Execute selected text as query button then appears below the text box.
For example, you might execute only a part of the entered text if you have uploaded a SQL script that containing multiple queries, but you decide to run only one of those queries.
To customize your execution settings, click the Settings icon ( ) at the top right of the text box:
- Row Limit: Set the maximum number of rows to return. By default, the limit is 10000 rows.
- Search Path: Specify the schema to query.
Get Query Results
The Query Runner returns results in a table format. If you ran multiple queries simultaneously, the results window displays a tab for each set of results. View the number of rows returned and the query execution time at the bottom of the results window.
If your result returns many columns, you can click Auto-resize all columns in the top right of the results window for a better fit, or click and drag column borders to manually resize individual columns.
Sort results by clicking on a column name, or use the search bar to narrow down results.

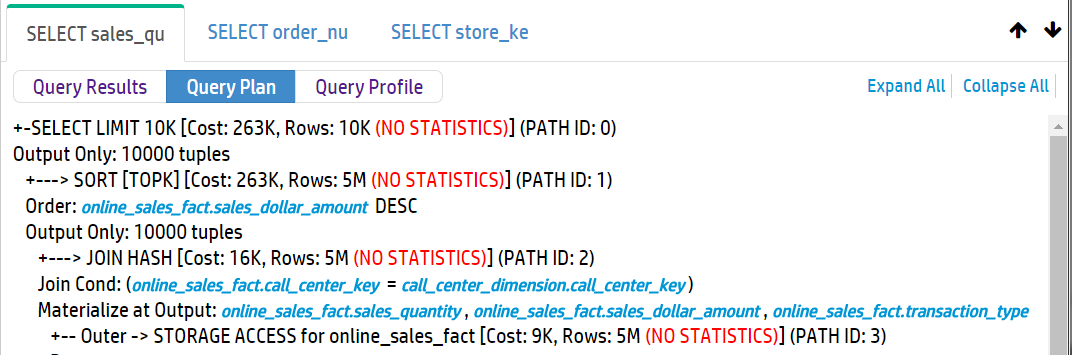
Query Plans and Profiles
Each query result also displays an option to retrieve the plan or profile for that query.
After retrieving a plan or profile, you can expand or collapse the results view to see different levels of detail. To view metadata for a projection or a column, click the object name in the path output. A pop-up window displays the metadata, if it is available.
Note that the Query Runner does not automatically provide query profiles for queries that run for less than 1 second. To do so, prepend the word PROFILE to the query and run it.
You can also profile your query on the Query Plan page. The Query Plan page provides more details about both plan and profile results, including a query plan drilldown by node, a tree path view, and a profile analysis.
Keyboard Shortcuts

The Query Runner provides the following keyboard shortcuts:
- ?: Press the question mark to display or dismiss a list of the available keyboard shortcuts. (You can also click the question mark icon at the top right of the text box to view this list.)
- alt + ↑: Press alt + up arrow to decrease the height of the text box.
-
alt + ↓: Press alt + down arrow to increase the height of the text box.
- ctrl + enter: Press ctrl + enter to run the query.
- ctrl + shift + enter: Press ctrl + shift + enter to run selected text.